
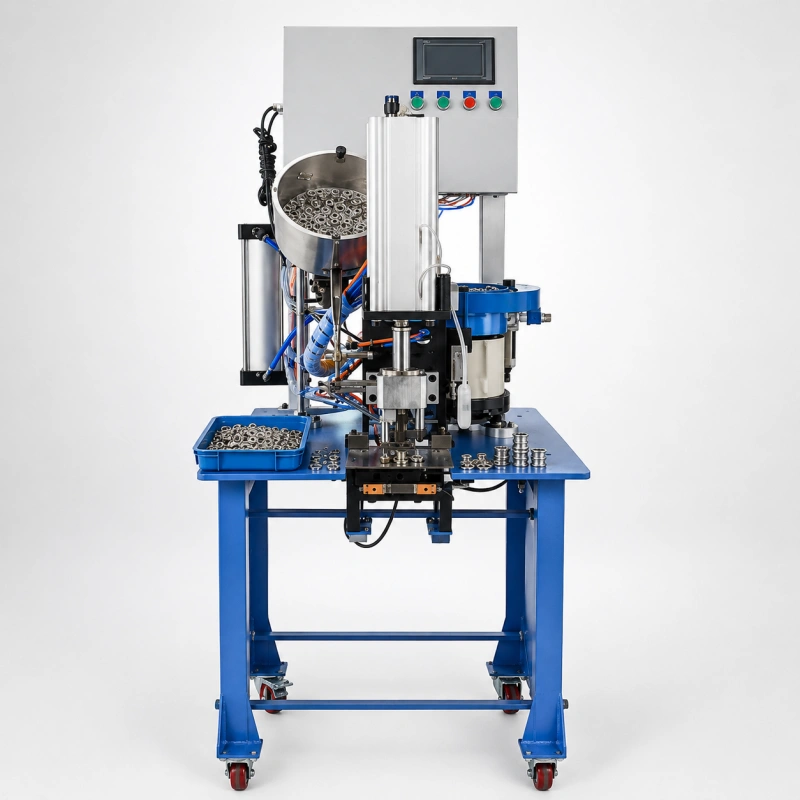
When an automatic eyelet machine misses a cycle, the obvious reaction is to turn up the bowl. That may fill the track for a few minutes. It can also make eyelets bounce, washers shingle, and the next jam harder to diagnose.
You will get a faster, more repeatable correction if you start with one question: Where is the first place a correctly oriented part stops behaving correctly?
That place may be inside the bowl, at a selector, at the discharge joint, in the linear track, at the escapement, or in the transfer to the die. Find that first failed station before you move a guide or change a controller value.
This guide covers active eyelet and washer feeding errors on machines that automatically present one or both fastener components. It does not redefine eyelets, washers, or grommets. For component selection, use our eyelets and washers guide and eyelet-washer-die matching guide. If you are changing to a different eyelet size, follow the separate vibratory bowl feeder setup procedure.
First, Make the Machine Safe
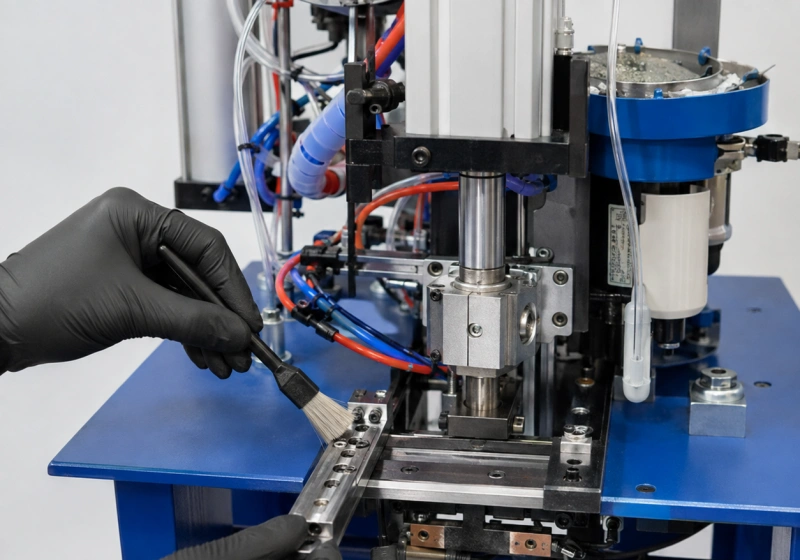
Stop the machine and follow its manual and your plant’s lockout/tagout procedure before you reach into a bowl, raceway, escapement, transfer, or die area. Isolate electrical power and compressed air where the procedure requires it. Stored spring, pneumatic, and mechanical energy can still move parts after the main switch is off.
Do not defeat a guard, hold a sensor on, or reach into a live track to watch a fault more closely. Reinstall guards before powered testing. Leave coil gaps, spring packs, electrical wiring, and structural feeder tuning to qualified personnel or the machine manufacturer.
Use the First-Failed-Station Method
Your feed system has several jobs, and each station should do only one or two of them:
- The hopper or bowl supplies loose parts.
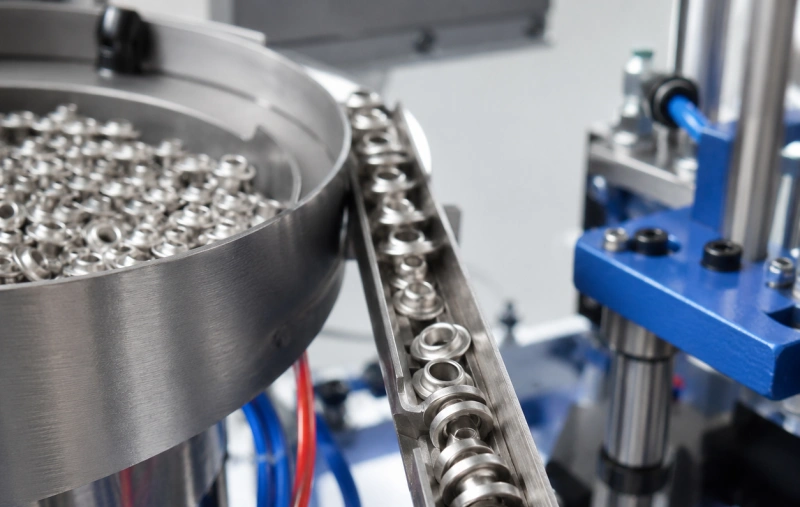
- Bowl tooling creates a single layer and rejects bad orientations.
- The discharge and raceway preserve that orientation.
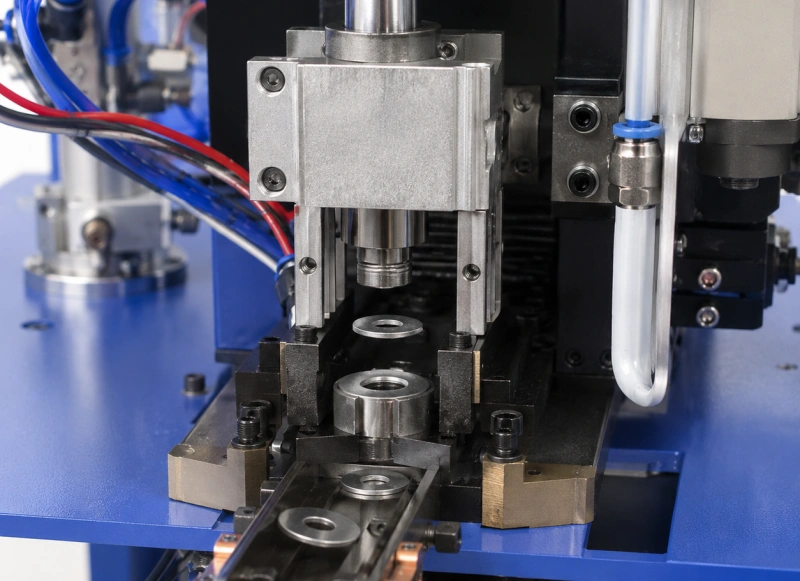
- The escapement releases one part at the correct time.
- The transfer places the part in the die or setting position.
- Sensors confirm that the required part is present or absent.
Run the machine at a safe observation speed, or use the approved manual/jog method. Follow one eyelet or washer from the bowl to the setting point. If the part is already doubled before it enters the track, the escapement is not your first cause. If the track contains a clean queue but the die receives nothing, increasing bowl vibration will not help.
Before you adjust anything, record the eyelet and washer part numbers, lot numbers, controller settings, bowl level, exact jam location, frequency of the fault, and whether it occurs cold, warm, after refill, or only at production speed. Take a close-up photo or short video from outside the guarded area. Then change one variable at a time.
Quick Symptom-to-Cause Guide
| What you see | Inspect first | Most likely correction direction |
| Bowl is silent or barely moves | Power, enable signal, controller, loose mounting, qualified checks of drive system | Restore the approved supply or signal; tighten only specified hardware; escalate drive tuning |
| Track repeatedly runs empty | First slow point upstream, bowl load, congestion, demand control | Clear the restriction; keep a stable load; balance feeder recovery with machine demand |
| Parts surge or jump | Output setting, refill amount, full-track control, abrupt restart | Reduce output within the approved range; use controlled refill and approved soft start/delay |
| Eyelets nest or washers overlap | First selector, wiper, rail, part variation | Clean and reset the controlling restriction; reject doubles before discharge |
| Parts leave the bowl in the wrong orientation | Orientation tooling, worn guide surfaces, altered part geometry | Restore alignment or replace worn change parts; validate the current component lot |
| Jam returns at one exact point | Burr, step, pinch, worn liner, loose guide, misaligned joint | Remove debris and restore a smooth, aligned handoff; replace damaged parts |
| Track is full but the die is empty | Escapement, stop, release timing, transfer alignment, sensor logic | Correct single-part release and handoff; do not speed up the bowl |
| Sensor says “missing” with a part present | Dirty lens/face, part position, bracket movement, wiring or logic | Clean by the approved method; restore position; have qualified staff verify the circuit |
| Two parts release together | Escapement wear, stop clearance, back pressure, timing | Restore the stop and one-part pocket; reduce upstream pressure after the mechanical fault is fixed |
| Washer arrives tilted or off-center | Final guide, transfer finger/tube, die pocket, side load | Align the last handoff and confirm the washer is fully seated before the cycle |
| Feeder works nearly empty but fails after refill | Bowl overload, buried selectors, bulk-hopper quantity | Narrow the working bowl-level range and reduce each refill amount |
| One component lot runs and another jams | Dimensions, burrs, plating, oil, flatness, nesting behavior | Compare the lots and quarantine out-of-tolerance parts before retuning the machine |
1. The Feeder Bowl Does Not Start
If the bowl is completely still, treat it as an electrical, control, enable, or drive problem before you treat it as a track problem. Confirm that the machine is in the correct operating mode, guards and safety circuits are satisfied, the feeder is enabled, and the approved controller recipe is active. Check for an empty-bowl inhibit, full-track signal, or upstream/downstream interlock that intentionally stops feeding.
With power isolated, inspect accessible plugs, cables, controller indicators, and specified mounting fasteners. A loose bowl, base, or support can absorb motion instead of transferring it to the track. A cracked spring, incorrect coil gap, damaged controller, or overheated drive can produce the same symptom, but those checks belong to qualified maintenance staff.
Correction: restore the approved enable condition or connection. Tighten only hardware identified in the manual. If the bowl still does not move, stop there and record the controller indication for your manufacturer. Do not turn every adjustment to maximum to “wake up” the feeder.
2. Eyelets or Washers Feed Too Slowly
A slow feeder is not always short of vibration. First look for the earliest place where parts stop moving freely. Common restrictions include contamination on the track, a burr on a washer, a nested pair at a selector, a guide that shifted after cleaning, a discharge joint with a small step, or a raceway pinched by an overtightened cover.
Also check bowl level. Too few parts may not create a steady queue; too many can bury the selector and reduce useful flow. Watch whether the bowl moves parts well but rejects most of them. If so, your problem is orientation yield, not raw speed.
Correction: isolate and clean the first slow point with the approved method. Remove damaged components from the bowl. Restore the recorded guide position and a normal working load. Increase feeder output only in small steps and only within the manufacturer’s approved range. Judge the result at the escapement, not by how fast parts circle the bowl.
3. The Feed Rate Surges
Surging often appears after the track empties, the feeder restarts, or a bulk hopper drops a large batch into the bowl. The parts rush forward, stack at a narrowing point, and then stop again. Excessive output, an aggressive restart, unstable bowl level, or poor demand control can all create this pattern.
Look at the relationship between the feeder and the machine cycle. The feeder only needs to replenish the queue faster than the machine consumes it. A constantly overfilled raceway adds back pressure to the escapement and gives thin washers more chances to ride over one another.
Correction: use the full-track sensor, demand signal, delay, and soft-start functions provided by the machine. Reduce bulk-hopper refill quantity so each addition does not bury the tooling. Set the lowest stable feeder output that keeps the downstream queue available at the required production rate.
4. Eyelets Nest or Washers Shingle and Overlap
This is one of the most common two-part feeding errors. Eyelet barrels can enter one another. Thin washers can overlap like roof tiles or form a small cluster at a rail. Once a double passes the last selector, downstream guides may not have enough control to separate it.
Inspect the first singulation point. Look for a wiper or cover gap that has opened, a loose rail, worn selector edge, missing reject air, contaminated surface, or component dimensions outside the range used to set the feeder. Do not assume two nested eyelets are twice the height of one; nesting can make the pair surprisingly low.
Correction: clean the station, verify that the correct change parts are installed, and restore the approved settings. Challenge the selector with good singles and realistic nested or overlapped pairs. A good single must pass without scraping, while the bad pair must be rejected or returned. If one mechanical clearance cannot separate the two conditions, you need different selector tooling or a dedicated change part—not more vibration.
5. The Part Reaches the Track in the Wrong Orientation
If an eyelet exits flange-up when the system requires flange-down, or a washer leaves a selector tilted, the fault began before the track. Watch the last orientation device that should reject the bad part. Worn guide faces, a bent wiper, a disabled air jet, changed part weight, deeper nesting, or a different surface finish can let the wrong orientation pass.
Correction: return the orientation tooling to its approved position and replace worn parts rather than bending or filing them during production. Compare the current component lot with the approved sample. Confirm that compressed-air rejects, where fitted, have clean nozzles and the specified pressure and timing. After correction, run a feeder-only challenge long enough to expose intermittent wrong orientations.
6. The Jam Always Returns at the Same Location
A repeatable location is useful evidence. It usually points to a local mechanical problem: a burr, sharp corner, worn liner, loose cover, misaligned joint, sudden height change, or pinched width. Mark the exact leading edge of the stopped eyelet or washer, then compare several jams. If they stop in the same way, resist the temptation to adjust the whole feeder.
Correction: isolate the machine, remove debris, and inspect the joint from both the top and side. Restore a smooth centerline and handoff height. Check that fasteners seat the guide without twisting it. Replace a damaged rail, liner, tube, or selector. Do not grind, file, polish, or lubricate product-contact surfaces unless the manufacturer approves the material and method; a small surface change can alter orientation throughout the feeder.
7. The Track Is Full, but No Part Reaches the Die
When you can see a stable queue near the machine head, the bowl has done its job. The next suspects are the stop, escapement, release timing, transfer finger or tube, receiving pocket, and part-present sensor.
Use the approved manual or jog method to watch one cycle. Does the stop release? Does exactly one component enter the pocket? Does it fall or slide completely into position before the press command? Does the next part push on it? A worn escapement can release late, release two, or hold a part at an angle.
Correction: restore the escapement to a one-part release, align the transfer with the die pocket, and verify timing against the machine manual. Fix mechanical travel before changing PLC delays. Once the handoff works slowly, test at production speed and confirm the eyelet and washer presence signals change in the correct sequence.
8. The Sensor Reports a Missing Part When One Is Present
Metal dust, plating flakes, oil film, lint, adhesive residue, or a moved sensor bracket can create a false empty alarm. Shiny, dark, perforated, or very thin parts may also be harder for an optical or proximity sensor to detect if the position or sensitivity is wrong.
First check the physical presentation. A sensor cannot reliably confirm a washer that stops tilted or several millimeters away from the validated position. Then inspect the sensing face and bracket without bypassing the safety circuit.
Correction: clean the sensing face with the approved material, restore its documented position, and confirm both “part present” and “part absent” states. If teach-in, sensitivity, wiring, input logic, or sensor replacement is required, use qualified maintenance personnel. Do not compensate for poor part positioning by increasing sensitivity until the sensor also sees the guide or die.
9. Two Eyelets or Washers Release in One Cycle
A double release can begin upstream as an overlap, or it can begin at the escapement. Look at the parts immediately before release. If two are already stacked, return to the last singulation point. If the queue contains good singles but two pass the stop, inspect the escapement pocket, stop edge, clearances, wear, and release stroke.
High track pressure can worsen the fault, especially when the bowl runs continuously against a full queue. However, reducing vibration is not a substitute for a worn or incorrectly adjusted stop.
Correction: repair the one-part mechanical control first. Then balance upstream supply so the queue stays available without forcing parts against the stop. Test repeated start-stop cycles, because a double release often appears on restart rather than during steady running.
10. The Washer Reaches the Die Crooked or Off-Center
If the washer is correct in the final track but tilted in the die, focus on the last handoff. A side-loaded transfer finger, dirty receiving pocket, bent tube, loose die holder, incorrect washer orientation, or insufficient seating time can leave one edge high. The press then captures the washer crooked or sets the eyelet without it.
Correction: clean the final guide and die pocket, align the transfer path, and confirm the washer sits flat and centered before the cycle continues. Check the die and component match before changing timing. If the washer enters correctly but the finished setting is still crooked, move to the common eyelet setting defects guide instead of continuing to adjust the feeder.
11. The Feeder Works Nearly Empty but Fails After Refill
The mass of parts in the bowl changes how the feeder behaves. A large refill can cover reject tooling, increase contact pressure, slow climbing, or send a wave of washers into the track. If the machine alternates between almost empty and overloaded, the same controller value can produce two very different results.
Correction: define a minimum and maximum working level. Move or adjust the bulk-hopper level control only as described in the manual, then refill in smaller amounts. Run through several automatic refill events before you approve the correction. The fault is not fixed if it disappears only while an operator hand-manages the bowl.
12. One Lot Runs and the Next Lot Jams
Before you retune a stable machine, compare the parts. Measure the dimensions that control the feeder: flange or outside diameter, barrel diameter, height, thickness, flatness, roundness, and realistic nested-pair height. Check burrs, plating buildup, oil, corrosion, mixed sizes, and damaged packaging.
Thin washers are especially sensitive to flatness and edge condition. Eyelets with a changed finish may slide faster or slower even when the nominal drawing is unchanged.
Correction: quarantine suspect parts and compare them with the approved lot or golden sample. Clean only when contamination is removable and the process allows it. If the parts are within the agreed tolerance but behave differently, send both good and bad samples to the machine manufacturer. Do not keep opening guides until an out-of-tolerance lot can pass; you may make the feeder unreliable for every good lot that follows.
13. The Eyelet Feeds but the Washer Does Not—or the Reverse
On a dual-feed machine, diagnose the two routes separately. Each component may have its own bowl, track, sensor, escapement, and transfer. A successful eyelet feed does not prove that the washer feeder has the correct enable, demand signal, level, or timing.
Correction: run the approved feeder-only check for each side. Record where the failed component first stops. Then verify the interlock between them: some machines correctly block the cycle if either part is missing. Never bypass that logic to keep production moving. A missing washer can create a setting that looks acceptable at first but does not meet the product’s retention requirement.
14. Feeding Declines as the Machine Warms Up
If output is stable at startup and deteriorates after several minutes, record the elapsed time and whether the controller or feeder base feels or indicates abnormal heat. Loose fasteners, electrical faults, drive problems, contamination that becomes tacky, or an overloaded feeder can create a temperature-related pattern.
Correction: stop within the limits stated in the manual. Let qualified maintenance inspect the controller, drive, mounting, springs, and electrical supply. Do not mask a heat-related decline with progressively higher output. That can increase stress while hiding the evidence your technician needs.
Corrections That Commonly Make the Fault Worse
- Turning vibration to maximum: You may increase movement while reducing singulation and orientation.
- Opening every guide: You remove the first jam but allow doubles, flips, and poor handoffs farther downstream.
- Adding oil to the track: Unless the manufacturer specifies it, oil attracts dirt and changes friction and sensor performance.
- Filing selector tooling during production: You lose the validated geometry and make the change difficult to reverse.
- Changing several settings at once: You cannot tell which change helped, and you have no safe route back.
- Blaming timing for a mechanical double: Software cannot reliably separate two parts that have already passed the physical guardrail.
- Bypassing a missing-part sensor: You trade a stoppage for unverified product and a safety or quality risk.
How to Confirm the Correction?
Do not approve the feeder after five clean cycles. First, run a feeder-only test with enough components to include normal lot variation. Record correct presentations, wrong orientations, overlaps, jams by location, and manual interventions. Then run the actual material with the matched eyelet, washer, and die.
Challenge the conditions that produced the original fault: a normal bowl refill, restart after a full-track stop, minimum and maximum working level, and sustained production speed. Your acceptance limit should come from your product and quality plan, not a universal number. Count accepted settings, not just press cycles.
Save the final controller values, guide positions, bowl-level range, sensor positions, component lot, and close-up photos. This turns a one-time repair into a repeatable setup for the next shift.
For routine prevention after the fault is closed, use the feeding stability guide and the eyelet punching machine maintenance checklist.
When You Should Contact the Machine Manufacturer
Stop adjusting and ask for technical support when you find cracked springs, damaged electrical parts, repeated overheating, a controller fault, a guide or bowl that needs welding or machining, or a component that cannot be separated within the approved tooling range. You should also escalate when the feeder works in manual mode but fails under automatic timing after the basic mechanical and sensor checks are complete.
Send useful evidence with your request:
- machine model and serial number;
- eyelet and washer drawings, supplier, part numbers, and lot numbers;
- production material and thickness;
- controller settings and normal bowl level;
- exact first failed station;
- clear photos of correct and failed orientations;
- a short video from outside the guarded area;
- fault frequency and whether it changes after refill, restart, or warm-up;
- samples from both a good lot and a failed lot.
That information lets your manufacturer separate a component problem, feeder-tooling problem, control problem, and application mismatch before parts or technician time are wasted.
FAQ
Will more vibration clear an eyelet or washer jam?
Sometimes it moves the jam to the next station, but it does not correct the cause. Find the first restriction or failed selector, clean and align it, then use the lowest approved output that maintains the required queue.
Should you lubricate an eyelet or washer feeder track?
Only if the machine or feeder manufacturer specifies the lubricant, location, and quantity. Unapproved oil can collect dust, change friction, mark finished parts, and interfere with sensors.
How do you know whether the problem is feeding or setting?
Run the approved feed-only or manual presentation check. If one correctly oriented eyelet and washer reach the die consistently, but the finished assembly is loose, split, crushed, or flared unevenly, the likely problem is tooling, alignment, force, component match, or material—not the feeder.
Can one washer feeder run different washer sizes?
Only when the feeder and change parts provide reliable control for each washer’s outside diameter, inside diameter, thickness, flatness, weight, and required orientation. Validate each size with its own documented setup and challenge test. If good singles and overlaps cannot be separated mechanically, use dedicated tooling.
What is the fastest way to diagnose an intermittent misfeed?
Record the exact first failed station and the condition around it: bowl level, restart, refill, warm-up time, component lot, and production speed. Intermittent faults become easier to reproduce when you stop describing them only as “random jams.”
Final Takeaway
You do not troubleshoot an eyelet and washer feeder by adjusting everything that moves. You follow the component, find the first point where control is lost, correct that station, and prove the result under the same conditions that caused the fault.
If your machine keeps jamming after you have isolated the first failed station, contact QC Machinery. Send the machine details, component samples, settings, and a clear fault video so we can help you identify whether the next step is cleaning, adjustment, replacement change parts, or a feeder review.