
An awning valance and a tensioned shade-sail corner may both use metal hardware, but they do not give your eyelet machine the same job. The material stack is different. The load path is different. The panel is handled differently. Your production rhythm may be different too.
That is why you should not select a machine from a product photo or a maximum-force number. Start with the finished product. Then work backward through the eyelet or grommet, washer, reinforcement, hole-making method, tooling, feed system, and operator workflow.
In this guide, “eyelet machine” includes industrial machines used to punch and set eyelets or two-piece grommets. Suppliers do not always use the terms eyelet and grommet consistently, so the component drawing and sample are more useful than the name.
Short answer: For mixed or custom awning work, a flexible foot-operated pneumatic or semi-automatic machine is often the practical starting point. For stable, repeat orders with one hardware specification, automatic feeding can reduce handling per cycle. For shade sails, the decisive issue is usually whether the complete reinforced corner or edge assembly can be positioned and set consistently—not the headline cycle speed.
Why This Application Needs Its Own Machine-Selection Logic?
Eyelets in outdoor covers reinforce attachment points and make installation or maintenance easier. That general description is accurate, but it is not enough to choose equipment. A factory decision depends on what the hardware must do after it leaves your floor.
Awning work is usually edge-focused
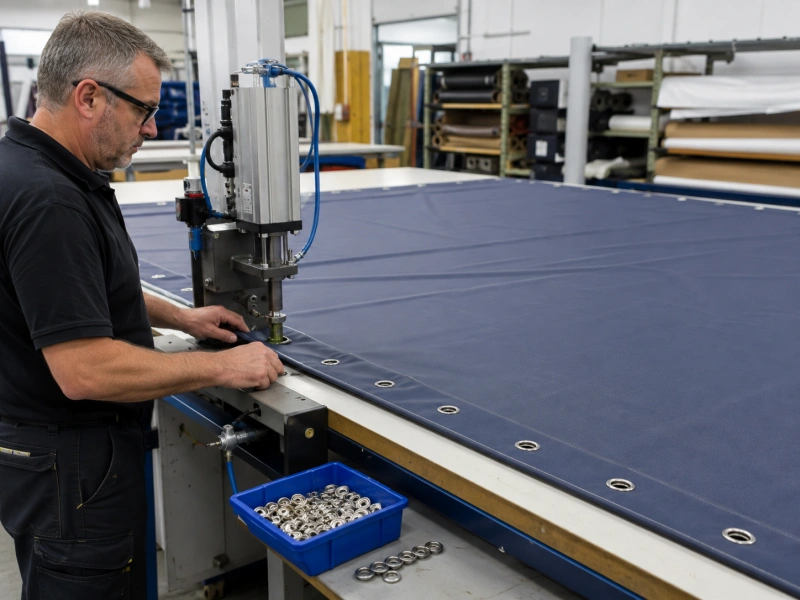
Many awning panels place hardware along hems, valances, tie-down points, or side edges. The operator may repeat one spacing pattern over a long run. That favors a clear edge guide, easy panel support, consistent cut-and-set action, and a layout that lets the operator move bulky fabric without twisting it.
Shade-sail work concentrates load at critical points
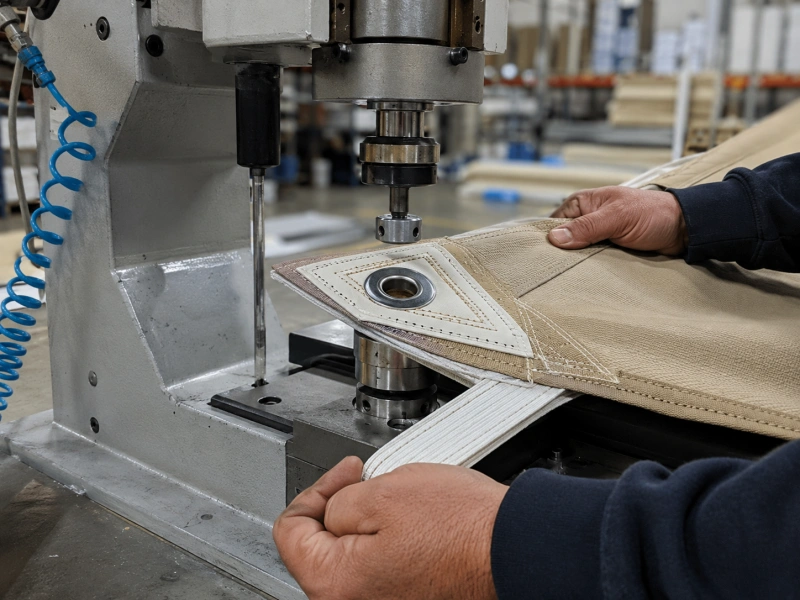
A shade sail is tensioned after installation. Corners and selected perimeter points may include multiple fabric layers, webbing, patches, or other reinforcement. In some designs, the primary corner hardware is not a standard eyelet at all. You must confirm the actual fastening specification before assuming an eyelet-setting machine is suitable for every attachment point.
The machine question is therefore narrower: where your shade-sail design uses eyelets or grommets, can the press form them correctly through the full reinforced stack, and can the operator present that stack squarely under the tooling?
Start With Five Samples, Not a Machine Catalogue
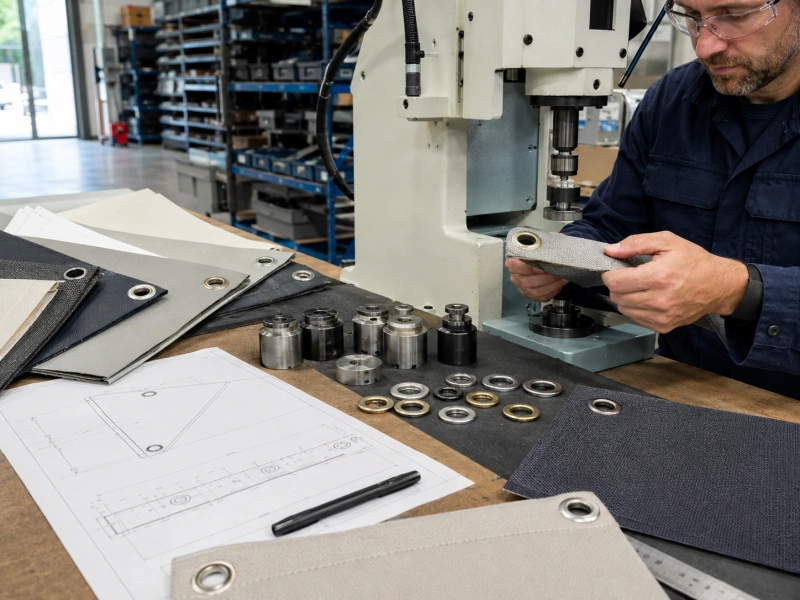
Before you ask for a quotation, prepare a sample pack that represents production. A plain fabric swatch is not enough. Send the combinations that are hardest to punch, hardest to position, or most important to the finished product.
- Your thinnest normal material assembly.
- Your thickest reinforced hem or corner assembly.
- The actual eyelet or grommet and washer from the intended supplier.
- A marked panel or drawing showing edge distance, corner geometry, and required spacing.
- One acceptable finished sample, plus failed samples if you are solving a current defect.
Label every item with material construction, layer count, reinforcement, hardware part number, and intended location. If you use coated polyester, acrylic awning fabric, PVC-coated textile, mesh, webbing, or laminated reinforcement, identify the exact combinations. “Outdoor fabric” is not a test specification.
1. Match the Hardware to the Complete Material Stack
The barrel must pass through the full stack and leave enough material to form the required roll or flare into the washer. If it is too short, increasing pressure does not create missing barrel length. If it is too long, the barrel may buckle, split, or form poorly.
Do not select by a nominal size such as “No. 2” alone. Numbering systems vary. Record the barrel outside diameter, barrel length, flange diameter, washer inside and outside diameters, washer style, metal, and finish. Then give those dimensions and physical samples to the machine supplier.
Outdoor exposure also affects hardware selection. The correct metal and finish depend on the service environment, appearance, contact materials, and customer specification. Salt air, moisture, cleaners, and dissimilar metals can change the corrosion risk. The machine must set the approved hardware without damaging its coating or visible flange.
| Do not guess: A machine can close the wrong eyelet and still produce a joint that looks acceptable at the table. Your approval should be based on the specified hardware, full production stack, and a defined mechanical test—not appearance alone. |
2. Decide Whether to Pre-Punch or Cut and Set in One Cycle
Some systems punch the hole and set the hardware in one operation. Others require a separate pre-punch. Neither route is automatically better.
| Process | Best fit | Watch for |
| Cut and set in one cycle | Repeat edge positions, compatible material stacks, faster handling | Slug removal, cutting cleanliness, coating drag, die wear, alignment |
| Pre-punch, then set | Very thick or unusual stacks, sensitive reinforcement, separate cutting process already in place | Hole-to-eyelet registration, extra handling, work-in-process, wrong hole size |
| Self-piercing hardware | Only when the hardware and material combination is validated for it | Fiber displacement, coating stress, hidden tearing, hardware-specific tooling |
On coated or woven material, inspect the hole before the hardware hides it. A clean cut should not leave uncontrolled fraying, long pulled yarns, severe whitening, or a distorted reinforcement layer. Test the coldest and thickest material condition you expect, because stiffness can change with storage and temperature.
3. Choose the Feed Level Around Product Mix
The right automation level depends on repeatability. Automatic feeding saves value when the same eyelet and washer run often enough to justify feeder setup, tuning, and changeover. It offers less benefit when every order changes hardware, color, finish, or material thickness.
| Machine approach | Choose it when | Main trade-off |
| Manual hand press | Sampling, repair, very small batches, or backup work | Low investment, but operator effort and consistency limit sustained output |
| Pneumatic / powered, hand-fed hardware | Custom awnings, mixed runs, bulky panels, frequent hardware changes | Flexible and hands-free at the press, but each component is still handled manually |
| Semi-automatic feed | One component can be fed reliably while the operator controls placement | Reduces a repetitive motion without forcing full automation |
| Automatic eyelet and washer feed | Stable hardware, repeat volume, controlled changeovers, clean parts | Higher output potential, but feeder quality and part consistency become critical |
| Integrated production line | Long, standardized runs where welding, hemming, cutting, and grommeting share one flow | Highest integration effort; poor fit for frequent custom changes |
Do not use the machine’s no-load cycle rate as your factory output. The operator still has to find the mark, support the panel, align the reinforced area, trigger the cycle, inspect the result, and move to the next position. On large products, material handling can consume more time than pressing.
4. Treat Material Handling as Part of the Machine
A compact press can become an inefficient workstation when the panel drags on the floor, folds against the frame, or pulls the operator’s hands away from the placement mark. Review the whole cell: infeed side, outfeed side, table height, roller or air support, lighting, scrap collection, and room for the operator to turn a corner assembly.
- Use a flat support surface so a heavy panel does not pull sideways during the stroke.
- Confirm the machine frame and guards leave clearance for folded hems and reinforced corners.
- Keep the foot control where the operator can stand squarely without reaching or twisting.
- Provide a positive edge guide, laser reference, stop, or physical template when spacing must repeat.
- Plan where punched slugs go so they do not collect around the lower die or enter a feeder track.
Throat depth matters only in relation to the eyelet location and how the panel can be folded or approached. If every eyelet is close to an accessible edge, an extreme throat may add cost without solving a real problem. If a fitting sits far inside the panel, measure the required reach on the actual assembly and include clearance for the folded material—not just the center-to-edge distance on a drawing.
5. Specify the Tooling Before You Compare Presses
The die set is part of the fastening system. It supports the visible flange, controls the roll or flare, locates the washer, and may also cut the hole. A powerful press with the wrong die can make bad parts faster.
Ask the supplier to identify each die set against your hardware drawing and sample. If you run several eyelet sizes, list the change parts, expected changeover method, adjustment points, and setup verification. If colors or finishes change while dimensions remain the same, confirm whether the same tooling is safe for every finish.
- The flange remains flat and free from unacceptable marking.
- The barrel rolls or flares evenly without splitting.
- The washer is seated and does not spin when the specification forbids rotation.
- The fabric is clamped without crushing, cutting, or wrinkling outside the joint.
- Punch and die alignment remains stable across repeated cycles.
6. Size the Machine With Real Output Data
Convert your order book into accepted eyelets per shift. Multiply finished units by eyelets per unit, then add the expected setup, inspection, maintenance, and rejection allowance. Next, time a complete operator cycle using a full-size panel.
For example, a press advertised at a fast mechanical rate may still produce slowly if two people must lift and rotate every shade sail. Conversely, a moderate-speed machine with a well-supported table, repeat stop, and reliable feeder may deliver more accepted parts by the end of the shift.
Compare machines using accepted output, not strokes. Your trial record should separate press time, positioning time, feeder stops, adjustments, rework, and rejected joints. That tells you whether to buy more pressing speed, better material support, automatic feeding, or a second workstation.
A Practical Selection Matrix
| Your production condition | Likely starting point | What must be proven in the trial |
| Custom awnings; frequent changes; low-to-medium volume | Powered hand-feed or semi-automatic press with quick tooling changes | Clean cut, easy placement, changeover repeatability, low operator strain |
| Standard awning panels; repeated spacing; stable hardware | Automatic feeding with edge guide or positioning aid | Feeder uptime, spacing control, accepted output over a representative batch |
| Shade sails with thick reinforced points | Rigid powered press sized from the complete stack; pre-punch if testing requires it | Joint formation through the thickest corner, clearance, access, and pull/load test |
| Large, heavy panels that dominate cycle time | Press plus purpose-built support table, rollers, or movable handling arrangement | One-person versus two-person handling, alignment repeatability, floor-space fit |
| Long standardized product family at high volume | Evaluate integrated or multi-station automation | Changeover economics, line balance, fault recovery, quality traceability |
Run an Acceptance Trial That Can Fail
A useful trial has pass/fail criteria. “The machine can set this eyelet” is not enough. Agree on the sample quantity, material variants, eyelet batches, machine settings, inspection method, and defects that cause rejection.
- Confirm the approved material, reinforcement, hardware, washer, and finish for each test group.
- Record the tooling identification, pressure or force setting, stroke adjustment, and feeder setup.
- Run first-off samples and inspect both faces, the cut edge, the formed barrel, and the surrounding material.
- Run a representative batch long enough to expose misfeeds, heat buildup, material-handling problems, and setting drift.
- Measure accepted output and record every stop rather than reporting only machine cycles.
- Perform the customer-required pull, torque, peel, cyclic, or environmental check. If no test method exists, define one with the product designer before purchasing equipment.
- Keep approved samples and a setup record for commissioning at your factory.
If your product is a structural or highly tensioned shade system, the fastening specification and validation method should come from the responsible product designer or engineer. A machine supplier can prove setting repeatability, but cannot decide the safe load rating of your finished sail from a fabric swatch.
Common Buying Mistakes
Buying by tonnage alone. More force does not correct mismatched hardware, poor tooling, frame deflection, or bad alignment. Ask for acceptable samples from your complete stack.
Testing only one flat layer. Production eyelets often pass through hems, patches, webbing, seams, or overlaps. Test the thickest and most difficult location.
Automating inconsistent consumables. Automatic bowls and tracks depend on controlled dimensions and clean parts. Variation, burrs, damaged washers, or mixed batches can erase the labor saving.
Ignoring the panel around the press. A fast cycle is irrelevant if the operator cannot support and align the awning or sail safely.
Using one setting for every assembly. Material stack and hardware can change the correct closure window. Use documented setup cards and first-off approval after changeover.
Accepting appearance as proof. A neat flange can hide an incomplete roll, wrong washer engagement, cut fibers, or insufficient retention. Inspect the joint and run the specified test.
What to Include in Your RFQ
- Finished product: retractable awning, fixed awning, canopy, screen, shade panel, or shade sail.
- Material specifications and complete layer stacks at every eyelet location.
- Eyelet or grommet drawing, washer drawing, samples, supplier, material, and finish.
- Required hole location, edge distance, spacing pattern, and positional tolerance.
- Largest panel dimensions, weight, fold limitations, and required working reach.
- Product mix, batch sizes, shifts, eyelets per product, and target accepted output.
- Available electricity, compressed air, floor space, access, and extraction or cleaning requirements.
- Required safety standard, guarding, controls, documentation language, training, spares, and acceptance criteria.
This information gives the manufacturer something concrete to engineer and test. It also makes quotations easier to compare because each supplier is responding to the same application instead of guessing at your requirements.
Final Recommendation
Choose the machine only after the joint and the workstation are defined. For awnings, pay close attention to repeated edge placement, long-panel support, and changeover needs. For shade sails, focus on the full reinforced stack, access to critical points, approved hardware, and a meaningful mechanical acceptance test.
If your mix changes frequently, prioritize flexible tooling and controlled hand feeding. If your hardware and orders are stable, evaluate automatic feeding with a timed production trial. If the panel is the bottleneck, invest in material handling before you pay for more press speed.
Send your material assemblies, eyelets, washers, layout drawing, and output target to QC Machinery. You can then evaluate a machine around real samples and agreed pass/fail criteria instead of selecting from a generic specification sheet.
FAQ
Can the same eyelet machine handle both awnings and shade sails?
Possibly, but only if the machine, tooling, clearance, and force range are validated on every complete material stack and hardware combination. The products may share a press while requiring different dies, settings, punching methods, or handling fixtures.
Is an automatic eyelet machine always the best choice for awning production?
No. Automatic feeding is most useful when hardware and orders are stable. A mixed custom shop may get better overall productivity from a powered hand-feed or semi-automatic machine with fast changeovers and good panel support.
Should you pre-punch reinforced shade-sail corners?
That depends on the hardware and full reinforcement stack. Use a one-cycle cut-and-set process only if trials show a clean hole and an acceptable joint. Pre-punching may be preferable for unusually thick, sensitive, or hard-to-cut assemblies.
How do you choose the correct throat depth?
Measure from the accessible panel edge to the center of the deepest eyelet location, then add clearance for the folded or reinforced assembly. Do not choose throat depth from overall panel width alone.
What should you send for a machine test?
Send the thinnest and thickest production assemblies, actual eyelets and washers, a marked layout, an approved finished sample, and any current failed samples. Include material and hardware specifications plus your acceptance test.
How should you compare machine speed?
Time the complete process with a full-size product and report accepted eyelets per hour. Include positioning, panel movement, inspection, feeder stops, changeover, and rework.