
The worst time to discover an eyelet machine problem is after the crate has crossed an ocean.
At that point, a missing die is no longer a five-minute correction. A wrong voltage becomes an installation delay. A feeder that jams on your real eyelets becomes a production problem. A safety sensor that was never tested becomes your responsibility.
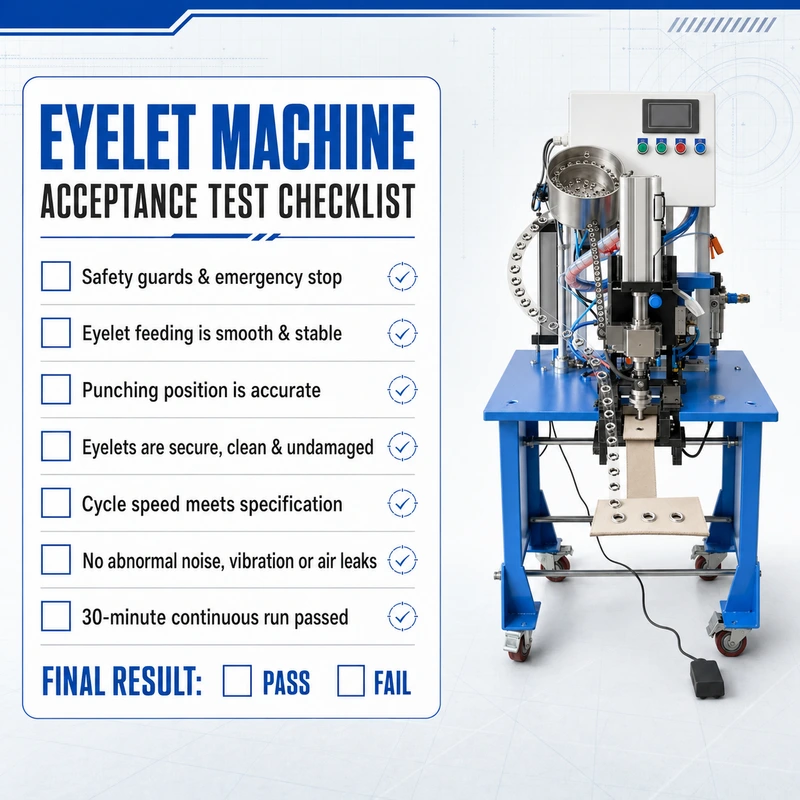
That is why every industrial buyer needs an eyelet machine acceptance test checklist before shipment. The purpose is simple: confirm that the exact machine you ordered can run the agreed eyelets, washers, and materials safely, repeatedly, and at the promised output before it is packed.
This is normally called a factory acceptance test, or FAT. A good FAT is not a sales demonstration. It is a contract-based production test with written criteria, real samples, recorded evidence, and a clear release decision.
What an Eyelet Machine FAT Should Prove?
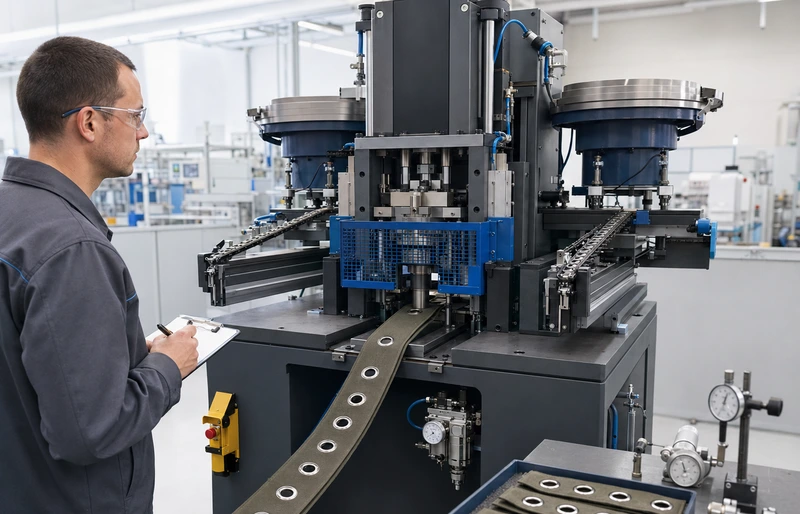
An eyelet machine may pass a short demonstration and still fail in production. One perfect setting tells you almost nothing about feeder stability, warm-machine performance, fault recovery, changeover time, or output over a full run.
The acceptance test should answer six questions:
- Is this the exact machine and configuration listed in the purchase order?
- Are the electrical, pneumatic, mechanical, and safety systems complete and working?
- Can it feed, punch, and set your real eyelets without frequent jams or manual help?
- Do finished settings meet your visual, dimensional, and strength requirements?
- Can your team operate, adjust, clean, maintain, and recover the machine after a fault?
- Are all tools, spare parts, programs, manuals, and shipping items included?
If one of these questions is unanswered, the FAT is not finished.
Set the Acceptance Criteria Before the Test
Do not wait until the machine is running to decide what “pass” means. The buyer and supplier should agree on the FAT protocol before the test date.
Define the machine model, approved drawings, eyelet sizes, washer types, material range, feeding method, tooling, voltage, air requirements, target speed, trial duration, quality limits, and documents required for release. If the machine is customized, include every special sensor, guide, worktable, guard, program, and interface.
The acceptance numbers should reflect the purchase agreement. There is no universal jam rate, pull-out force, spacing tolerance, or trial quantity for every eyelet application. A curtain eyelet, a shoe eyelet, and a heavy tarpaulin grommet do different jobs. Set limits that match the product.
Send production samples early. Include the thinnest and thickest materials, multilayer assemblies, coated or laminated material, all regular eyelets and washers, and an approved finished sample if one exists. Do not let the FAT use an easier substitute.
Keep one sealed set of approved components as the “golden sample.” Label the material, eyelet, washer, die, recipe, and date. This gives both sides a fixed reference when appearance or setting quality is disputed.
1. Confirm Machine Identity and Ordered Configuration

Start with the nameplate. Record the manufacturer, model, serial number, manufacturing date, voltage, frequency, phase, power, and any pneumatic requirement. Match these details to the purchase order and approved specification.
Then inspect the complete configuration. Confirm the head type, number of working heads, throat depth, stroke, work height, feeder bowls, raceways, washer feed, tooling, table, guides, laser, counters, sensors, foot pedal, guards, wheels, and optional accessories.
Do not accept “equivalent” substitutions without written approval. A different PLC, sensor, valve, motor, or drive may work today but create spare-parts and service problems later. If a component changed, record the brand and model, explain why, and update the drawings and parts list.
Check loose items separately. Dies, gauges, tools, change parts, spare fuses, belts, seals, springs, manuals, cables, and mounting hardware are easy to miss when everyone is watching the machine run. Lay them out, compare them with the packing list, and photograph them before packing.
Pass evidence: nameplate photo, configuration photos, serial-number record, and signed deviation list showing no unapproved substitutions.
Review Drawings, Manuals, and Software
A machine is not ready to ship when the hardware works but the documentation is incomplete.
The package should include the operating manual, installation instructions, electrical schematic, pneumatic diagram where applicable, maintenance schedule, lubrication chart, parts list, wear-parts list, alarm list, troubleshooting guide, and the approved machine layout.
For PLC, touchscreen, servo, or programmable models, back up the working software and recipes. Record the program version. Confirm that the backup can be restored and that passwords needed for normal maintenance are handed over under the agreed support policy.
If certificates or declarations are required for the destination market, list them in the purchase specification and verify the machine identity matches the documents. Do not use a generic certificate from a different model as shipment evidence.
Confirm the manuals describe the actual machine. A diagram showing a different valve arrangement or control panel wastes time during installation. Mark every late modification on the final as-built drawings.
Pass evidence: document index, as-built drawings, labeled program backup, recipe file, certificate list, and signed document receipt.
3. Inspect Mechanical Build and Workmanship
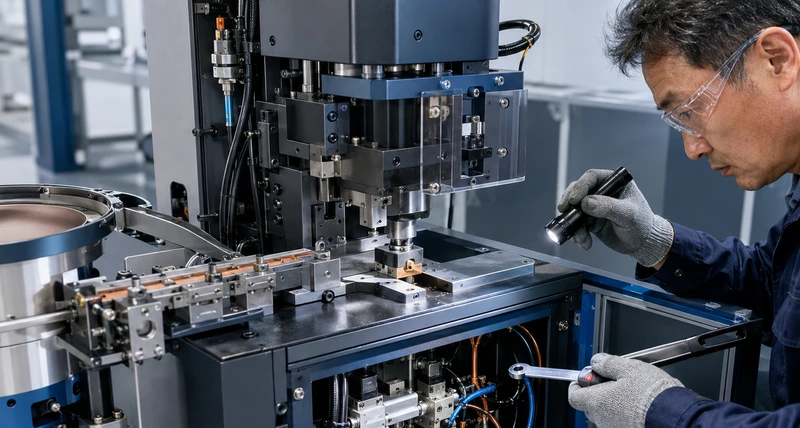
Walk around the machine before power is connected. Look for shipping damage, unfinished welds, sharp edges, loose fasteners, cracked covers, poor paint, exposed threads, oil leaks, damaged tubing, unsupported cables, and components that interfere with normal cleaning or adjustment.
Check the frame and worktable for stability. The machine should sit level without rocking. The punch and lower die must align correctly. Move adjustable guides and stops through their full range and confirm they lock securely.
Inspect the die holders, punch, anvil, feed fingers, tracks, and raceways. Surfaces that guide eyelets should be smooth and clean. Burrs, steps, or damaged edges can create random jams that only appear after the machine warms up.
Turn shafts or mechanisms by hand only where the manufacturer’s safe procedure allows it. Check for unusual tight spots, excessive play, rubbing, or poor return action. Verify guards and covers can be removed for service and refitted without forcing them into position.
Pass evidence: completed workmanship checklist with dated photos of the frame, tooling area, feeders, cabinets, and cable or hose routing.
4. Verify Utilities and Control Power
The test utilities must match the future installation conditions. Record actual voltage, phase, frequency, air pressure, air quality, and grounding used during the FAT.
For pneumatic machines, check the specified working pressure and flow under continuous cycling. A compressor can show the correct pressure while idle and then fall below the requirement during production. Inspect filters, regulators, lubricators if specified, drains, fittings, and leak points. Confirm the system maintains stable force and timing at the agreed speed.
For electric machines, verify current protection, grounding, cabinet fans, transformers, voltage stabilizers, and power supplies. Confirm motors rotate in the correct direction and the machine restarts in a controlled condition after power is removed and restored.
Test the main isolator and normal shutdown sequence. Settings and production counts should behave as specified after a normal restart. Recipes should not disappear because the control was switched off.
Pass evidence: utility readings during idle and production, cabinet inspection, grounding check, and restart record.
5. Test Every Safety Function
Safety devices are not decorations. Test them one by one and record the result.
Verify the emergency stop stops hazardous motion and prevents an automatic restart. Check every guard, door switch, ring guard, finger guard, two-hand control, light sensor, interlock, and safety relay included in the ordered design. Where a foot pedal is used, confirm its guard and operating logic match the agreed configuration.
Use the manufacturer’s approved test method. Never put a hand into the tooling area to prove a guard works. Use a safe test piece or the procedure defined by the machine builder.
Open each interlocked cover during the relevant mode and confirm the machine responds correctly. Trigger low-air, missing-eyelet, missing-washer, feeder-empty, overload, or sensor alarms where those functions are fitted. Confirm the alarm message is understandable and the reset procedure does not create unexpected movement.
Test restart prevention. After an emergency stop, guard opening, power interruption, or air loss, the machine should not resume an unfinished automatic cycle without the intended reset and start actions.
Safety requirements vary by machine design and destination. The FAT should verify the ordered risk-control measures and required documentation, but it does not replace the buyer’s site risk assessment after installation.
Pass evidence: signed safety-function matrix, alarm photos or video, and a record of any safety-related open item. A safety defect should block shipment.
6. Verify Tooling, Eyelets, Washers, and Feeders
The machine and tooling must be tested as one system. A powerful press with the wrong dies will only make bad eyelets faster.
Confirm each die set is labeled for the correct eyelet, washer, material range, and machine. Check punch diameter, die cavity, alignment, clearance, and mounting. Verify quick-change features actually reduce changeover time and do not disturb alignment.
Load the buyer’s eyelets and washers into the correct bowls. Start at low speed and watch how parts orient, climb, transfer through the track, enter the raceway, and reach the setting point. Look for doubled parts, reversed eyelets, tilted washers, bouncing, track gaps, and places where parts hesitate.
Do not polish the test by hand-feeding every difficult part. Record each manual intervention. If the operator touches the track every few minutes, the feeder is not ready for production.
Run the minimum and maximum fill levels. Some bowls work when full and become unstable near empty. Test a normal lot of fasteners, not a carefully selected handful.
Pass evidence: feeder video at normal speed, die list, component identification, recorded jams and interventions, and approved first-off samples.
7. Check Manual Mode, Setup Mode, and Dry Cycling
Before using material, test every permitted manual command. Jog the head, feeders, cylinders, positioning axes, clamps, counters, lights, and other devices. Confirm direction labels and button names match the movement.
Run dry cycles only where the machine builder allows them. Watch for abnormal sound, vibration, heat, rubbing, loose hardware, delayed sensors, or air leakage. Check the machine at low speed and then at the agreed operating speed.
Verify counters, batch settings, recipe selection, speed adjustment, and password levels. Confirm the machine cannot enter an unsafe automatic state from setup mode.
Pass evidence: completed I/O or function checklist, dry-run duration, alarm history, and list of adjustments made.
8. Run a Real Production Trial
This is the heart of the eyelet machine acceptance test checklist.
Use the buyer’s production materials and fasteners. Begin with first-off samples at a controlled speed. Adjust the approved parameters until the setting matches the golden sample. Record the final pressure, die height, speed, feeder settings, sensor positions, and recipe number.
Then run the agreed quantity or duration without stopping the clock for normal minor faults. The purchase specification should define the target: for example, a number of consecutive good cycles, a continuous time period, or a production batch at the quoted speed.
Record total cycles, good parts, rejects, jams, misfeeds, double feeds, missing washers, alarms, manual interventions, and downtime. Calculate good output per minute from accepted parts, not empty machine cycles.
Repeat the trial for each important combination: smallest and largest eyelet, thinnest and thickest material, washer and no-washer setup, and any difficult coated or multilayer product. If the machine was sold for several sizes, one easy size is not enough.
Check performance after warm-up. A cylinder, motor, feeder, or sensor may behave differently after extended use. Inspect the final samples as carefully as the first ones.
Pass evidence: signed production log, counter photos, settings sheet, downtime record, and labeled sample board showing first, middle, and final parts.
9. Inspect Finished Eyelet Quality
Look at both sides of every sample. The front flange should sit flat without dents or heavy marking. The barrel should roll, flare, split, or form according to the approved eyelet and die design. The washer should be centered and captured. The material should not be torn, cracked, excessively stretched, scorched, or trapped unevenly.
Check for loose or spinning eyelets, uneven rear flares, broken barrels, cut washers, ragged holes, exposed sharp edges, misalignment, and inconsistent spacing. Compare thin and thick material separately.
Measure the characteristics that matter to the finished product. These may include hole position, edge distance, spacing, finished height, flange flatness, rear-roll diameter, and pull-out strength. Use calibrated measuring tools where numerical acceptance limits are specified.
Do not invent a universal pull-out value. The correct requirement depends on the eyelet, material, product design, and customer standard. Agree on the test method, sample conditioning, direction of load, speed, and minimum result before FAT.
Retain approved samples from every tested combination. Sign and date them. Send one set with the machine and keep one at the factory.
Pass evidence: inspection report, measurements, strength-test result where required, defect photos, and signed golden samples.
10. Test Changeover and Fault Recovery
A machine can run one setup beautifully and still waste hours between orders.
Time a complete changeover from the last good part of one size to the first approved part of another. Include bowl and raceway changes, die replacement, guide adjustment, recipe selection, trial pieces, and final inspection. Note which tools and skills are required.
Create controlled faults using safe procedures. Test an empty feeder, misoriented component, missing washer, blocked track, low air, sensor timeout, and material-position error where applicable. The machine should stop or alert as designed, protect the tooling, and guide the operator toward recovery.
After clearing the fault, confirm the machine returns to production without losing settings or creating an unexpected cycle. Check whether rejected or uncertain parts are clearly identified.
Pass evidence: measured changeover time, fault-and-recovery record, operator steps, and list of any fault the control failed to detect.
11. Confirm Maintenance Access, Spares, and Training
Ask the supplier to perform the routine maintenance tasks during FAT. Find every lubrication point, drain, filter, belt, seal, spring, sensor, fuse, and wear part. Confirm that technicians can reach them without dismantling half the machine.
Review the daily, weekly, monthly, and annual schedule. Match lubricants to the manual. On pneumatic machines, confirm the procedure for draining water, checking leaks, and servicing air-preparation components. On mechanical machines, review belts, bearings, clutch or brake parts, guides, and lubrication. On programmable machines, include backups, cooling fans, electrical filters, and sensor checks.
Verify the two-year recommended spare-parts list, quantities, prices, and lead times. Separate normal wear parts from emergency spares. Confirm part numbers match the as-built machine.
Use FAT time for operator and maintenance training. The buyer’s team should start, stop, adjust, load, change over, clean, diagnose, and safely recover the machine. Record attendees and topics. A video is useful, but it does not replace hands-on practice.
Pass evidence: maintenance demonstration, signed training record, spare-parts list, and labeled service kit.
12. Close the Punch List Before Packing
Every failed or incomplete item belongs on a punch list. Give it an owner, corrective action, due date, and retest requirement. Separate shipment-blocking defects from minor documentation items, but do not hide open points in email.
Retest corrected functions under the same conditions. A photo of a replaced part does not prove the machine now passes the production test.
The release document should identify the machine by serial number and list the approved FAT protocol, test date, attendees, results, open items, deviations, samples, software version, and attachments. Both sides should sign only after the agreed release conditions are met.
Pass evidence: closed punch list and signed FAT release. “Pass with open safety item” is not a pass.
13. Inspect Packing and Shipment Preparation
Acceptance is not complete until the machine is ready to survive transport.
Back up programs and record final settings before shutdown. Drain fluids or air systems where required by the packing procedure. Secure moving heads, bowls, raceways, tables, and loose accessories with labeled transport brackets. Protect exposed metal and moisture-sensitive components.
Check the crate base, lifting points, center of gravity, blocking, wrapping, desiccant, corrosion protection, and weather barrier. Make sure heavy tooling cannot move inside the crate. Photograph the machine before wrapping, during blocking, and before the crate is closed.
Match every package to the packing list. Mark gross weight, net weight, dimensions, lifting points, destination, and case number. Put manuals and small critical parts in a clearly labeled waterproof box rather than loose in the cabinet.
Pass evidence: final packing list, crate photos, shipping marks, and record of transport locks that must be removed during installation.
Remote FAT: What to Request When You Cannot Attend
Remote acceptance can work if the camera follows the checklist instead of the supplier’s sales route.
Ask for a live session with a wide view of the machine and close views of the nameplate, control screen, feeders, tooling, safety tests, utility gauges, cycle counter, samples, spare parts, and packing items. The buyer should choose what happens next, including restarts, alarms, material changes, and sample selection.
Request the raw production log and unedited video of the continuous run. Mark tested samples on camera and have them shipped to the buyer or an independent inspector. A three-minute highlight video is useful for marketing, not acceptance.
Common FAT Mistakes
Testing supplier material instead of buyer material. The machine passes because the sample is easier than production.
Counting empty cycles as output. The quoted speed means little if accepted parts per minute are much lower.
Ignoring the washer side. The front looks good while the rear flare is split, off-center, or loose.
Running only a full feeder. Jams appear later when bowl level drops or mixed parts reach the track.
Skipping warm-up. A cold machine passes, then timing or force drifts during a longer run.
Accepting verbal promises. If a correction is not on the punch list, it may disappear after packing.
Signing before evidence is complete. Once shipment is released, leverage and correction speed both fall.
Eyelet Machine Acceptance Test Checklist: Final Release Summary
Before shipment, confirm these points:
- Machine model, serial number, voltage, drive, tooling, feeders, guards, and options match the order.
- Manuals, as-built diagrams, software backups, recipes, certificates, and parts lists are complete.
- Mechanical build, alignment, guides, wiring, tubing, and workmanship pass inspection.
- Electrical and pneumatic utilities remain stable during continuous production.
- Emergency stops, guards, interlocks, alarms, and restart prevention work as designed.
- Actual eyelets, washers, and materials feed reliably at minimum and normal bowl levels.
- The machine completes the agreed production run at the promised good-part output.
- Front and rear eyelet quality, dimensions, spacing, and strength meet written limits.
- Changeover and fault recovery are demonstrated by the buyer’s team.
- Maintenance tasks, spare parts, training, and after-sales contacts are confirmed.
- Every punch-list item is closed or formally accepted under written shipment conditions.
- Packing protects the tested configuration and includes every listed item.
Final Thoughts
A proper eyelet machine acceptance test checklist protects both buyer and manufacturer. The buyer receives evidence that the machine is ready. The manufacturer receives a clear record of what was tested, approved, and shipped.
Do not judge the machine by one clean eyelet or one fast video. Test the exact configuration, run real production material, challenge the feeders and safety functions, inspect both sides of the setting, and keep the evidence.
Problems found at the factory are corrections. The same problems found after delivery are downtime. Finish the checklist before the crate is closed.