Metal eyelets are small, circular metal rings commonly used in a variety of textile applications, such as clothing, home furnishings, and industrial settings.
These tiny fasteners serve to reinforce holes in fabrics and materials, making them more durable while offering a sleek, professional finish. Whether you’re creating garments, curtains, or DIY projects, knowing how to apply metal eyelets is essential to achieving strong and aesthetically pleasing results.
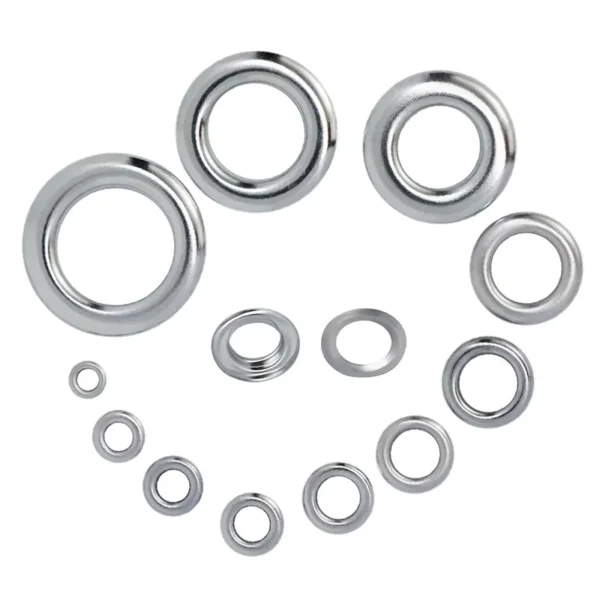
What Are Metal Eyelets?
A metal eyelet is typically a small ring made of durable materials like brass, copper, or aluminum. These rings are inserted into fabric or other materials to create a reinforced hole, allowing for the insertion of laces, cords, or hooks. Eyelets come in various sizes, styles, and finishes, and they are used in fashion, home décor, and industrial applications.
Common Uses of Metal Eyelets in Various Industries
- Fashion: Metal eyelets are commonly used in clothing items such as jeans, jackets, shoes, and belts. They provide a sturdy hole for laces or decorative designs.
- Home Furnishings: Eyelets are also widely used in curtain production, offering a simple yet effective method for hanging drapes or blinds.
- Industrial Applications: In industrial sectors, metal eyelets are used for securing cables, ropes, and other materials in manufacturing and construction settings.
Importance of Proper Installation
Proper installation of metal eyelets ensures that they perform their intended function effectively. A well-applied eyelet provides strength and durability, preventing wear and tear on the fabric while offering a polished, professional appearance. Incorrect installation, on the other hand, can cause the fabric to tear, the eyelet to slip out, or result in uneven finishes.
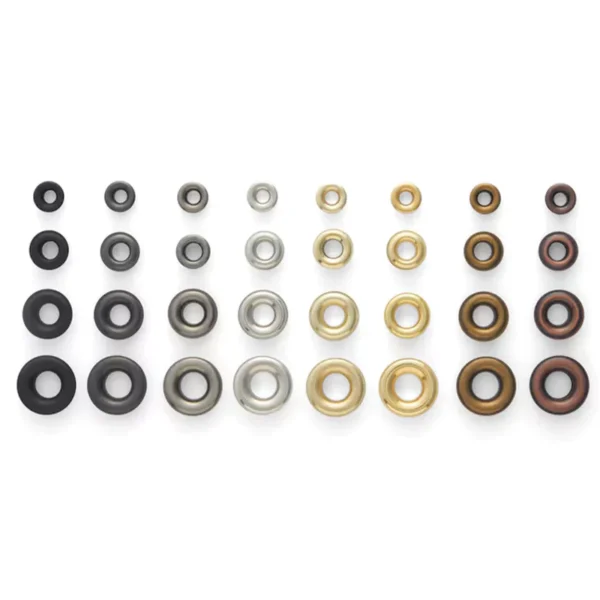
Types of Metal Eyelets
When applying metal eyelets, it’s essential to choose the right type based on the material you’re working with and the intended use. There are various types of eyelets to choose from, each with unique features.
Different Materials for Metal Eyelets
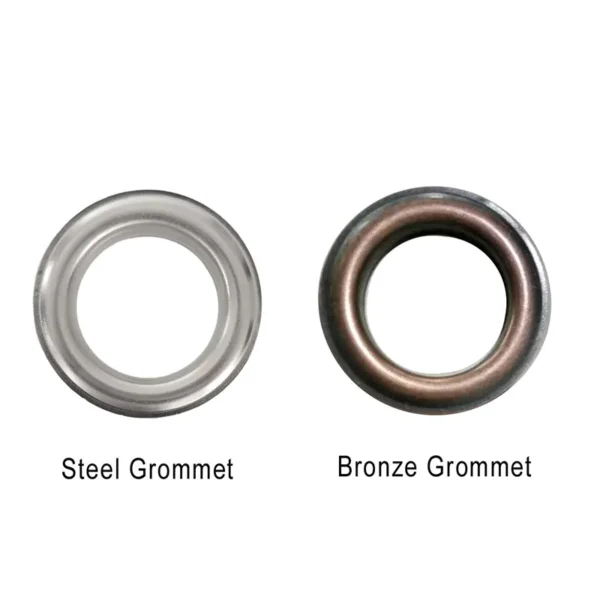
- Brass: Known for its strength and corrosion resistance, brass eyelets are ideal for heavy-duty applications like denim or leather.
- Aluminum: Lightweight and resistant to rust, aluminum eyelets are often used in garments and accessories.
- Copper: Copper eyelets have a distinct appearance and are frequently used in fashion items for their aesthetic value.
Types of Eyelets
- Plain Eyelets: These eyelets have a simple cylindrical shape and are ideal for basic applications like clothing and curtains.
- Claw Eyelets: Featuring small prongs or claws, these eyelets are used for extra grip and are often used in applications where additional holding power is required.
- Rolled Eyelets: These eyelets have a smooth, rolled edge, providing a clean finish. They are commonly used in high-end fashion and upholstery.
Tools and Materials Required
To apply metal eyelets, you’ll need a few essential tools and materials to get the job done effectively.
Essential Tools for Applying Metal Eyelets
- Eyelet Tool Kit: An eyelet tool kit typically includes a punch, setter, and anvil. These tools are designed to create the hole and secure the eyelet in place.
- Hole Punch: A hole punch is necessary for creating the correct size hole for the eyelet.
- Hammer or Press Machine: A hammer is typically used for manual eyelet installation, while a press machine offers greater precision for larger projects.
Choosing the Right Eyelets for Your Project
The size and material of the eyelet you choose depend on the fabric or material you’re working with. For lightweight fabrics, a smaller, thinner eyelet may be more appropriate. For heavier materials like denim or leather, you’ll need a more robust, thicker eyelet.
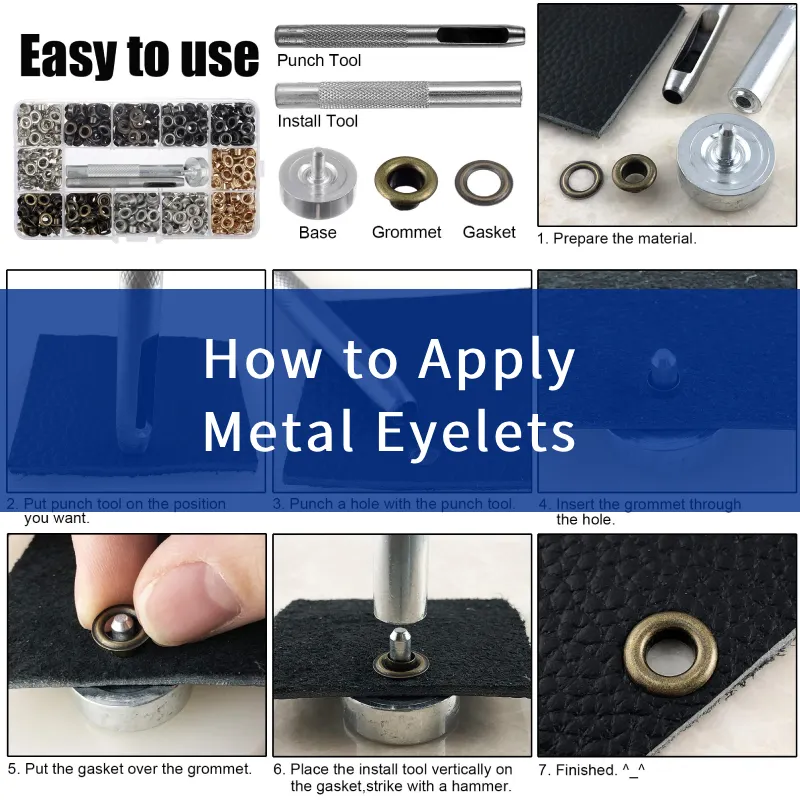
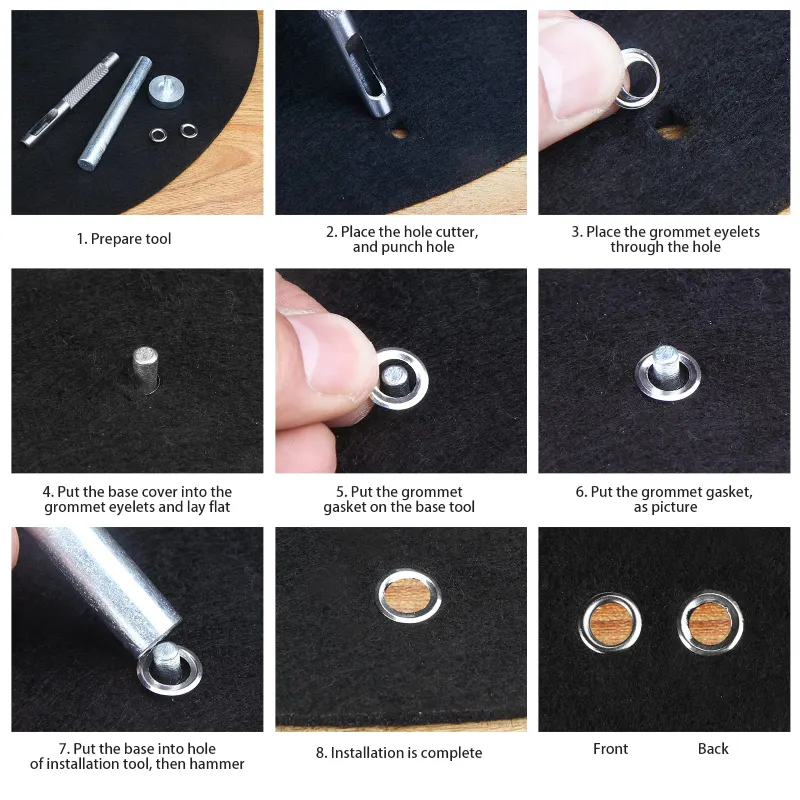
Step-by-Step Guide to Applying Metal Eyelets
Follow this step-by-step guide to properly apply metal eyelets to your fabric or material:
1. Preparing the Fabric or Material
Before applying the eyelet, ensure your fabric or material is clean and free of wrinkles. Lay the material flat on a stable surface, ensuring there is enough space around the area where you plan to apply the eyelet.
2. Marking the Eyelet Placement
Accurately mark the spot where the eyelet will go. You can use a fabric marker or chalk to ensure the placement is precise. For symmetrical projects, measuring tools or templates may help ensure even spacing.
3. Cutting the Fabric for the Eyelet Hole
Once you’ve marked the eyelet placement, use a hole punch or fabric cutter to create a clean hole in the fabric. The hole should be slightly smaller than the eyelet, ensuring a snug fit.
4. Inserting the Eyelet into the Hole
Insert the eyelet into the hole, ensuring the flange (the flat part of the eyelet) sits flush against the fabric. The prongs or shaft of the eyelet should pass through the fabric, with the smooth side facing outward.
5. Using the Right Tools to Secure the Eyelet
Using your eyelet setter, position the tool over the exposed part of the eyelet. Gently tap the tool with a hammer to secure the eyelet in place. If you’re using a press machine, follow the manufacturer’s instructions to apply pressure evenly.
Step-by-Step Automatic Eyelets Machine Guide to Applying Metal Eyelets
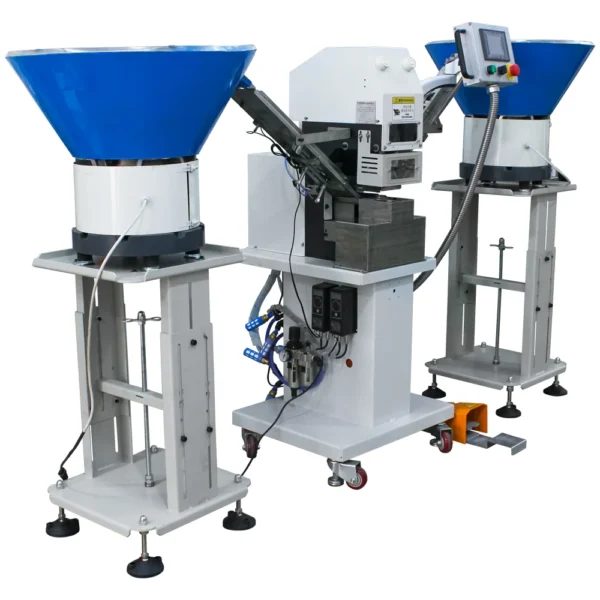
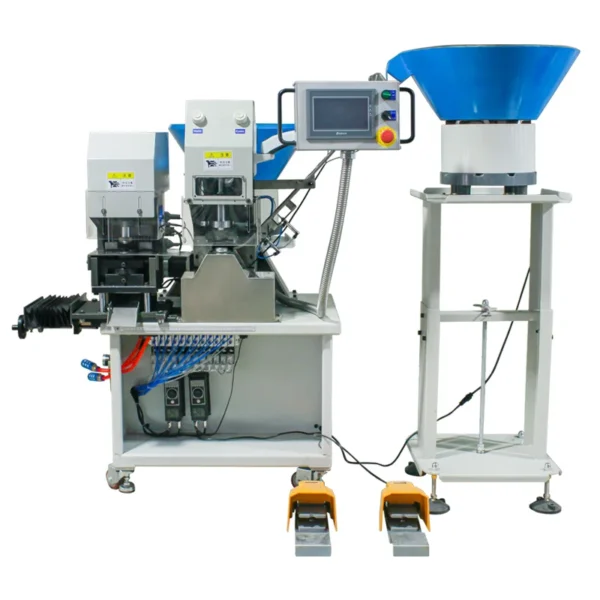
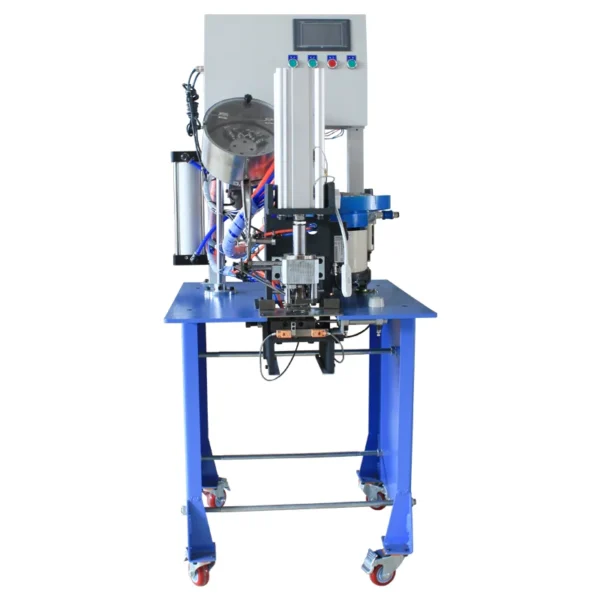
Step 1: Setting Up the Automatic Eyelets Machine
The first step is to properly set up your automatic eyelets machine. Proper setup ensures smooth operation and consistent results.
1.1 Preparing the Machine
Ensure that the machine is securely placed on a flat, stable surface. If your machine has adjustable settings for fabric thickness, make sure the settings are appropriate for the type of fabric you’ll be working with.
1.2 Inserting the Correct Eyelet Size
Select the metal eyelets that match the hole size you plan to create in the fabric. Insert the eyelets into the machine’s eyelet chamber, ensuring they are loaded correctly. Some automatic machines offer a variety of sizes for different projects, so double-check that the eyelet size is compatible with the fabric and the design.
1.3 Adjusting Fabric Holders
Adjust the fabric holders or guides to securely hold the fabric in place. Some automatic machines feature clamps or suction systems that keep the fabric steady during the eyelet application process.
Step 2: Preparing the Fabric
Before applying the eyelets, proper fabric preparation is essential for successful installation.
2.1 Marking Eyelet Placement
Use a fabric marking tool (chalk, pen, or marker) to mark the exact spots where you want to insert the eyelets. Ensure the placement is symmetrical, and the holes are evenly spaced. Measure the spacing between each eyelet for uniformity.
2.2 Cutting the Holes
Use a fabric hole punch or a cutting tool compatible with the machine to create holes at the marked spots. The hole should be slightly smaller than the diameter of the eyelet to ensure a tight fit.
2.3 Stabilizing Lightweight Fabric
If you’re working with lightweight fabrics, consider applying a fusible interfacing to reinforce the fabric around the hole. This prevents the fabric from tearing or stretching when the eyelet is inserted.
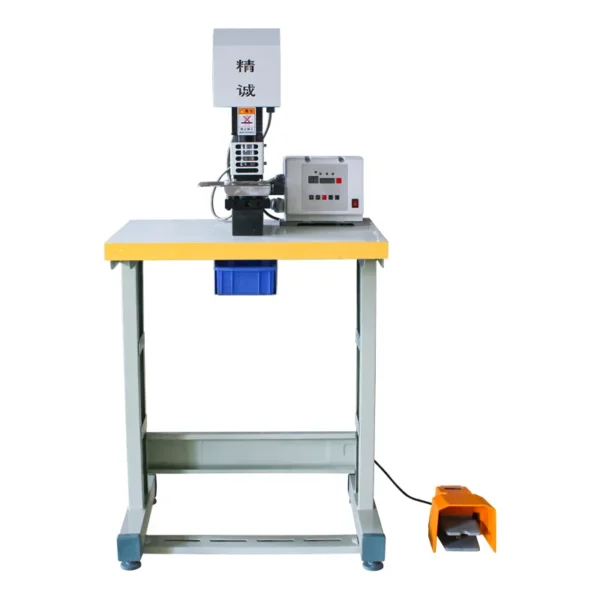
Step 3: Operating the Automatic Eyelets Machine
Now that your machine is set up and the fabric is prepared, it’s time to start applying the metal eyelets.
3.1 Loading the Fabric Into the Machine
Place the prepared fabric under the eyelet press. Most automatic machines come with a feeding system that automatically positions the fabric. Ensure that the fabric is aligned properly, and the marked hole corresponds to the machine’s punch and die area.
3.2 Inserting the Eyelet
Once the fabric is loaded into the machine, activate the machine to start the eyelet insertion process. The machine will punch the hole (if it hasn’t already been punched), then insert the metal eyelet into the fabric.
3.3 Setting the Eyelet
After the eyelet is inserted, the machine uses a set of dies to press the eyelet firmly into place. The pressure from the machine ensures that the eyelet is securely fastened, with no risk of it coming loose or falling out over time.
Step 4: Inspecting the Finished Eyelets
Once the automatic machine has finished setting the eyelet, it’s time to inspect the result.
4.1 Checking the Alignment
Ensure the eyelet is properly aligned with the hole and that it has been set securely. There should be no gaps between the eyelet and the fabric.
4.2 Examining the Quality of the Fabric
Inspect the fabric around the eyelet. There should be no damage, stretching, or fraying. The machine should apply even pressure, ensuring the fabric remains intact and the eyelet is snugly fastened.
4.3 Testing the Durability
Gently tug on the eyelet to test its durability. A properly applied eyelet should hold firm without any signs of loosening or detaching from the fabric.
Step 5: Final Adjustments
If any eyelet doesn’t meet your quality standards, you may need to make adjustments. Here are some tips:
5.1 Adjusting Pressure Settings
If the eyelet isn’t set tightly enough, you can adjust the pressure settings on the machine. This ensures that future eyelets are properly secured without damaging the fabric.
5.2 Checking for Misalignment
If the eyelet is misaligned, check that the fabric is properly positioned in the machine. Misalignment can occur if the fabric isn’t placed correctly under the machine’s guide.
Step 6: Cleaning and Maintaining the Automatic Eyelets Machine
Proper maintenance of your machine ensures that it continues to perform optimally.
6.1 Cleaning After Use
Clean the machine’s components regularly to remove any fabric dust or metal particles that may accumulate during the eyelet installation process. Use a soft cloth and mild cleaning solution to wipe down the machine.
6.2 Regular Maintenance Checks
Perform regular maintenance checks, such as lubricating moving parts, inspecting the punch and die components for wear, and ensuring all settings are calibrated correctly.
Finishing Touches and Checking Installation
Once the eyelet is securely attached, check for any loose edges or misalignments. If necessary, adjust the placement or apply additional pressure to ensure a tight fit.
Common Mistakes When Applying Metal Eyelets
Even experienced crafters and designers can make mistakes when applying metal eyelets. Here are some common errors to avoid:
Incorrect Hole Size
If the hole is too small, the eyelet won’t fit. If it’s too large, the eyelet won’t stay securely in place. Always double-check the size of the hole before inserting the eyelet.
Misalignment During Placement
Misalignment can cause the eyelet to sit crooked or off-center, ruining the appearance. Be sure to measure carefully and align the eyelet correctly before securing it.
Over-tightening or Under-tightening the Eyelet
Applying too much force can damage the fabric or eyelet, while too little force may result in a loose eyelet. Strike a balance to ensure a tight, secure fit.
Fabric Damage During Installation
Using the wrong tool or excessive force can tear or damage the fabric around the eyelet. Always use a soft anvil or cushion when working with delicate fabrics.
Tips for Perfectly Applied Metal Eyelets
Here are a few tips to ensure your metal eyelets are applied perfectly every time:
Using Stabilizers for Thin or Delicate Fabrics
For delicate or lightweight fabrics, consider using a stabilizer or interfacing. This will provide additional support during the eyelet installation process, preventing fabric damage.
Proper Handling and Storage of Eyelets
Store your eyelets in a dry, cool place to prevent corrosion. Handle them with care, especially if you’re working with decorative finishes that may scratch easily.
Maintenance and Care of Metal Eyelets
Proper maintenance is crucial for ensuring the longevity of your metal eyelets. Here’s how to keep them looking good as new:
Ensuring Durability and Preventing Rust or Corrosion
To prevent rust or corrosion, clean eyelets regularly and avoid exposing them to excessive moisture. Consider using a protective coating or lacquer for added protection.
Cleaning and Polishing Techniques
Use a soft cloth and mild cleaning solution to wipe down eyelets. If they’ve become tarnished, consider polishing them with a gentle metal polish to restore their shine.
Applications of Metal Eyelets
Metal eyelets have a wide range of applications beyond fashion, including:
- Fashion and Apparel: Common in garments like jackets, skirts, and shoes, eyelets provide functionality and visual appeal.
- Home Textiles: Used for curtains, drapes, and upholstery, eyelets help reinforce the fabric and provide an attractive finish.
- Industrial and Technical Uses: Eyelets are used in industries like construction, manufacturing, and electronics, often to secure cables or wires.
Troubleshooting Metal Eyelet Problems
While metal eyelets are durable, sometimes issues can arise. Here’s how to troubleshoot:
How to Fix a Loose or Malfunctioning Eyelet
If an eyelet becomes loose or detaches, gently remove it and replace it with a new one. Ensure the hole is the right size and that the eyelet is properly secured.
Dealing with Fabric Tearing or Damage
If the fabric tears during eyelet installation, consider reinforcing the area with fabric glue or patching it before applying the eyelet.
Alternatives to Metal Eyelets
If you prefer not to use metal eyelets, there are other options available:
- Plastic Grommets: A lightweight, rust-free alternative that can be applied similarly to metal eyelets.
- Fabric-Covered Eyelets: These eyelets are covered with fabric and provide a softer, more subtle finish than metal versions.
FAQ
How do I choose the right size for metal eyelets?
Choose an eyelet size based on the thickness of the fabric and the type of use. A standard 5/16-inch eyelet works well for most projects, but for thicker fabrics, consider larger sizes.
Can I use metal eyelets on leather or heavy fabrics?
Yes, metal eyelets are ideal for leather, denim, and other heavy fabrics. They provide extra reinforcement and durability.
Do I need special tools for applying eyelets?
Yes, you’ll need a hole punch, eyelet setter, and possibly a hammer or press machine to securely attach the eyelets.
What are the benefits of using metal eyelets over other fasteners?
Metal eyelets are strong, durable, and provide a polished finish. They are more reliable than fabric-covered or plastic alternatives, especially for heavy-duty applications.
How do I avoid damaging my fabric when applying eyelets?
Ensure you’re using the correct tools and size for your fabric. Be gentle with the application process and consider using stabilizers for delicate materials.
How can I ensure my metal eyelets stay secure?
Properly apply and press the eyelets with the right tools. Check the eyelet’s fit and alignment to ensure it’s secure.
Conclusion
Learning how to apply metal eyelets correctly ensures your projects are both durable and visually appealing. Whether you’re working on fashion designs, home textiles, or industrial applications, taking the time to apply eyelets properly can make a significant difference in the quality of your work.