Snaps are an incredibly versatile and practical choice for fastening a variety of fabric projects. knowing how to apply snaps correctly is essential to ensure your projects are durable, functional, and visually appealing.

This guide is designed to walk you through every aspect of how to apply snaps, from choosing the right tools to mastering the techniques involved, whether you’re using manual tools or a snap fastening machine.
Tools and Materials Needed
Manual Tools for Snap Application
To effectively learn how to apply snaps, you’ll need to gather a few basic tools. For manual application, the most common tools are a hammer, anvil, or snap pliers. These tools are particularly suitable for smaller projects or when you need to apply snaps to fabric in specific, delicate areas. Here’s a breakdown of the tools you’ll need:
- Hammer and Anvil: This traditional method is reliable for those who prefer manual work. The hammer provides the necessary force to secure the snap components, while the anvil offers a stable surface for accurate application.
- Snap Pliers: Snap pliers are designed for ease of use, especially when you need to attach snaps quickly or in tight spaces. These pliers hold the snap components in place while you apply pressure to secure them, making them an excellent choice for beginners learning how to use a snap tool.
Snap Fastening Machine

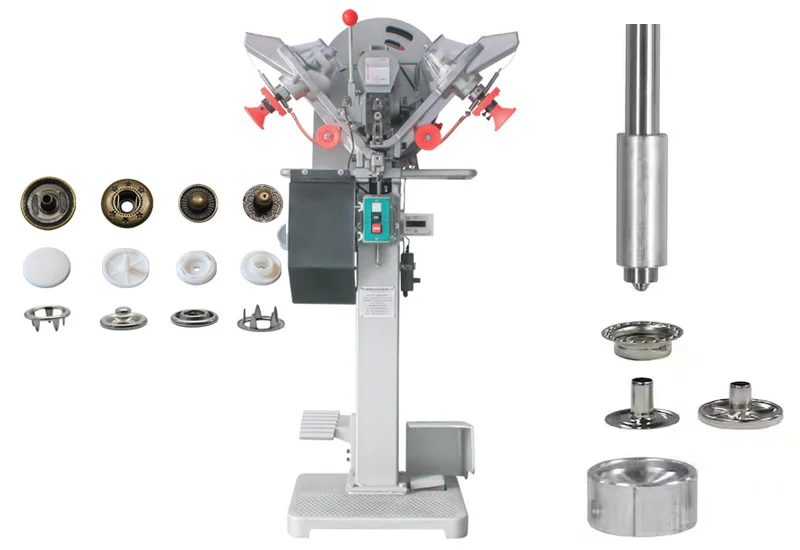
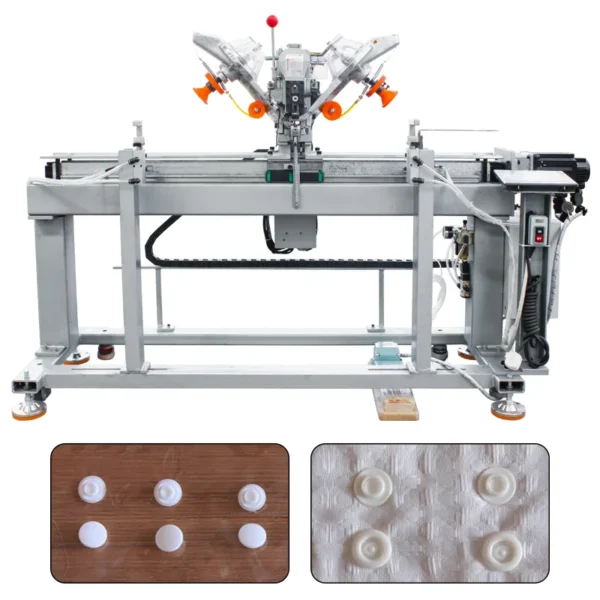
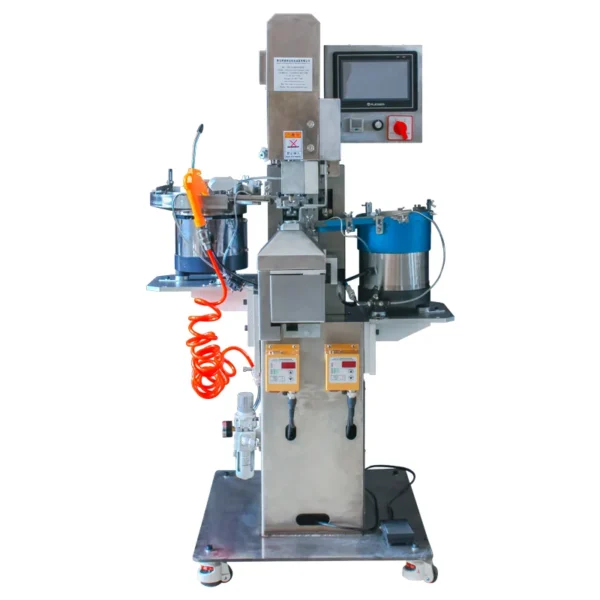
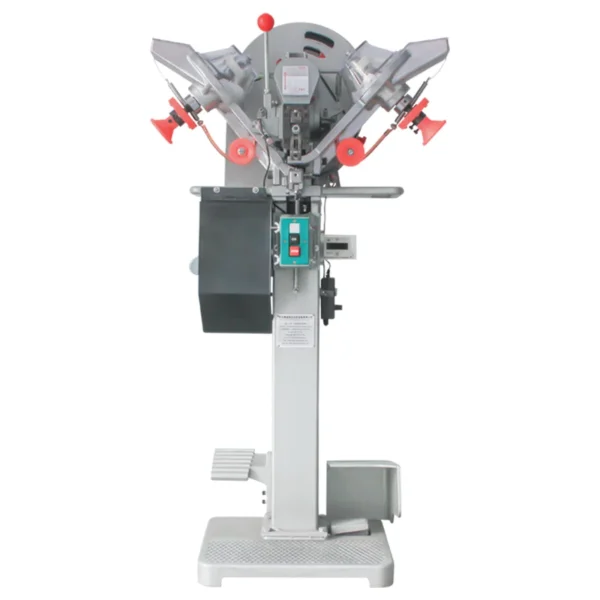
For larger or more repetitive projects, investing in a snap fastening machine can be highly beneficial. A snap fastening machine automates the process of how to install snaps, ensuring each one is applied with consistent pressure and alignment.
This machine is ideal for professional results, particularly when you need to apply a large number of snaps in a short period. Some key features of a snap fastening machine include:
- Precision: The machine ensures that each snap is placed with exact pressure and alignment, reducing the risk of misalignment or loose snaps.
- Efficiency: A snap fastening machine significantly speeds up the process, making it a valuable tool for those working on bulk projects.
The above content outlines the two current mainstream methods of How to Apply Snaps, manual, and using Snap Fastening Machine ( Snap Button Machine)
Preparing Your Fabric
Selecting the Right Snap for Your Fabric
Before you begin applying snaps, it’s crucial to choose the right type of snap for your fabric. The type and size of the snap will largely depend on the fabric’s thickness and the intended use of the finished project. Understanding how to apply snaps effectively starts with this important step.
- Lightweight Fabrics: For delicate materials like silk, chiffon, or lightweight cotton, opt for small, plastic snaps. These snaps are less likely to damage the fabric and are sufficient for lighter uses, such as in blouses or light accessories.
- Heavyweight Fabrics: For thicker materials like denim, canvas, or leather, metal snaps are more appropriate. These snaps provide the strength and durability needed to hold the fabric securely in place, especially in high-stress areas like jackets, bags, or heavy-duty workwear.
Marking Snap Placement
Proper placement is key to ensuring that your snaps function correctly and look professional. Before you begin applying snaps, take the time to carefully mark where each snap will go. This step is essential to mastering how to attach a snap without misalignments.
- Measuring and Marking: Use a ruler or measuring tape to determine the exact location for each snap. Mark these spots lightly with a fabric marker or tailor’s chalk. Ensure that your marks are evenly spaced and aligned, particularly if you’re applying multiple snaps in a row.
- Test Placement: It’s often helpful to test the placement by laying the snaps on the fabric before permanently attaching them. This allows you to make any necessary adjustments before committing to the final placement.
How to Apply Snaps is not just a simple technique and tool. The mastery and use of the Snap Button Machine, industry experience, and material selection all directly affect the effect of Snap button application.
Step-by-Step Guide: How to Apply Snaps with Manual Tools
Setting Up Your Workspace
Before you begin applying snaps, it’s important to set up a clean, organized workspace. Having all your tools and materials within easy reach will help you focus on the task at hand and ensure a smoother process as you learn how to apply snaps.
- Organize Tools: Lay out your hammer, anvil, snap pliers, and snaps in an orderly fashion. Make sure your workspace is well-lit so you can clearly see the markings and placement of each snap.
- Prepare the Fabric: Ensure your fabric is clean, free of wrinkles, and properly aligned. Iron the fabric if necessary to create a smooth working surface.
Using a Hammer and Anvil
The hammer and anvil method is a tried-and-true approach to applying snaps manually. Here’s how to apply snaps using this technique:
- Position the Snap Cap: Place the snap cap on the anvil, prong side up. Ensure the cap is stable and centered on the anvil.
- Align the Fabric: Lay your fabric over the snap, making sure that the area where the snap will be attached is centered over the prongs. This step is crucial in learning how to attach snap fasteners correctly.
- Apply the Socket: Place the socket over the prongs and carefully align it with the snap cap. Hold the fabric steady and gently tap the socket with a hammer until it is securely attached to the cap. Be sure to apply even pressure to avoid misalignment.
Applying Snaps with Pliers
Snap pliers are an excellent tool for those who are new to learning how to use a snap tool. Here’s how to install a snap button using pliers:
- Prepare the Pliers: Insert the snap cap and socket into the corresponding slots on the pliers. Make sure the pieces are securely in place and aligned correctly.
- Position the Fabric: Place the fabric between the snap components, ensuring that the marked placement is centered.
- Secure the Snap: Squeeze the pliers firmly to attach the snap. The pliers will press the prongs into the socket, securing the snap in place. This method is ideal for projects that require precision and control.
Step-by-Step Guide: How to Apply Snaps with a Snap Fastening Machine
Setting Up the Snap Fastening Machine
Using a snap fastening machine is the most efficient way to apply snaps, especially for large projects. Here’s how to use a snap fastener tool like a machine:
- Install Snap Components: Load the snap cap, socket, and other necessary components into the machine’s designated slots. Ensure that the machine is set up for the specific type of snap you’re using.
- Adjust Settings: Depending on your fabric type and snap size, you may need to adjust the machine’s settings. This includes pressure, alignment, and depth settings to ensure the snaps are applied correctly.
- Safety Check: Before you begin, perform a safety check to make sure all machine components are functioning properly. Engage any safety features to prevent accidents during use.
Applying Snaps with the Machine
- Position the Fabric: Place the fabric under the machine’s press, ensuring that the marked placement is correctly aligned with the snap components.
- Activate the Machine: Depending on your machine model, press the foot pedal or activate the machine’s button to apply the snap. The machine will press the components together with precise force, securing the snap in place. This method is the fastest way to learn how to apply snaps to fabric consistently and efficiently.
How to Apply Snaps: Troubleshooting Common Issues
Snaps Not Aligning Properly
One of the most common issues you may encounter when applying snaps is misalignment. This can occur if the fabric shifts during the application process or if the snaps are not properly centered on the anvil or in the pliers. To correct this:
- Re-check Markings: Ensure that your fabric markings are accurate and clearly visible. Adjust the snap placement if necessary.
- Stabilize the Fabric: Use a clamp or additional hand pressure to keep the fabric from shifting while applying the snap.
Snaps Coming Apart Easily
If your snaps come apart too easily, it’s usually due to insufficient pressure during installation or using the wrong snap size for the fabric. Here’s how to address this issue:
- Apply More Pressure: When using manual tools, ensure you’re applying enough pressure to fully secure the prongs into the socket. For machine application, check the pressure settings.
- Choose the Right Snap Size: Make sure you’re using the appropriate snap size for your fabric. Smaller snaps may not hold as well on thicker fabrics, and vice versa.
How to Apply Snaps: Tips for a Professional Finish
Choosing the Right Snap Size and Type
To achieve a professional finish, selecting the correct snap size and type is crucial. Here are some tips:
- Match Snap Size to Fabric: Ensure that the snap size complements the thickness and weight of your fabric. A mismatch can lead to poor snap performance or damage to the fabric.
- Consider Snap Appearance: For visible snaps, choose a style and color that complements the design of your project. This is particularly important for clothing and accessories where aesthetics matter.
Ensuring Proper Snap Alignment
Proper alignment is key to a professional-looking project. Misaligned snaps can lead to functional issues and a less polished appearance. Here’s how to ensure proper alignment:
- Double-Check Placement: Before applying the snap, double-check your fabric markings and placement to ensure everything is aligned.
- Use Guides: Some snap pliers and machines come with alignment guides. Use these to help ensure your snaps are placed correctly.
Expert Insights on Snap Application
Learning how to use snap pliers and a snap fastening machine can take some practice. Here are some insights from experts in the field:
- Practice on Scrap Fabric: Before applying snaps to your final project, practice on a piece of scrap fabric. This will help you get a feel for the tools and techniques, reducing the risk of mistakes.
- Invest in Quality Tools: High-quality tools can make a significant difference in the ease and precision of your snap application. Consider investing in good snap pliers or a reliable snap fastening machine if you plan to use snaps frequently.
Practical Applications of Snaps
Snaps are not just for clothing; they have a wide range of practical applications in various DIY projects. Here are some ideas:
- Home Décor: Use snaps to create removable pillow covers, curtains, or tablecloths. They’re a great way to add functionality to your home décor projects.
- Accessories: Snaps are perfect for bags, belts, and other accessories where you need a secure but easily removable fastening.
- Organizing Solutions: Create custom organizing solutions with snaps, such as tool rolls, cable organizers, or travel pouches. The versatility of snaps makes them ideal for creating items that need to be both functional and flexible.
FAQs
How to Apply Snaps?
To apply snaps manually, position the snap pieces on the fabric and use a hammer to secure them. With a snap button machine, place the fabric and snaps in the machine, then press to attach them easily and quickly. Click More
What Materials Do I Need How to Apply Snaps?
Fabric, snap buttons (top, bottom, and socket), and either a hammer or a snap button machine.
Can I Apply How to Apply Snaps by Hand?
Yes, use a hammer to securely attach them by tapping the snap pieces into place.
How to Apply Snaps Different Types of Snaps?
Yes, common types include plastic, metal, and decorative snaps, each with specific applications and functionalities.
Conclusion
Mastering how to apply snaps, whether manually or with a machine, is an invaluable skill for any Clothing, how to apply snaps to fabric, shoemaking, how to install a snap button, stationery, how to attach snap fasteners, advertising posters, and other factories.
By following this comprehensive guide, you’ll be well-equipped to tackle any project that requires snaps, from simple repairs to complex designs. With the right tools, careful preparation, and a little practice, you can achieve professional results that are both functional and aesthetically pleasing. Ready to get started?


