

If you are learning how to use laser welding machine equipment, the most important lesson is that a good weld starts before you pull the trigger. You need a controlled work area, a clean and accurately fitted joint, the correct process recipe, and a test piece made from the same material as the production part.
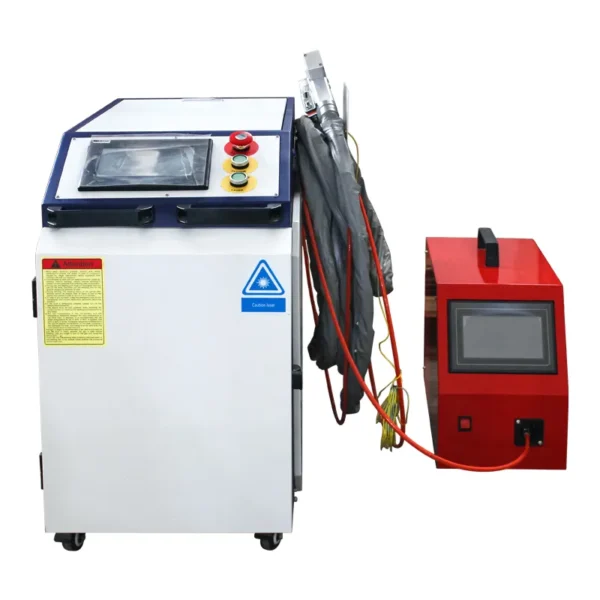
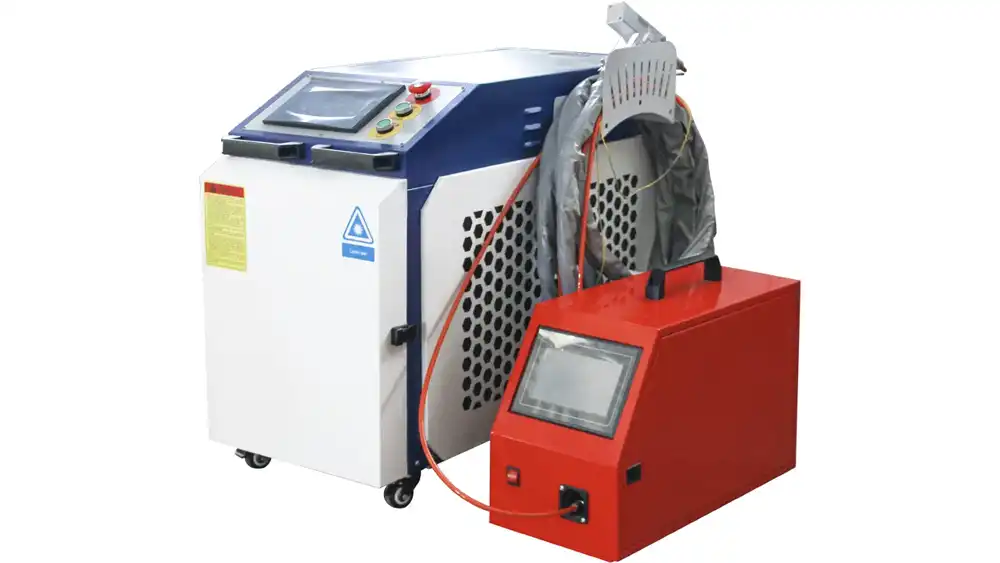
This guide is written for a portable handheld fiber laser welder such as the QC Machinery laser welding machine. The QC2301 operates on 220 V and combines a compact mobile cabinet, an intelligent control panel, a handheld gun, leakage protection, and welding, laser cleaning, and cutting functions.
The welding workflow below also applies to many similar continuous-wave handheld systems, but your machine manual and approved welding procedure always take priority.
Laser welding is easier to learn than many traditional processes, but it is not a casual power-tool task. A high-power industrial laser can injure an eye or skin through direct or reflected radiation and can start a fire. You should receive machine-specific training and complete a documented risk assessment before operating the system.
What You Need Before You Start?
Prepare the job before you energize the laser. You will need:
- Your machine manual and the parameter sheet supplied for your laser source, welding head, material, and thickness
- A laser-controlled work area with suitable barriers, warning signs, access control, and local fume extraction
- Laser safety eyewear rated for the machine’s wavelength and required optical density, plus a laser welding helmet; ordinary welding lenses are not a substitute
- Flame-resistant clothing, heat-resistant gloves, safety footwear, and any respiratory protection required by your risk assessment
- The correct shielding gas, regulator, clean hose, and leak-free fittings
- The correct nozzle, protective window, and—when the joint requires filler—the matching wire, feed roller, liner, and contact tip
- Degreasing and surface-cleaning supplies that are compatible with the base metal
- Clamps or fixtures, a stable conductive worktable, and scrap coupons that match the production material and thickness
Do not begin if an interlock, safety ground circuit, emergency stop, enclosure, barrier, or protective device is missing or faulty. Never bypass a safety circuit just to make the machine emit.
How to Use Laser Welding Machine Equipment Step by Step?
Step 1: Make the Work Area Laser-Safe
Treat a handheld industrial laser as a Class 4 hazard unless the machine’s labeling and your laser safety assessment state otherwise. Establish a laser-controlled area that keeps unprotected people outside the hazard zone. Cover windows and openings where hazardous radiation could leave the area, and use barriers designed for the wavelength and power of your system.
Remove solvents, paper, oily rags, gas cylinders not in use, and other combustible materials from the beam and reflection zone. Position an appropriate fire extinguisher where you can reach it quickly. Extract welding fumes at the source without disturbing the shielding gas around the weld pool.
Pay special attention to shiny stainless steel, aluminum, copper, curved parts, and angled surfaces. They can send a specular reflection in an unexpected direction. Arrange the part and a beam-safe backstop so neither the direct beam nor a reflection can reach a person, doorway, window, gas hose, cable, or combustible surface. Never place your hand or another body part behind the joint.
Step 2: Inspect the Machine and Utilities
Walk around the machine before switching it on. Check the power cable, protective earth, fiber delivery cable, welding-gun cable bundle, gas line, water lines, connectors, and cabinet for damage or loose fittings. The fiber cable must not be sharply bent, twisted, pinched, driven over, or pulled by the gun.
Check the emergency stop and confirm that the machine is connected to the power supply specified on its nameplate. For the QC2301, the published supply is 220 V; the actual circuit capacity, grounding, plug, and local electrical protection should follow your delivered configuration and local code. The built-in leakage-protection device is an additional safeguard, not a replacement for correct installation.
If your configuration is water-cooled, verify the coolant level, condition, temperature range, and flow according to the chiller manual. Confirm that the air inlets and outlets are clear. If the display shows a chiller, temperature, pressure, or communication alarm, stop and correct the cause before enabling the laser.
Inspect the nozzle and protective window. Replace a spattered, cracked, or burned protective window with the specified part. A contaminated window can reduce delivered power, destabilize the weld, overheat the head, and damage more expensive optics. Only trained personnel should handle internal optical components.
Step 3: Install the Welding Setup
The QC system can support welding, cleaning, and cutting, but each function requires the correct hardware and software mode. For welding, install the welding nozzle and any wire-feeding components specified for the joint. Do not leave a cleaning or cutting attachment on the head and then select welding mode.
If you are using filler wire, match the wire alloy to the base metal and approved procedure. Fit the correct feed roller and tip for the wire diameter, guide the wire through the liner without kinks, and set only enough roller pressure to feed smoothly. Too much pressure can deform the wire; too little causes slipping.
Connect the shielding-gas hose and check for leaks. Argon and nitrogen are commonly used with handheld fiber laser welding, but the correct gas depends on the material, appearance requirements, penetration target, and procedure qualification. Use the gas type, purity, inlet pressure, and flow specified by QC Machinery or your welding procedure. More gas is not always better: excessive flow can create turbulence and draw air into the weld pool.
Attach the work-contact or safety-ground clamp to clean bare metal on the workpiece or approved welding table, as required by your system. This circuit is part of the gun’s emission safety logic on many handheld welders. It must make reliable contact; it must never be defeated.
Step 4: Prepare and Fixture the Joint
Laser welding rewards accurate fit-up. Remove oil, paint, rust, oxide, moisture, and cutting residue from both sides of the joint. For aluminum, remove the oxide layer using a method approved for the alloy and weld the cleaned parts promptly. Never weld a sealed or unvented container, or a part that has held a flammable substance, unless it has been made safe under an approved hot-work procedure.
Align the joint and clamp it so the seam cannot open or move as it heats. For an autogenous weld, where you do not add filler wire, keep the gap within the limit established by your procedure. If the gap is too large, increasing wobble width or power will not reliably replace proper fit-up. Use filler wire or correct the part preparation instead.
Place a scrap coupon beside the job. It should use the same alloy, thickness, surface condition, joint type, and orientation as the production part. A test on a different piece of metal tells you very little about how the real joint will behave.
Step 5: Select a Starting Recipe
On the intelligent control panel, choose welding mode and load the closest approved recipe for the material and thickness. Confirm that the maximum laser power entered in the controller matches the actual laser source. Save a known-good recipe under a clear name instead of overwriting it during every job.
The main laser welding machine settings work together:
- Laser power controls how much energy reaches the joint. Too little can cause lack of fusion; too much can cause burn-through, spatter, undercut, or excessive penetration.
- Travel speed controls energy per unit length. Moving too fast often creates a narrow, shallow weld. Moving too slowly increases heat input, discoloration, distortion, and burn-through risk.
- Wobble pattern and width spread the beam across the joint. A wider pattern can cover a slightly wider seam, but it usually reduces energy density and penetration. Stay within the welding-head limits.
- Focus position changes the spot and power density at the workpiece. Use the head’s specified focal position and nozzle setup; do not copy a focus value from a different brand or optical configuration.
- Shielding-gas flow protects the molten pool and helps protect the optics. Low or unstable flow can cause oxidation and porosity, while excessive flow can disturb the pool.
- Wire-feed speed must match travel speed, joint volume, wire diameter, and laser energy. Too little wire leaves an underfilled joint; too much wire can pile up, push the gun away, or create incomplete fusion.
Do not copy a universal online parameter table and apply it blindly. Two machines with the same rated wattage can use different optics, wobble heads, focal lengths, control systems, and nozzle geometry. Start with the parameter sheet supplied for your QC Machinery configuration, then qualify the result on scrap.
Step 6: Start the Machine in the Approved Sequence
The exact sequence depends on the installed laser source, controller, chiller, and wire feeder. Follow the startup page in your delivered manual. A typical water-cooled handheld system is started by releasing the emergency stop, energizing the main power, starting the chiller, waiting until temperature and flow are normal, starting the control system and laser source, opening the shielding gas, and then enabling the wire feeder and laser output.
Watch the monitoring screen as each system comes online. All required safety signals should show a normal state before you enable emission. If an alarm appears, read it and fix the underlying condition. Repeatedly resetting an alarm without finding its cause can damage the machine or defeat the purpose of its protective logic.
Step 7: Align the Gun and Make a Dry Run
With laser emission disabled, use the visible aiming light or approved alignment function to trace the seam. Confirm that the gun can travel from start to finish without the cable snagging, the nozzle hitting a clamp, or your body entering the reflection zone.
Use a comfortable stance and support the gun with both hands when possible. Keep the nozzle orientation, stand-off distance, and work angle specified for your welding head. The nozzle often helps you maintain a repeatable distance, but it should not be used to force misaligned parts together.
Plan where you will start and stop. Run-on and run-off tabs can help when end craters are unacceptable. For a long seam, make sure you can complete the pass smoothly rather than changing grip midway while the laser is active.
Step 8: Make and Evaluate a Test Weld
Place the gun on the scrap joint, establish the required contact, start the shielding gas, and trigger the laser using the machine’s approved method. Move along the seam at a steady speed. Keep your eyes on the joint through the correct laser helmet—never view the process outside the protected viewing system.
Release the trigger before lifting or turning the gun away from the workpiece. Allow the post-flow gas to finish if your controller uses it. Then inspect the coupon. Look for a continuous bead, consistent width, complete fusion, acceptable penetration, limited discoloration, and no visible cracks, porosity, undercut, or burn-through.
Change one variable at a time. If penetration is low, first confirm cleanliness, focus, fit-up, gun angle, and actual travel speed before raising power. If the sheet burns through, reduce energy input by correcting the approved balance of power and speed. Record each test so you can return to the best combination.
For a structural, pressure-retaining, safety-critical, or regulated part, appearance is not enough. Use a qualified welding procedure and the required destructive or nondestructive testing. A smooth bead can still hide lack of fusion or porosity.
Step 9: Weld the Production Part
Once the test coupon passes, clean the production joint again and confirm the clamps, recipe, gas, wire, nozzle, and safety controls. Hold the gun steady and keep the aiming point centered on the seam. Maintain a consistent travel speed; sudden pauses put extra heat into the part and can create a depression or hole.
For a butt joint, center the beam on the meeting edges. For a lap joint, aim according to the qualified procedure so both sheets fuse without cutting through the top sheet. On a fillet or outside corner, keep the gun angle consistent so the energy is not biased toward one side.
Stop immediately if the sound, plume, bead appearance, wire feed, gas flow, or gun vibration changes. Release the trigger, keep the gun pointed at the safe work area, and investigate. Do not continue welding through an optical, cooling, gas, or safety alarm.
Step 10: Inspect, Finish, and Record the Weld
Let the part cool in a controlled way. Do not quench it unless the approved procedure requires quenching; sudden cooling can change material properties or increase cracking risk.
Perform the inspection required by the drawing or welding procedure. At minimum, check bead continuity, width, profile, start and stop points, penetration evidence where visible, distortion, undercut, cracks, pinholes, spatter, and discoloration. Use gauges, section tests, dye penetrant, ultrasonic testing, radiography, leak testing, or mechanical testing when the application requires them.
Laser welds often need little finishing. If you grind or polish the seam, avoid removing required weld reinforcement or thinning the base metal. Record the final recipe, material heat or grade, wire, gas, operator, and inspection result so the job can be repeated.
A Safe Shutdown Procedure
At the end of the job, use the shutdown sequence in your QC Machinery manual. In general, you should:
- Release the trigger and confirm that laser emission has stopped.
- Disable laser output at the control panel and return the gun to its safe holder.
- Stop the wire feeder and close the shielding-gas cylinder valve; safely release downstream pressure if your procedure requires it.
- Turn off the laser source and controller in the specified order.
- Allow any required chiller cool-down period, then switch off the chiller and main power.
- Clean the work area and inspect the nozzle, protective window, cable bundle, gas line, and connectors.
If you will inspect, clean, or service an area that can expose hazardous energy, follow your lockout/tagout procedure. The emergency stop is not an energy-isolation device.
Common Laser Welding Problems and What to Check
The Machine Will Not Emit
Check the emergency stop, laser-enable status, chiller-ready signal, safety-ground contact, gun interlock, access-control circuit, gas alarm, and active messages on the monitoring screen. Do not bypass an interlock. If the cause is not obvious, record the alarm code and contact the manufacturer.
The Weld Is Shallow or Inconsistent
Confirm that the joint is clean and tightly fitted, the focus and nozzle are correct, the protective window is clean, the gun angle is stable, and your actual travel speed matches the qualified test. Low power is only one possible cause.
The Sheet Burns Through
You may have too much energy per unit length, an oversized joint gap, a poorly positioned focus, or a pause in travel. Return to scrap and adjust the approved power-speed balance rather than trying to repair the production part by guesswork.
The Weld Has Porosity or Heavy Oxidation
Check base-metal cleanliness, moisture, gas type and purity, hose leaks, flow stability, nozzle position, and drafts around the joint. On aluminum, oxide and hydrogen contamination require particularly careful control.
Wire Feeding Is Unstable
Verify the roller groove, tension, tip, liner, wire diameter, spool drag, and alignment with the weld pool. Keep the wire path smooth. A feed problem should be corrected mechanically before you compensate with more laser power.
Spatter Returns Toward the Gun
Stop and inspect the nozzle and protective window. Recheck surface contamination, energy input, gun angle, stand-off, and shielding gas. Continued operation with a damaged or contaminated protective window can lead to expensive head repairs.
Daily and Routine Maintenance
Before each shift, inspect the cables, fiber delivery line, gun, nozzle, protective window, gas fittings, work-contact clamp, emergency stop, and safety circuits. Check the chiller level and alarms on water-cooled models. Keep cabinet filters and ventilation openings clear.
At the end of each shift, wipe external surfaces, remove metal dust from the approved areas, return the gun to its holder, and store consumables in a clean, dry place. Replace protective windows and nozzles when inspection shows damage; do not wait for weld quality to collapse.
Follow the maintenance intervals in the laser source, chiller, welding head, and wire feeder manuals. Internal optics and fiber connections should be serviced only by trained personnel in a clean environment. For additional practical guidance, see how a laser welding machine works and the comparison of laser welding vs. TIG welding.
Using the QC Machinery 3-in-1 Functions
The QC2301 welding gun can be configured for welding, laser cleaning or rust removal, and cutting. These are separate processes, not three techniques you should switch between while the gun remains unchanged. Each mode may require a different nozzle or attachment, process file, focus, scan pattern, safety assessment, and work setup.
Power down or place the system in the safe state required by the manual before changing hardware. Confirm the selected mode on the control panel, perform the mode-specific checks, and run a test on scrap. If you need one compact platform for multiple fabrication tasks, review the 3-in-1 laser welding machine and handheld laser welding machine pages before choosing a configuration.
FAQ
Is a Laser Welding Machine Easy for a Beginner to Use?
You can learn the gun movement and control panel relatively quickly, especially when you start with approved recipes. Safe implementation takes more than a short demonstration, however. You still need laser-safety training, a controlled area, machine-specific instruction, and practice on representative coupons.
Do You Always Need Filler Wire?
No. If the joint has accurate fit-up and the design allows an autogenous weld, you may not need filler. Use wire when the joint gap, bead profile, metallurgy, or procedure requires added material. The wire alloy and diameter must match the job.
Which Shielding Gas Should You Use?
Argon and nitrogen are common, but there is no single correct gas for every material. Use the gas and flow range supplied with your QC parameter sheet or qualified welding procedure. Material grade, penetration, appearance, cost, and downstream requirements all affect the choice.
Can You Weld Stainless Steel, Carbon Steel, and Aluminum With the Same Machine?
Yes, a suitable fiber laser welder can process all three, but you must change the recipe, preparation method, gas, and sometimes filler wire. Aluminum is more reflective and thermally conductive than steel, so it generally needs tighter control of cleanliness, fit-up, energy, and shielding.
How Do You Know the Settings Are Correct?
Make a representative test coupon and inspect it against the job requirements. For critical work, section or test the coupon using the specified method. Do not judge a recipe only by surface appearance.
How Often Should You Replace the Protective Window?
Replace it when inspection shows contamination, pitting, cracking, burning, or a decline in transmitted power that cannot be corrected by the approved cleaning method. The interval depends on process stability and use, not simply calendar time.
Final Checklist Before You Pull the Trigger
You are ready to weld only when the work area is controlled, everyone inside it has the correct laser PPE, the extraction and fire controls are operating, the machine has no active alarms, the joint is clean and clamped, the correct welding hardware and recipe are loaded, the gas and wire are stable, the reflection zone is protected, and a representative test weld has passed inspection.
That is the practical answer to how to use laser welding machine equipment: control the hazard, control the joint, control the parameters, and verify the result before you move into production.
If you need a parameter starting sheet or a configuration matched to your material, thickness, joint type, and daily output, contact QC Machinery with those details. You will get a more useful recommendation than you would from choosing wattage alone.