
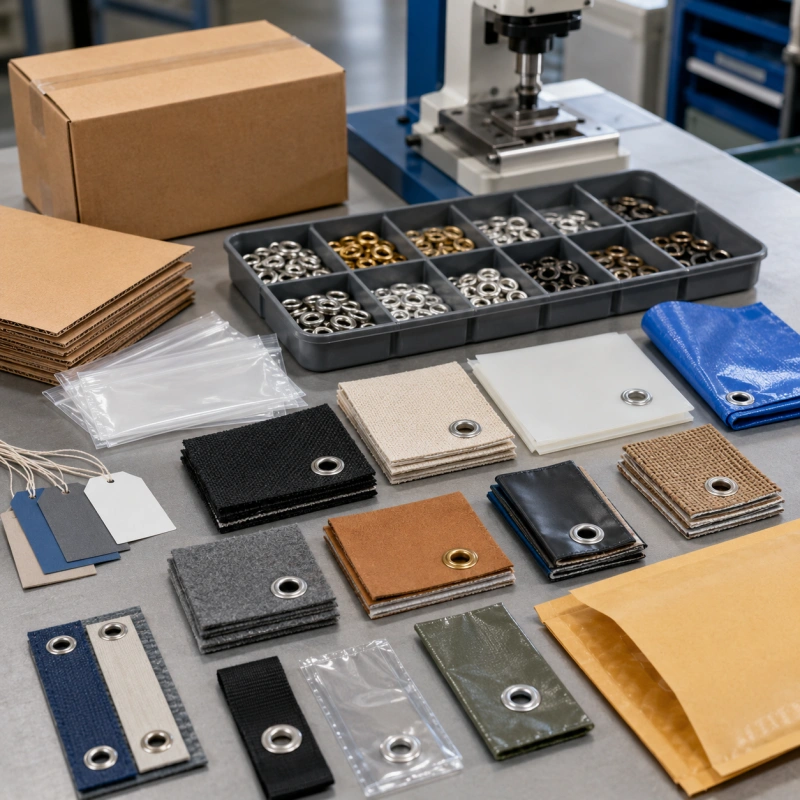
You can learn more from an eyelet machine trial than from ten specification sheets, but only if the samples represent your real production. Send one perfect swatch and a handful of loose eyelets, and the machine may produce one attractive result while leaving the difficult questions unanswered.
Will the feeder handle your normal fastener variation? Will the material sit flat? Will the eyelet hold after repeated cycles? Can the result stay within your positioning tolerance?
The purpose of a pre-sales trial is to remove those unknowns before you select a machine, die set, feeder, or process. That starts before the parcel leaves your factory. You need the right quantity, a clear identity for every item, and written acceptance criteria that both you and the manufacturer understand.
Quick answer: For each material and eyelet combination, send enough samples for setup, the agreed acceptance run, and a retest reserve. Label every variant separately. Include production-grade eyelets and washers from one traceable batch. Before the trial, define what will be checked, how many consecutive settings must pass, and what result will count as acceptable.
First, Decide What the Trial Must Prove
Do not begin with a box size. Begin with a question. A basic compatibility check needs far fewer samples than an automatic feeding trial. If you ask the manufacturer to recommend a machine without explaining the test objective, the team may run a short demonstration that proves only that one eyelet can be installed.
Your trial usually falls into one of four levels:
- Fit check: confirm that the eyelet, washer, material thickness, and die geometry can form a secure setting.
- Process check: establish punching method, pressure, stroke, material support, and a usable setup window.
- Repeatability check: confirm that a run of consecutive settings stays visually and mechanically consistent.
- Automatic feeding check: confirm that the bowl, track, escapement, and machine can handle real production fasteners without frequent jams or misfeeds.
A pre-sales trial is not the same as a factory acceptance test. The trial helps you choose the machine configuration and exposes application risks before you order. The FAT later verifies that the exact machine you purchased meets the agreed requirements before shipment. If you are already at that stage, use the eyelet machine acceptance test checklist as a separate release document.
How Many Samples Should You Send?
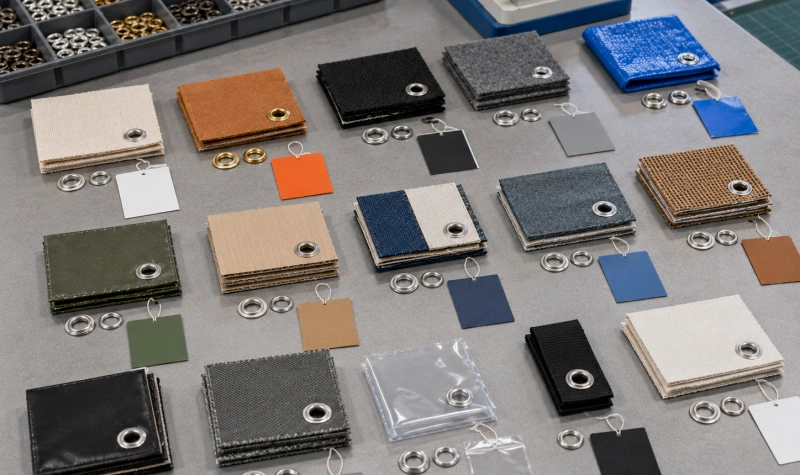
There is no honest universal number. The required quantity depends on the machine type, how many variants you want to test, whether fasteners are fed automatically, and how long the acceptance run will be. A useful quantity is not simply “as many as possible.” It is a calculated amount tied to the trial plan.
Use this formula for each sample combination:
Sample quantity = setup allowance + acceptance-run quantity + retest reserve
Setup samples are consumed while the engineer selects the die, adjusts pressure and stroke, aligns guides, and finds the working window. Acceptance samples are the pieces used for the recorded pass/fail run. The retest reserve prevents the trial from ending just when an adjustment needs to be confirmed. A reserve of about 20% is a sensible starting point, but difficult or highly variable applications may need more.
| Trial level | Usable setting positions per combination | Eyelets and washers per combination | What this quantity should prove |
| Basic fit check | 30-50 | At least 100 matched sets | Die match, barrel flare, appearance, and obvious material damage |
| Semi-automatic process trial | 100-200 | About 300-500 matched sets | Setup window, operator handling, placement, and short-run consistency |
| Automatic feed and repeatability trial | 300-1,000 | Often 1,000-3,000 matched sets | Feeder behavior, consecutive output, stops, scrap, and warm-run stability |
| Extended or multi-shift simulation | Defined by the agreed run time and target speed | Feeder fill plus all planned cycles and reserve | Sustained output, refill behavior, heat, wear, and fault recovery |
These are planning ranges, not fixed standards. Confirm the quantity with the machine manufacturer before shipping. Some feeder bowls need a minimum fill level to present eyelets correctly. Large curtain rings, finished bags, or molded parts may also limit how many samples can be sent. In that case, combine finished parts with production offcuts or continuous strip material that provides enough usable setting positions.
Count Usable Positions, Not Just Pieces
A carton containing 100 pieces does not guarantee 100 tests. A finished bag may have only one acceptable eyelet location. A wide fabric strip may provide dozens. Tell the manufacturer how many setting positions each sample offers and whether unused areas can be cut into test coupons.
For roll goods, calculate the length from the intended pitch and add material for threading, alignment, and recovery. For layered products, send the complete layer stack in the same order used in production. Do not send only the outer fabric if the real product includes foam, lining, reinforcement tape, coating, or a folded hem.
Send Every Production Variant That Can Change the Result
Your nominal sample is useful, but the difficult variants often determine the correct machine. Send the normal version plus any reasonable worst case. The goal is not to test every SKU in your catalog. It is to cover the range of conditions the machine must handle without pretending that one material represents them all.
- Minimum, nominal, and maximum total thickness
- Softest and stiffest material constructions
- Single layer, folded edge, seam, reinforcement, or multi-layer stack
- Coated, laminated, elastic, brittle, or easily marked surfaces
- Smallest and largest eyelet or grommet sizes you expect the machine to run
- Different eyelet finishes or colors when plating or coating changes dimensions or stiffness
- The least stable shape, narrowest edge distance, or most difficult orientation
Keep each combination separate. If material A is tested with eyelet 1 and material B with eyelet 2, the result does not prove that the other pairings work. Build a small test matrix and give each combination its own code, such as M01-E01-W01.
Send Production-Grade Eyelets and Washers
The machine should be tested with the fasteners you actually plan to buy. Do not assume that two parts with the same trade size are interchangeable. Naming conventions vary, and small changes in barrel diameter, barrel length, flange shape, wall thickness, washer hole, plating, or hardness can change feeding and setting behavior.
For every fastener variant, include:
- Eyelet part number, size, material, finish, and supplier
- Washer part number and the exact eyelet it matches
- Production batch or lot number, if available
- A drawing or dimension sheet, especially for custom fasteners
- A sealed reference bag that must not be mixed into the trial
Use one normal production lot for the main test. If lot-to-lot variation has caused problems before, send a second known lot as a clearly labeled challenge sample. Never pour leftovers from several suppliers or batches into one bag. Mixed fasteners make a feeder problem almost impossible to diagnose.
If you are unsure which dimensions matter, review how to match eyelet size, washer size, and die set before you prepare the shipment.
How to Label Eyelet Machine Trial Samples?
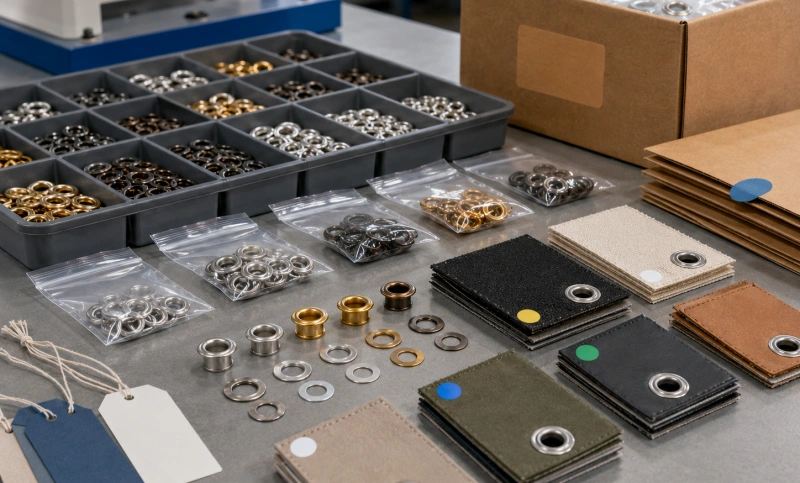
Your labels should let an engineer identify every item without opening an email thread or guessing from appearance. Place a label on the outer carton, on every inner bag, and on the sample itself when the surface allows it. If adhesive could damage the material, attach a tag or place the label on a separate sleeve.
Each label should show:
- Project name and your company name
- Unique sample ID
- Material description, thickness range, and number of layers
- Eyelet ID and washer ID
- Front/back, grain, coating, print side, or feed direction
- Production condition: dry, conditioned, filled, folded, sewn, welded, or laminated
- Quantity or number of usable setting positions
- Trial purpose and any restriction, such as “appearance surface – do not punch”
- Contact person and date packed
Example label: Project: Outdoor Cover 24-07 | Sample: M03-E02-W02 | PVC-coated fabric, 0.62-0.68 mm, folded to four layers | Eyelet: E02, brass-plated, lot 2407B | Washer: W02 | Coated face up | 180 usable positions | Test: automatic feed, placement +/-1 mm, pull target per buyer drawing.
Include a Sample Manifest in the Box and by Email
The manifest is the control sheet for the trial. Send the same version by email before the parcel arrives, then place a printed copy inside the carton. List every package, sample ID, quantity, intended pairing, and requested test. Ask the manufacturer to confirm receipt and report any shortage, damage, or mismatch before testing begins.
Photograph the open carton and its contents before dispatch. This gives both sides a reference if a bag opens in transit or a label becomes detached. For international shipments, describe samples accurately on the shipping documents and avoid sending hazardous, wet, contaminated, or restricted materials without prior agreement.
Agree Test Acceptance Before the Trial Starts
“Looks good” is not an acceptance criterion. It is an opinion. Before the manufacturer runs your samples, write down what will be measured, the sample size, the test method, the allowable defects, and who makes the release decision.
Your pre-sales trial acceptance sheet should cover the following points.
1. Visual setting quality
Define unacceptable defects from both sides of the material: cracked barrel, incomplete or uneven flare, damaged flange, loose washer, spinning eyelet, wrinkles, tears, coating marks, burrs, or crooked setting. Photographs of an approved and rejected result are better than adjectives such as “clean” or “good.”
2. Mechanical retention
Specify a pull, torque, spin, or functional test that matches your product. The target should come from your product requirement, customer specification, or internal validation plan. The machine supplier should not invent a strength value after the trial. Record the test equipment, direction of force, conditioning, and pass threshold.
3. Position and appearance tolerance
Define the eyelet center location, edge distance, spacing, orientation, and allowable variation. A tolerance such as +/-1 mm may be suitable for one product and completely wrong for another, so treat any number as application-specific. If cosmetic appearance matters, identify the viewing side and the areas where tool marks are not allowed.
4. Feeding and run stability
For an automatic machine, agree the number of consecutive cycles, allowed misfeeds, allowed jams, and what counts as an unplanned stop. State whether replenishing the feeder, removing a planned sample, or changing a material roll pauses the clock. A five-cycle video cannot prove production stability.
5. Output and scrap
Measure net good output, not only the machine’s fastest dry-cycle speed. Agree the warm-up period, test duration, operator tasks, planned stops, and method for counting good pieces. If scrap rate matters, define the denominator and defect categories before the run.
6. Changeover and operating limits
If one machine must run several materials or fasteners, decide whether the trial includes changeover. Record which parts must be changed, how long the change takes, and whether a different bowl, track, die, guide, or program is required. A result that needs a dedicated tool set may still be acceptable, but it should be visible in the quotation.
A practical rule: Do not approve the process from the best single sample. Approve it from a defined consecutive run after setup is complete. Keep the setup pieces separate from the acceptance pieces so the result cannot be cherry-picked.
What Evidence Should You Receive After the Trial?
Ask for a short, traceable trial record. It does not need to be a heavy engineering report, but it should allow you to understand what was tested and reproduce the result later.
- Sample IDs and actual quantities received and consumed
- Machine model, feeder, die set, and relevant settings
- Photos of the front and back of accepted and rejected settings
- An uncut video showing startup and part of the consecutive run
- Measured results for position, retention, output, stops, and scrap
- Any deviation from the agreed sample, method, or acceptance limit
- The manufacturer’s recommendation, including dedicated tooling or sample limitations
Request several returned samples from the accepted run and mark one as the golden sample. That piece becomes a physical reference for the quotation, tooling approval, future FAT, and operator setup. Store it with the sample ID and test report rather than dropping it into an unlabeled drawer.
If a sample shows spinning, tearing, an incomplete flare, or damage, use the common eyelet setting defects guide to separate material, fastener, die, pressure, and alignment causes. For thickness-related setup, see material thickness vs. press pressure.
Common Sample-Shipment Mistakes
Most weak trials fail before the machine is switched on. Avoid these mistakes:
- Sending only the easiest, flattest, nominal material
- Sending prototype fasteners when production will use a different supplier or finish
- Mixing eyelet or washer lots in one unmarked bag
- Counting pieces without counting usable setting positions
- Omitting linings, folds, seams, coatings, or reinforcement layers
- Requesting a speed test without supplying enough material for a stable run
- Changing the acceptance target after seeing the result
- Allowing the manufacturer to consume every sample without retaining an approved reference
If the quantity is limited, say so before the trial. The engineer can prioritize fit, appearance, or feeder risk and explain which claims cannot be proven with the available samples. A transparent limited test is more useful than a confident conclusion based on too little material.
A Simple Pre-Sales Sample Workflow
- Define the application: product, material stack, eyelet/washer, position, output, and quality requirement.
- Create the test matrix: nominal and worst-case combinations, each with a unique ID.
- Agree the trial level: fit, process, repeatability, automatic feeding, or extended run.
- Confirm quantities with the manufacturer, including feeder fill and retest reserve.
- Pack and label every variant separately; email the matching manifest.
- Approve the acceptance sheet before testing starts.
- Review the evidence, deviations, recommended machine, and tooling list.
- Retain approved samples and carry their criteria into the quotation and later FAT.
Conclusion
The samples you send shape the machine recommendation you receive. When the parcel contains a single unlabeled swatch and a small bag of mixed eyelets, the trial can only produce a rough demonstration. When it contains representative variants, traceable fasteners, enough material for a defined run, and written acceptance criteria, the trial becomes a useful engineering decision.
Before you ship, ask the manufacturer to confirm three things in writing: the quantity is sufficient, the sample IDs are understood, and the proposed test can prove the result you need. That short confirmation prevents wasted freight, repeated trials, and a machine choice based on the wrong sample.
If you want QC Machinery to review your application, send your sample matrix, photos, material thickness range, eyelet and washer details, target output, and draft acceptance criteria first. We can confirm what to ship and which trial level fits your project.
FAQ
How many material samples should you send for an eyelet machine trial?
Send enough usable setting positions for setup, the agreed acceptance run, and a retest reserve. A basic fit check may use 30-50 positions, while an automatic feeding and repeatability trial may require 300-1,000 or more. Confirm the number with the manufacturer because feeder fill and test duration change the requirement.
Should you send your own eyelets and washers?
Yes, if you plan to use them in production. Send matched eyelets and washers from a traceable production lot, along with part numbers or drawings. Supplier demo fasteners can prove the machine works, but they do not prove compatibility with your fasteners.
Can you send only photos and dimensions instead of physical samples?
Photos and drawings are useful for an initial review, but they cannot fully show material compression, stretch, brittleness, coating damage, feed behavior, or retention after setting. Physical samples are normally needed before the manufacturer confirms tooling and process performance.
What should count as a passed eyelet machine trial?
A pass should mean that a defined number of consecutive settings meet the agreed visual, retention, position, feeding, output, and scrap limits. The test method and limits should be approved before the trial, not chosen after the results are known.
What happens if the samples fail?
Record the failure and identify whether it comes from the material, fastener, washer, die, machine setting, feeding method, or acceptance requirement. Then agree one controlled change and retest with the reserve samples. Do not change several variables at once, because you will not know which change solved the problem.