
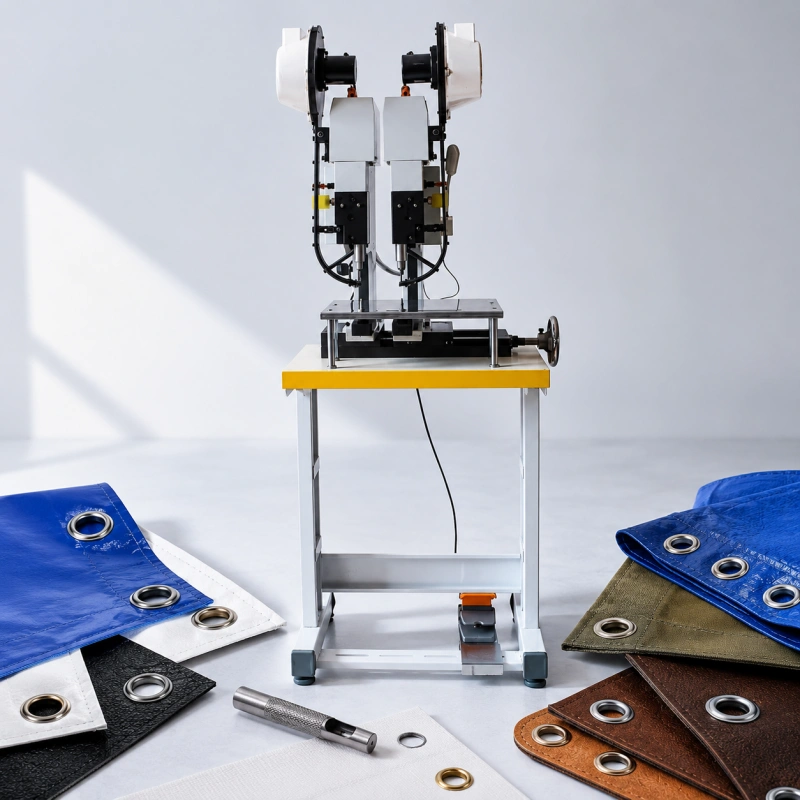
Quick answer: when must you pre-punch?
You must pre-punch before setting an eyelet when any one of these conditions is true:
- The eyelet or grommet is designed for a prepared hole. Standard eyelets, many sheet-metal grommets, rolled-rim grommets, and most plastic eyelets do not become self-piercing simply because the press has enough force.
- Your machine is a setting-only press. If neither the fastener nor the tooling cuts the material, the hole has to exist before the setting stroke.
- The complete material stack is thicker, denser, harder, or more layered than the validated piercing range. Test the folded hem, lining, reinforcement tape, seam, coating, or adhesive layer—not a convenient single offcut.
- Piercing creates unacceptable damage. Cracking, delamination, fiber pulling, whitening, distortion, or an oversized torn opening means you need a controlled hole-making step or a different fastener system.
- Hole size and position are functional requirements. If a cable, screw, lace, locating pin, or customer drawing controls the finished opening, make the hole with a qualified punch, drill, or cutting process rather than relying on uncontrolled rupture.
You may be able to skip a separate pre-punching operation when you use a matched self-piercing eyelet and die set within its proven material range. You can also avoid a separate station when an automatic machine punches the hole and then sets the eyelet in the same cycle. Those are different processes, even though both can be described as “one operation.”
If you need the terminology first, read our self-piercing eyelets guide. This article stays focused on the decision: when a prepared hole is mandatory and when it is not.
Do not decide from the material name alone
“Suitable for fabric” is not a useful production specification. A single layer of vinyl banner, a four-layer welded hem, a coated canvas seam, and a reinforced webbing tab can all arrive under the label “fabric.” They do not pierce in the same way.
Your decision depends on the full system:
- Fastener: standard, self-piercing, sheet-metal, rolled-rim, plastic, one-piece, or eyelet-and-washer set
- Material stack: total compressed thickness, number of layers, density, hardness, weave, stretch, coating, reinforcement, and local seams
- Tooling: setting die only, self-piercing die, separate punch, or integrated punch-and-set tooling
- Machine: available force, stroke control, alignment, material support, and slug removal
- Quality requirement: appearance, retention, finished-hole size, edge distance, and allowed material damage
This is why a fastener that pierces one banner film cleanly may fail on the same film after the edge is folded and welded. It is also why a machine demonstration on one nominal sample cannot approve an entire product range.
Material and eyelet decision chart
Use the chart as a starting decision. “Conditional” means you should not release production until the exact fastener, die, and worst-case material stack pass a controlled trial.
| Material or construction | Pre-punch decision | Why and what you should verify |
| Thin, single-layer PVC or vinyl banner | Conditional—not automatically required | A sharp, compatible self-piercing system can cut and set in one stroke Check: Clean cut, no coating split, secure washer, pull performance, and slug clearance |
| Folded, welded, taped, or reinforced banner edge | Usually mandatory unless an integrated punch-and-set process is validated | The local stack is thicker and less uniform than the banner field Check: Maximum hem thickness, seam transitions, layer shift, and continuous-run scrap |
| Light woven fabric, nonwoven, or garment panel | Conditional with a matched self-piercing system; otherwise mandatory | Thin material may pierce, but loose fibers can pull instead of cutting cleanly Check: Fraying, distortion, washer coverage, reinforcement, and wash or use testing |
| Knit, elastic, loose weave, or delicate fabric | Pre-punching is normally the safer controlled process | Stretch and yarn movement can turn a pierced opening into an irregular tear Check: Stabilizer, cut method, hole growth, appearance, and retention after cycling |
| Denim, webbing, multilayer garment area, or corset stack | Mandatory in most production setups | Dense yarns and several layers exceed many self-piercing limits Check: Complete layer stack, hidden bones or hardware, punch sharpness, and washer grip |
| Thin leather or synthetic leather | Standard eyelets: mandatory. Self-piercing: conditional | Thin leather may pierce, but surface finish, density, and backing change the result Check: Surface splitting, hole edge, barrel passage, grain direction, and pull-out |
| Thick leather, belt, shoe upper stack, or reinforced bag panel | Mandatory | Dense or layered material can deflect the eyelet, split the surface, or overload the cutting edge Check: Hole diameter, barrel length, skiving or reinforcement, die match, and flare |
| Canvas, marine cover, tent, or heavy tarpaulin | Mandatory for conventional systems; strong default for thick stacks | Heavy-duty washer systems usually require a prepared opening, and the stack may be reinforced Check: Punch quality, edge distance, washer type, barrel length, and pull test |
| Paper, tag stock, labels, or thin cardboard | Not required within the machine and eyelet limit | The eyelet can form the hole when the stack remains inside the rated capacity Check: Sheet count, total thickness, coating, hole cleanliness, and paper crush |
| Thick paper stack, board, laminated card, or bookbinding stack | Mandatory above the rated self-punching capacity | A prepared hole raises usable stack capacity and reduces crushing Check: Worst-case stack, hole alignment through all sheets, barrel length, and clamp quality |
| Corrugated board, foam board, honeycomb, or crush-sensitive packaging | Usually mandatory | Uncontrolled piercing can crush the core or tear the facing before the eyelet supports it Check: Core compression, facing cracks, backing support, washer footprint, and edge distance |
| Plastic eyelet or snap-together plastic grommet | Usually mandatory | Many plastic systems are made to enter a prepared hole, not cut the substrate Check: Specified cut diameter, material thickness, component lock, and cosmetic marks |
| Rigid plastic sheet, acrylic, hard composite, wood, or sheet metal | Mandatory | A setting fastener is not a substitute for drilling or punching a controlled opening in a rigid sheet Check: Hole tolerance, burr removal, cracking, panel support, and fastener clearance |
| Any material with a conventional eyelet in a setting-only press | Mandatory | Nothing in the station creates the hole Check: Correct punch process, position control, transfer method, and error-proofing |
| Any validated material in an automatic punch-and-set machine | No separate pre-punch station required | The machine creates a controlled hole before setting the eyelet Check: Punch-to-set alignment, slug evacuation, sensor logic, tool wear, and good output |
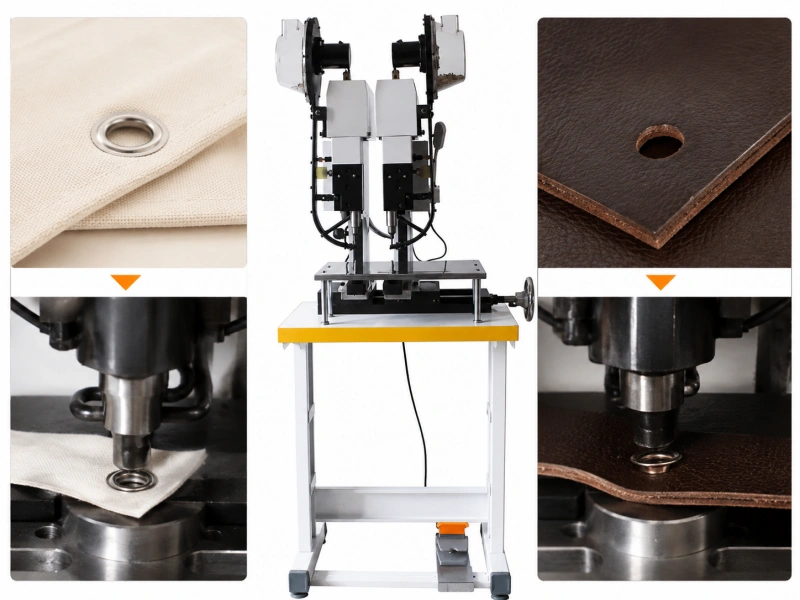
The fastener design makes the first decision
Start with the eyelet drawing or supplier specification. Do not start with press tonnage.
Conventional eyelets and sheet-metal grommets
If the fastener is designed to pass through an existing hole, pre-punching is mandatory unless your machine includes a separate punching function. More force does not convert a conventional eyelet into a self-piercing eyelet. It can instead buckle the barrel, drag material into the die, mark the flange, or create an irregular tear that is hidden under the washer.
Rolled-rim grommets with spur washers are a good example. You choose them for demanding retention, but that construction normally starts with a controlled hole. The same applies to many plain grommet and washer combinations used on canvas, leather, tarpaulin, and industrial textile products.
Self-piercing eyelets and grommets
A self-piercing label means pre-punching may be eliminated; it does not guarantee that every material will pierce. The cutting action depends on the barrel edge, washer profile, die geometry, alignment, material support, and the actual stack under the flange.
Use self-piercing only inside a tested operating window. When the stack becomes too thick, the edge may start pushing the layers apart instead of cutting through them. When the material is stretchy, the material may draw into the opening. When it is brittle or laminated, the cut can start a crack or separate layers.
Your fastener and tooling must also be a matched system. Similar trade sizes from different suppliers can have different barrel outside diameters, wall thicknesses, washer holes, hardness, and flare behavior. Read our guide to matching eyelet size, washer size, and die set before you approve a substitution.
Plastic eyelets
Treat plastic eyelets as pre-hole components unless the component manufacturer explicitly specifies a self-cutting process. The HANG 101-70/101-80 data, for example, identifies its listed plastic eyelets for pre-punched material. That is a useful reminder that a machine capable of self-punching with some metal eyelets may still require prepared holes for another eyelet family.
Material conditions that make pre-punching mandatory
1. The worst-case stack exceeds the piercing limit
Thickness is local. Measure where the eyelet is installed, under normal production compression. A 0.6 mm coated fabric can become a four-layer stack at a folded hem, then become thicker again where reinforcement tape or a seam overlaps the fold.
Published machine limits show how much the process can change. HANG states that its 101-70/101-80 can handle material up to 3 mm with self-punching eyelets and up to 8 mm when the material is pre-punched. Those numbers belong to that machine, its tooling, and its specified eyelets; they are not universal limits.
The lesson is broader: pre-punching can expand the usable thickness range because the setting stroke no longer has to create the hole.
2. The material does not cut cleanly
Stop treating self-piercing as acceptable if you see pulled yarns, crescents of uncut film, ragged leather fibers, white stress marks, coating cracks, delamination, or a slug that remains trapped in the assembly. These are process failures, not cosmetic details.
A sharp separate punch gives you more control over the cutting action and lets the setting die concentrate on forming the barrel. Depending on the material, the qualified method may be a hollow punch, steel-rule cut, drill, heated punch, ultrasonic cut, or another process. The correct method should create the required opening without starting a defect that grows in service.
3. The hole is part of the product specification
Pre-punch when the hole location or diameter must be controlled independently of the eyelet. This matters when the finished opening locates another component, carries a specified cable or lace, must align through a stack, or has a tight edge-distance tolerance.
Do not choose a punch only from the eyelet’s finished inside diameter. The installation hole relates to the barrel outside diameter, fastener construction, material recovery, and supplier tooling system. A hole that is too small can force and split the material. A hole that is too large reduces the material captured under the flange and can make pull-out easier.
Use the fastener maker’s specified cutter or approve the hole through trials.
4. Hidden components can damage the punch or the product
Layered sewn products may contain boning, wire, zippers, stiffeners, molded inserts, or previous hardware. A punch striking one of these can chip the cutting edge, damage the machine, or create a hazardous fragment. Define an exclusion zone, confirm the internal construction, and use positive positioning—not operator feel—as the main control.
5. Your quality target leaves no room for piercing damage
On a low-cost banner, a small concealed witness mark may be acceptable. On a premium leather bag, coated medical item, printed display, or visible garment panel, the same mark may be a reject. If a controlled pre-hole consistently gives you a cleaner face, lower scrap, and better retention, it is the correct process even if self-piercing can occasionally produce an acceptable sample.
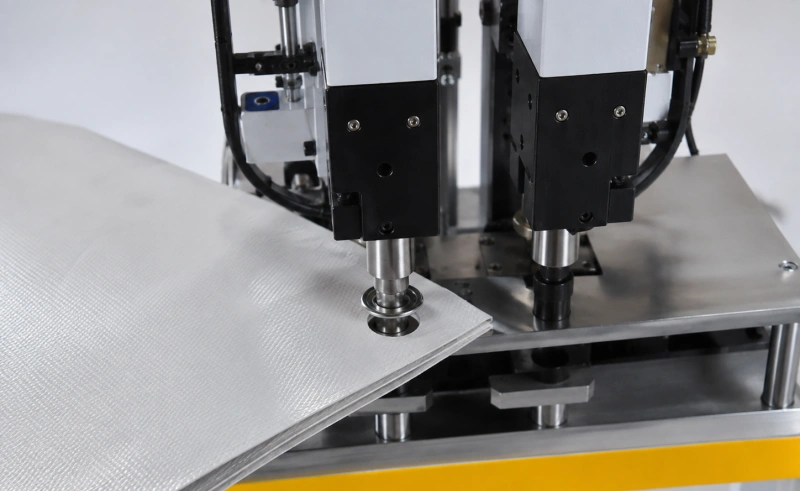
When pre-punching is not a separate operation
You have two legitimate routes to a one-cycle process.
Route 1: a self-piercing fastener. The eyelet and matched washer/tooling cut the material and form the setting in one stroke. This is most attractive on a stable, validated range of thinner materials.
Route 2: an integrated punch-and-set machine. The machine creates a controlled hole and sets a conventional eyelet within one automatic sequence. The material is still punched; you have simply removed the separate workstation and manual transfer.
This distinction matters when you compare quotations. Ask each supplier to state which component makes the hole, whether a slug is produced, how the slug is removed, and whether the setting can continue if the punch does not complete. A phrase such as “punching eyelet machine” is not detailed enough to define the process.
For the available machine categories, see our hole punch for eyelets guide and automatic eyelet punching machine.
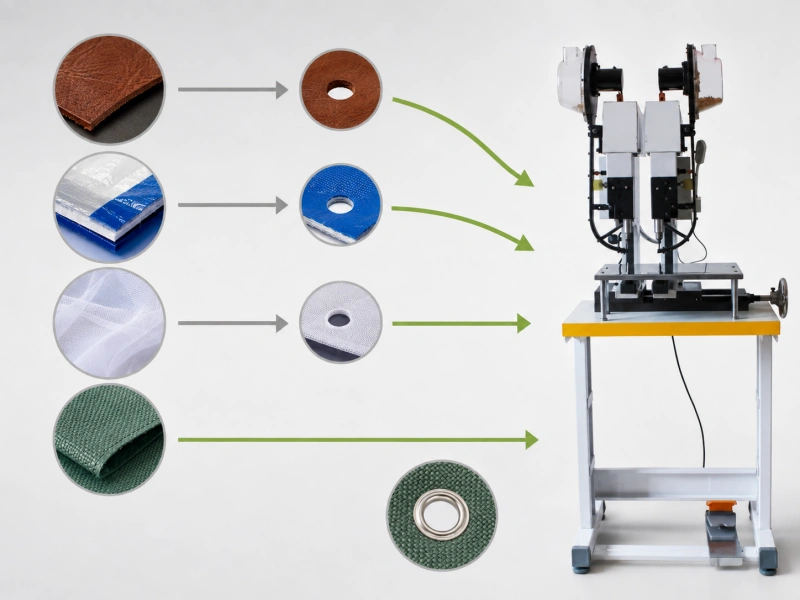
Use this five-step decision before you request a machine quotation
Step 1: identify the exact fastener system
Record the eyelet part number, barrel outside diameter, barrel length, flange diameter, material, finish, wall thickness, washer part number, and supplier. Mark it as conventional, self-piercing, or requiring a separate machine punch. Do not accept a generic trade size as the full definition.
Step 2: build the real material stack
Prepare minimum, nominal, and maximum stacks. Include folds, seams, reinforcement, lining, adhesive, coatings, and any conditioning that changes flexibility. If you run several products, group only the combinations that are genuinely equivalent.
Step 3: define the hole requirement
State the approved hole-making method, nominal diameter, position tolerance, edge distance, and acceptable front/back appearance. If the supplier must recommend the hole size, require the recommendation to be tied to your sample ID and fastener drawing.
Step 4: run controlled trials
Compare the proposed process on the worst-case samples. Inspect the front, back, cut edge, washer engagement, and barrel flare. Test retention in the direction the product sees in use. For an automatic machine, run enough consecutive parts to expose slug buildup, heat, tool wear, feeding variation, and material handling problems.
Use the eyelet machine trial sample guide to prepare representative material and hardware. If a result fails, the common eyelet setting defects guide can help you separate hole, material, fastener, die, pressure, and alignment causes.
Step 5: freeze the approved combination
Keep a golden sample and record the material code, stack thickness, eyelet lot, washer, punch, die set, machine settings, and inspection result. If any of those inputs changes, confirm the process again. A plating change or a new washer supplier can be enough to move a previously stable setting out of its working window.
What to send your eyelet machine manufacturer?
You will get a better recommendation if you send application evidence instead of asking, “Can this machine work on leather?” Include:
- Finished products or production offcuts showing the complete stack
- Minimum, nominal, and maximum thickness at the eyelet position
- Clearly separated eyelets and washers from the intended production lot
- Fastener drawings or measured dimensions
- Required hole size, finished opening, pitch, edge distance, and position tolerance
- Front and back appearance limits
- Pull, torque, spin, leakage, or functional acceptance test
- Daily output and the number of eyelets per finished item
- A note stating whether you prefer self-piercing, separate pre-punching, or an integrated punch-and-set cycle
Ask the manufacturer to return the approved samples and document whether pre-punching is mandatory for each tested combination. The answer should name the punch, die, fastener, material stack, and validated limits. “Works with fabric” is not an approval record.
Common purchasing mistakes
Buying press force instead of a complete process
More force can help a correctly designed punch cut a difficult stack. It cannot correct a standard eyelet being used as a cutter, a dull punch, a mismatched washer, or poor alignment.
Testing the flat material but producing the folded edge
The eyelet is usually installed where the product has already been folded, welded, sewn, or reinforced. Test that location. A trial in the easy center of the sheet answers the wrong question.
Assuming “one operation” means “no punching”
A self-piercing press and an automatic punch-and-set machine can both deliver one-cycle output, but their consumables, tooling, thickness range, slug handling, and maintenance are different. Put the actual sequence in the quotation.
Using an oversized hole to make assembly easier
An eyelet that drops through easily may look convenient at the bench, but the flange and washer may capture too little material. Approve the smallest clean, repeatable hole that the fastener supplier and your retention test support.
Approving one attractive sample
One good setting proves possibility, not stability. Approve a consecutive run across normal and worst-case material, then keep the settings and samples as the production reference.
Final decision rule
Pre-punching is mandatory when the fastener needs a prepared hole, the station has no qualified cutting function, the complete material stack sits outside the proven self-piercing range, or the product requires a controlled opening that piercing cannot deliver reliably.
You can remove the separate pre-punch step only when a matched self-piercing system passes your material and retention tests, or when the machine performs a controlled punch-and-set sequence in one cycle.
If the decision is still uncertain, do not settle it from a catalog description. Send the real stack, production eyelets and washers, and written acceptance criteria to the machine manufacturer. A short, controlled trial costs far less than discovering after delivery that your “one-step” process still needs another machine.
FAQ
Do all eyelets require a pre-punched hole?
No. A matched self-piercing eyelet system can cut and set in one stroke on approved materials. A machine with integrated punch-and-set tooling can also create the hole during its cycle. Conventional eyelets used in a setting-only press require a prepared hole.
Can you use self-piercing eyelets on thick fabric?
Only if the exact eyelet, washer, die, machine, and full fabric stack have been validated. Multiple layers and thick fabrics are common limits for self-piercing systems. When the stack does not cut cleanly, pre-punch or use an integrated punch-and-set process.
Is pre-punching mandatory for leather eyelets?
It is mandatory for conventional eyelets. Some matched self-piercing systems may work on thin leather or synthetic leather, but you should test for surface splitting, deformation, and pull-out. Thick leather and reinforced leather stacks normally need a controlled pre-punched hole.
Is pre-punching mandatory for banner grommets?
Not always. Thin, single-layer banner material is a common self-piercing application. Folded hems, welded seams, tapes, and multilayer reinforcement can exceed the system’s cutting range. Conventional sheet-metal or rolled-rim grommets also require a hole, although an automatic machine can punch and set them in one cycle.
What size hole should you punch for an eyelet?
Use the hole size specified for the exact eyelet and tooling system, then confirm it on your material. Do not use the finished inside diameter as a universal punch size. The correct opening depends on the barrel outside diameter, eyelet construction, material recovery, and the amount of material the flange and washer must capture.
Does an automatic eyelet machine eliminate pre-punching?
It can eliminate a separate pre-punch station, but only if the machine has an integrated punching function or uses a validated self-piercing fastener. An automatic feeder attached to a setting-only press does not create a hole by itself.