Hydraulic Punching Machine: The Key to Streamlining Your Production Process
Discover how Hydraulic Punching Machine optimizes production efficiency by effortlessly punching holes in various materials, from fabrics to plastics, enhancing your manufacturing workflow significantly.
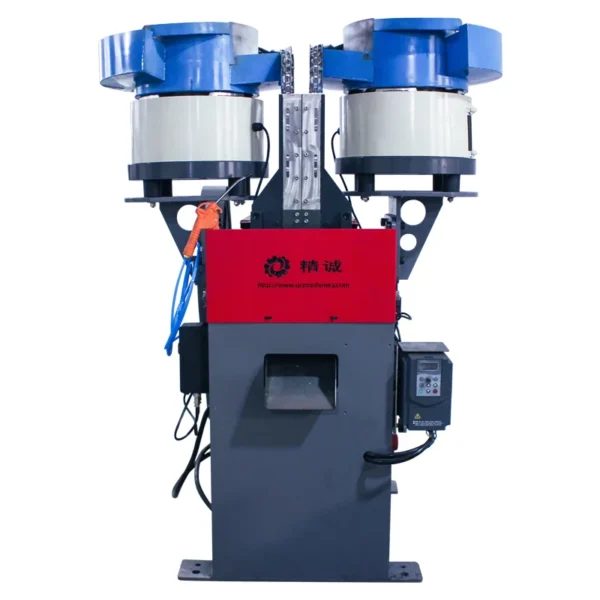
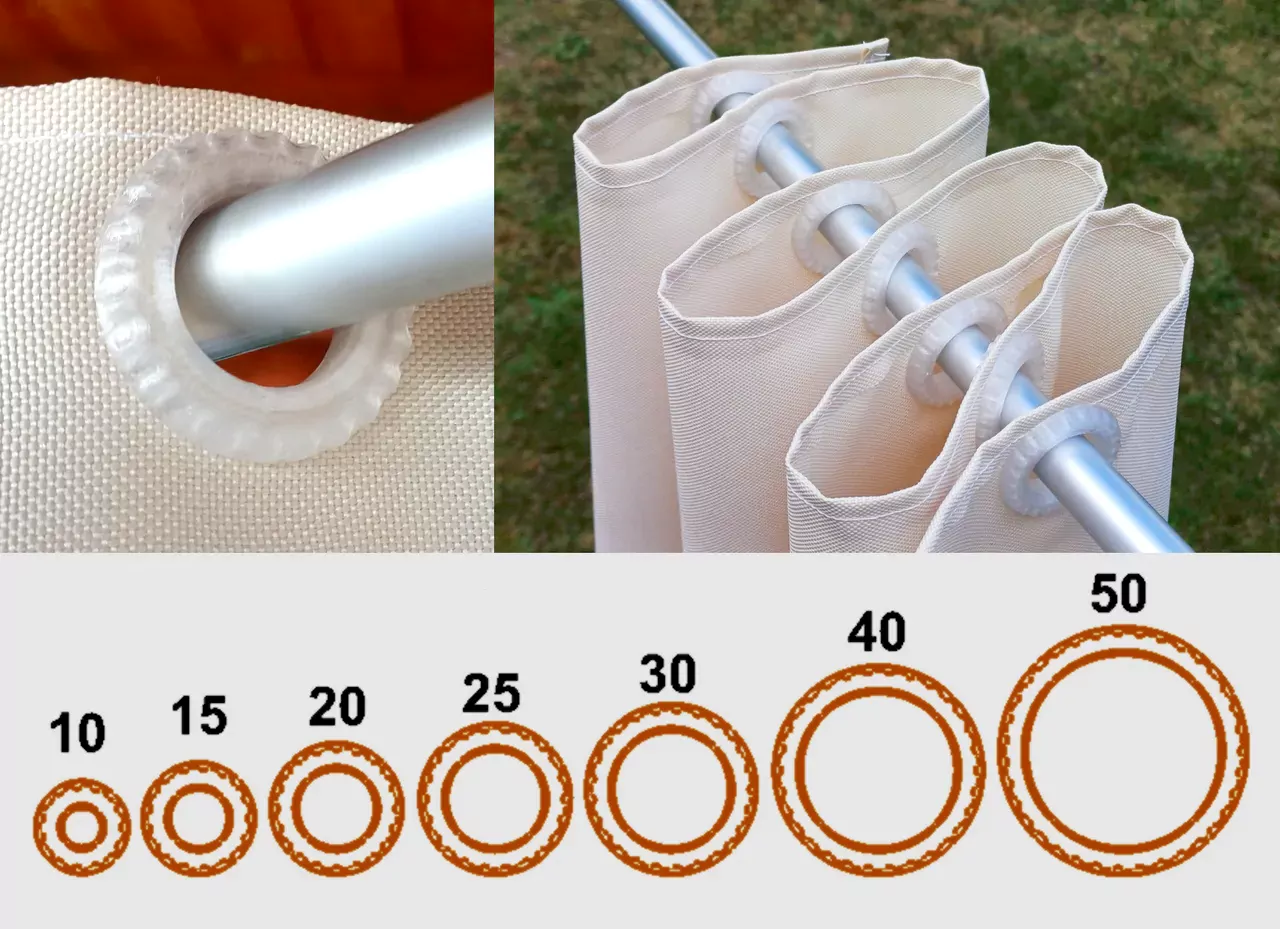
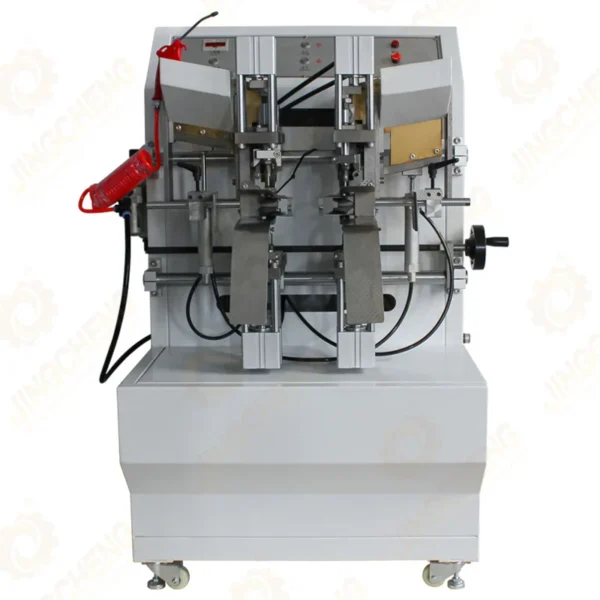
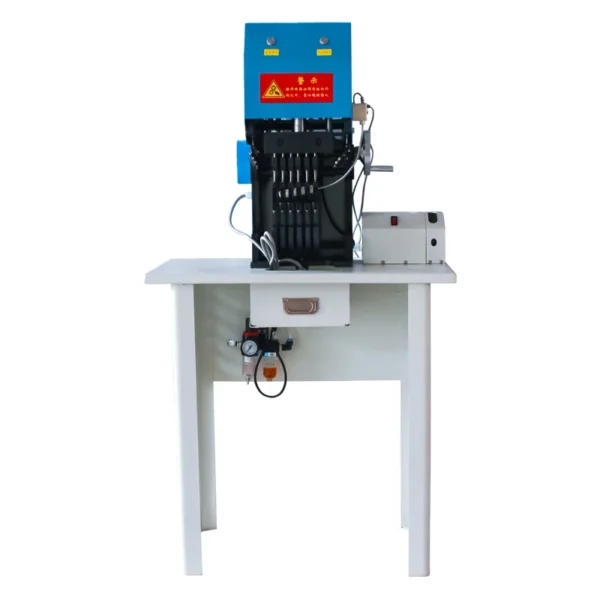
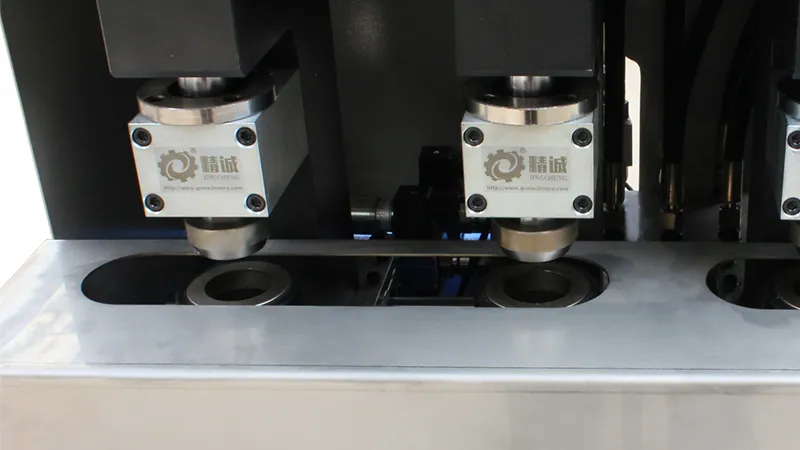
Hydraulic Punching Machine
Hydraulic Quadruple Punching Machine, an advanced solution designed for efficient and precise punching of fabrics such as curtains. This state-of-the-art machine streamlines the production process, ensuring accuracy and consistency in every punch.
High Efficiency: Equipped with a hydraulic system, this machine delivers powerful and swift punching capabilities, significantly increasing production speed.
Quadruple Punching: The quadruple punching mechanism allows simultaneous punching of four holes, enhancing productivity and reducing processing time.
Versatility: Ideal for various fabric types, including heavy-duty materials like curtains, ensuring uniform holes for ease of further processing.
Precision Engineering: Ensures accurate hole placement, minimizing material wastage and maintaining the integrity of the fabric.
Features of Hydraulic Punching Machine
Simplifies the workflow by integrating seamlessly into the production line, reducing manual labor and increasing overall efficiency.
The ability to punch four holes simultaneously speeds up the production process, allowing for faster turnaround times.
Reduces material wastage due to precise punching, ultimately saving on costs.
Delivers consistent results, ensuring each piece of fabric is processed to the same high standard.
What Can a Hydraulic Punching Machine be Used to?
A Hydraulic Punching Machine designed for fabric can be used for a variety of applications across different industries. Here are some of the primary uses:
1. Curtain Manufacturing
Hole Punching for Eyelets: Creating holes in curtains to install eyelets, allowing for smooth hanging and sliding on curtain rods.
2. Outdoor Fabrics
Tents and Awnings: Punching holes in heavy-duty outdoor fabrics for eyelets or grommets, facilitating the assembly and securing of tents, awnings, and other outdoor structures.
Tarpaulins: Creating reinforced holes for tarpaulins used in camping, construction, and transportation.
3. Automotive and Marine Industries
Car Seats: Creating holes in automotive upholstery for headrest supports and other attachments.
4. Advertising and Display Materials
Banners and Signs: Punching holes in fabric banners and signs for easy installation and mounting.
The Hydraulic Punching Machine Manufacturer
Jingcheng Zhiyuan is a professional equipment manufacturing enterprise integrating research and development, production, sales and service.
At present, Jingcheng Zhiyuan has more than 30 products such as Eyelet Punching Machines, Multifunctional Snap Button Machines, Automatic Rivet Machines, Semi-automatic Punching Machines, Curtain Machines, Thickness Screening Machines and so on.
It can be used in home textiles, clothing, shoes and hats, bags, crafts, tarpaulin, outdoor sporting goods, packaging and printing and other industries.
Products are sold to Europe, America, Africa, Australia, the Middle East, Southeast Asia and other countries and regions.
Contact Us
Looking For Professional Eyeleting Machine Manufacturer?
We collaborate with people and brands. Let’s build something great together.
What is a Hydraulic Punching Machine?
A Hydraulic Punching Machine for fabric is a specialized piece of equipment designed to create holes or cutouts in various types of fabric materials using hydraulic power.
This machine leverages the force generated by a hydraulic system to drive a punch through the fabric, ensuring precise and consistent hole placement. It is widely used in industries where precision and efficiency in fabric processing.

Advantages of the Hydraulic Punching Machine
Increased Productivity: The ability to punch multiple holes at once reduces processing time and increases throughput.
Cost Savings: Precise punching minimizes fabric waste, reducing material costs.
Consistency: Ensures uniform hole placement across large batches, maintaining high-quality standards.
Safety: Incorporates safety features to protect operators and prevent accidents during operation.
How to Make a Hydraulic Punching Machine?
1. Design and Planning
Define Requirements: Determine the machine’s purpose, the material thickness it will handle, and the size of the holes to be punched.
Create a Design: Use CAD software to create detailed drawings of the machine. Include dimensions, hydraulic circuit diagrams, and assembly instructions.
Safety Considerations: Plan for safety features such as emergency stop buttons, guards, and proper hydraulic pressure limits.
2. Components Selection
Hydraulic Pump: Choose a pump that provides sufficient pressure and flow rate for your application.
Hydraulic Cylinder: Select a cylinder with the appropriate bore size and stroke length to achieve the required punching force.
Punch and Die: Choose or custom-make the punch and die based on the desired hole size and material.
Frame and Support Structure: Design and fabricate a sturdy frame to hold all components in place.
Control Valves: Include directional control valves to manage the hydraulic fluid flow.
Reservoir: A tank to store the hydraulic fluid.
Hydraulic Hoses and Fittings: Select hoses and fittings rated for the operating pressure of your system.
3. Assembly Process
Frame Construction: Fabricate the frame using steel or other robust materials. Ensure the frame is rigid and stable to withstand the forces generated during punching.
Install Hydraulic Components: Mount the hydraulic pump, reservoir, and control valves securely on the frame. Connect the hydraulic cylinder to the frame and align it with the punch and die.
Hydraulic Circuit Assembly: Connect hydraulic hoses from the pump to the control valves, and from the valves to the cylinder. Ensure all connections are secure and leak-free.
Punch and Die Installation: Secure the die to the machine’s bedplate. Attach the punch to the hydraulic cylinder’s ram or piston rod. Ensure proper alignment between the punch and die for accurate punching.
4. Electrical and Control System
Control Panel: Install a control panel with start/stop buttons, emergency stop, and any other necessary controls.
Electrical Wiring: Connect the hydraulic pump to the power supply and integrate it with the control panel.
5. Testing and Calibration
Initial Testing: Run the machine without material to check for proper operation, leaks, and correct movement of the hydraulic cylinder.
Load Testing: Test the machine with sample materials to ensure it punches holes accurately and efficiently.
Calibration: Adjust the machine settings, such as pressure and stroke length, to optimize performance.
6. Safety Checks
Emergency Stop Functionality: Ensure the emergency stop button immediately halts all machine operations.
Safety Guards: Install guards to protect operators from moving parts and high-pressure hydraulic components.
Pressure Relief Valve: Ensure the hydraulic system has a pressure relief valve to prevent over-pressurization.
Building a hydraulic punching machine requires careful planning, precise assembly, and thorough testing. With proper design and construction, a hydraulic punching machine can be a powerful and efficient tool for various manufacturing applications.
Therefore, the best direct purchase of a finished hydraulic punching machine, our hydraulic punching machine supports customization.
Hydraulic vs Pneumatic
Hydraulic Punching Machine Power Source and Mechanism
Power Source: Uses hydraulic fluid to generate force.
Mechanism: A hydraulic pump drives a piston within a cylinder, creating high pressure that moves the punch into the material. The fluid’s incompressibility allows for precise and powerful punching.
Force Generation: Capable of producing very high force, making it suitable for thicker and tougher materials.
Pneumatic Punching Machine Power Source and Mechanism
Power Source: Utilizes compressed air to generate force.
Mechanism: Compressed air drives a piston within a cylinder, moving the punch into the material. The air’s compressibility makes the machine less precise but faster in operation.
Force Generation: Generates less force compared to hydraulic systems, suitable for lighter and thinner materials.
How to Use Hydraulic Punching Machine?
Step 1. Preparation:
Read the Manual: Before using the machine, read the user manual thoroughly to understand its features, controls, and safety instructions.
Check the Machine: Inspect the machine for any visible damage or leaks. Ensure all components are securely fastened.
Safety Gear: Wear appropriate safety gear, including gloves.
Step 2. Material Preparation:
Measure and mark the fabric where holes need to be punched. Ensure the fabric is clean and free from wrinkles for accurate punching.
Power On: Turn on the hydraulic system and let it reach operating pressure.
Adjust Settings: Set the punch depth, pressure, and other parameters according to the fabric type and thickness.
Align Fabric: Place the fabric on the work table and align it with the punch and die. Use guides or clamps if available to hold the fabric in place.
Step 3. Operation Position the Fabric:
Carefully position the fabric so that the marked spot aligns with the punch. If your machine has a positioning laser or guide, use it to ensure accuracy.
Activate the Machine: Use the control panel to initiate the punching process. Depending on the machine, this could involve pressing a button or using a foot pedal. Ensure your hands and other body parts are clear of the punching area before activating the machine.
Punch the Fabric: The hydraulic cylinder will drive the punch through the fabric and into the die, creating the hole. Once the punch is complete, the punch will retract automatically.
Remove and Inspect: Remove the punched fabric and inspect the hole for accuracy and quality. If the hole is not as expected, adjust the settings and try again on a test piece.
4. Continuous Operation
Repeat Process: For multiple holes, reposition the fabric and repeat the punching process. Ensure consistent alignment for uniform hole placement.