
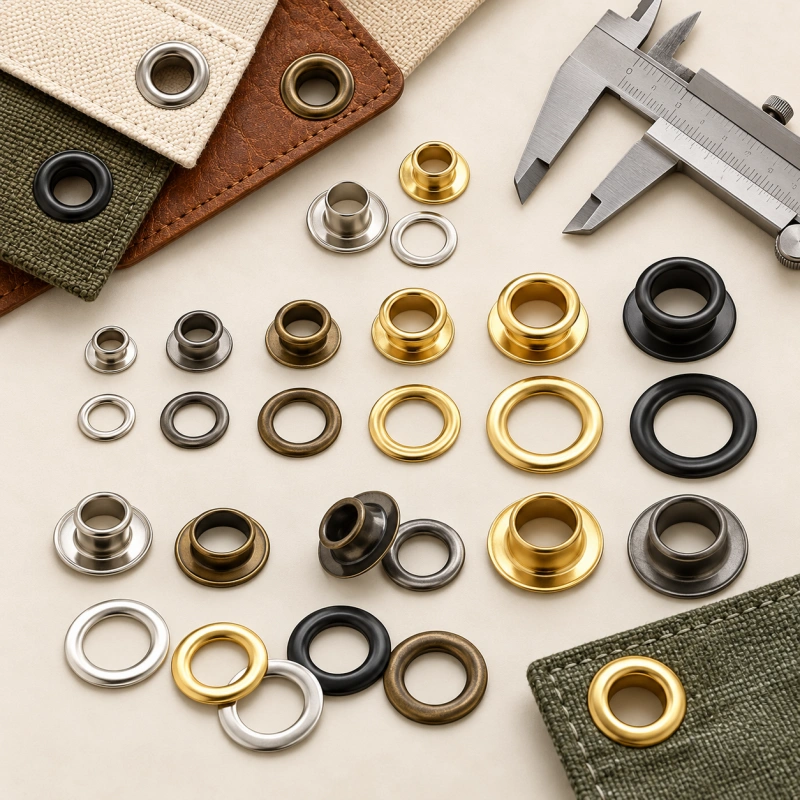
To choose an eyelet washer size, start with the specified eyelet system and the complete material stack. A matching size label cannot tell you whether the washer will seat properly, support the material around the opening, or give you the required back-side finish.
First confirm whether the system calls for a washer. Then compare approved options by inner diameter, outer diameter, thickness, and profile, and test the finished assembly on representative samples.
This guide covers the washer decision. For the complete eyelet, washer, and die setup procedure, use our eyelet, washer and die matching guide. Specify the washer as part of the assembled system.
Decide Whether the Application Needs a Washer
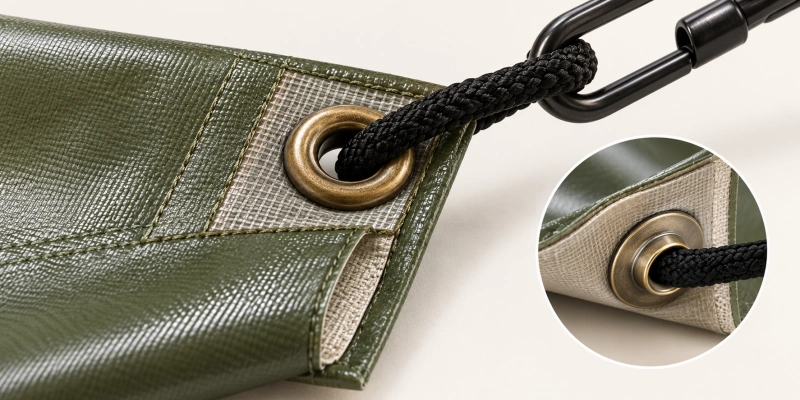
A two-piece eyelet or grommet system uses a compatible backing washer as part of its intended construction. Other eyelet designs may be specified without one. Removing a specified washer to save a feeding step, or adding a washer to a washerless design, changes the joint. Treat either change as a new combination that needs setting and performance trials.
Consider how the opening is used. A decorative opening in a stable material faces different demands from a tie point in a flexible cover. Repeated pulling, a cord bearing against one side, or a load directed toward a nearby edge can make retention and tearing more likely concerns.
A washer can provide more back-side contact area if it rests on sound material and the formed barrel holds it in place. The substrate, seam, or reinforcement may still fail first.
| Application condition | Selection direction | Check on a sample |
| Approved two-piece construction | Keep the matching washer specified for that eyelet family. | Confirm capture, orientation, and tooling with the assembled stack. |
| Flexible or compressible material near a loaded opening | Compare compatible washer profiles and support areas. | Check crushing, distortion, tearing, and retention in the expected load direction. |
| Visible or skin-contact back side | Consider a smoother approved profile and finish. | Inspect edges, protrusion, snagging, and appearance after setting. |
| Washerless design already qualified | Keep it only within its approved material and load range. | Repeat trials if the stack, hole, use, or eyelet changes. |
If material tears from the opening toward an edge, review reinforcement, eyelet location, and load direction along with the washer. Our pull-through failure guide covers diagnosis of an existing failure.
Choose the Washer Dimensions as a Set
Start with the eyelet supplier’s specified washer pairing and drawings, when available. Nominal size names vary between product families and suppliers, so request part numbers and actual dimensions if you source components separately.
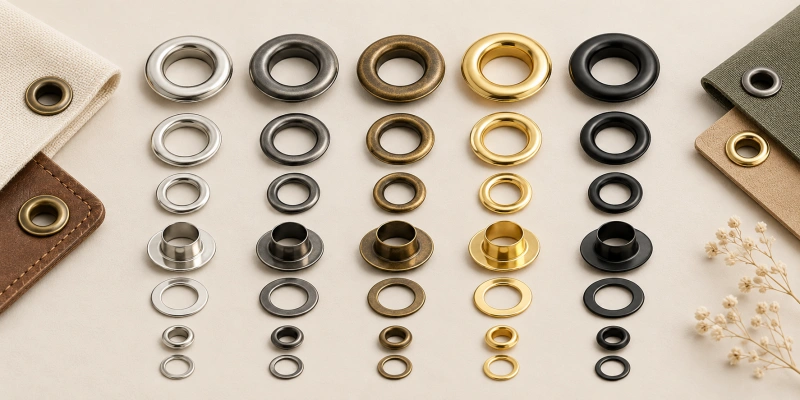
For a flat washer, record its inner diameter (ID), outer diameter (OD), and thickness. For a shaped washer, also check any specified profile height, neck geometry, tooth pattern, or orientation.
Inner Diameter and Barrel Capture
The washer opening must admit the unformed eyelet barrel while allowing the formed barrel to capture the washer. An opening that obstructs assembly may deform the hardware; an oversized opening may leave the washer loose after setting. Check the finished joint, not just whether the loose parts fit together. Barrel shape, wall thickness, forming profile, and washer design all affect capture.
Outer Diameter and Bearing Area
A larger OD can spread back-side contact farther from the hole in some flexible materials, but it does not guarantee greater pull-through resistance. The washer might straddle a seam, extend beyond a reinforcement patch, crowd another feature, or mark a coated surface. Check clearance from the product edge and compare the front flange as well: both faces transfer load into the material.
Judge contact after setting, rather than by OD alone. A raised or toothed profile can contact the substrate differently from a flat washer with the same OD. Use samples with the actual seams, hems, and edges, then inspect the contact marks and material condition.
Thickness and Formed Height
Washer thickness contributes to the grip thickness that the eyelet barrel must accommodate. A thicker washer can change the formed back and may leave a gap, split the barrel, or compress the substrate excessively if the eyelet and tooling are unsuitable.
Check the complete joint against the specified component drawings and trial settings. Do not reuse a finished-height target from a different material and washer combination.
| Variable | Why it matters | Poor-fit symptom to investigate |
| Inner opening | Barrel passage and capture after forming. | Interference, offset forming or a loose washer. |
| Outer diameter | Back-side support and available contact area. | Local tearing, interference with seams or visible distortion. |
| Thickness and profile height | Grip thickness and finished joint height. | Gap, crushed stack or incomplete forming. |
| Shape and orientation | Contact pattern, grip, and back-side appearance. | Rocking, material marking or inconsistent feed orientation. |
| Material and finish | Formability, exposure resistance, and appearance. | Corrosion, coating damage or mismatch with the eyelet. |
Match the Profile to the Material and Finished Back Side
A washer is not always a flat ring. Suppliers offer plain, toothed, necked, and other profiles for specific eyelet or grommet systems. A toothed washer engages the substrate; a necked washer has a raised neck that can help guide it through compatible automatic feeding equipment.
Rolled-rim grommets pair with spur washers in an interlocking construction. These components have different forming and contact behavior, so select a specified pairing and test it on your material.
A plain profile may suit a smooth back-side finish if it meets the retention requirement. Teeth or spurs can improve grip in a compatible system, but may mark a coating, damage fibers, or feel rough against skin or adjacent parts.
A raised profile can also reduce clearance behind the product. Check which face is visible and whether a lining or moving part touches the washer. Inspect both faces under the lighting and handling conditions used for customer approval.
If the washer sits across a reinforcement edge or uneven fold, trial another approved location or profile. For broader component background, see the eyelets and washers overview.
Measure the Complete Material Stack
Measure at the actual eyelet position. The stack may include face fabric, coating, foam, a folded hem, reinforcement, adhesive, and lining. A supplier’s single-layer thickness can miss a local build-up. Compression during setting and recovery afterward may also change the finished fit and appearance. If construction varies, test the thinnest and thickest representative stack conditions.
Record the hole-making method and inspect the material around the opening. Pre-punching, self-piercing, and poor cutting can leave different edge conditions; a washer cannot be assumed to compensate for a ragged or enlarged hole or a weak adhesive bond.
On coated fabric, check for whitening, cracking, and delamination around the contact area. On woven webbing, inspect displaced or cut yarns; on leather, look for permanent compression marks or tears. These are checks for possible damage, not a promise that changing washers will prevent it.
A washer that fits a flat test coupon may overlap a seam, sit near an edge, or interfere with a fold on the finished product. Include those features in trial pieces. Test in the expected load direction, including angled loads where relevant.
Consider Exposure, Appearance and Feeding
Specify the washer’s base material and finish alongside the eyelet; color alone does not identify either. For moisture, cleaning chemicals, or outdoor exposure, confirm the specified service conditions for the paired components. Check for staining, coating damage, and corrosion risks where unlike metals contact each other. Assess corrosion claims against a defined environment and test method.
For an automatic line, check feeding before approving a new washer profile. Diameter, thickness, curvature, burrs, and orientation can affect separation and placement. A washer that works when placed by hand may not feed consistently in the intended machine.
Confirm whether the equipment can feed it, whether change parts are required, and how it is positioned at the die. QC Machinery’s eyelet and washer feeding troubleshooting guide covers faults after setup. Include a feeding trial under representative production conditions in your selection process.
Use a Practical Selection Workflow
- Define the job. Record the opening’s function, load direction, use conditions, and acceptable finish on both faces.
- Document the stack. Include layers, thickness range, reinforcement, hole method, edge distance, and nearby seams. Supply physical samples when material behavior is uncertain.
- Identify the specified hardware. Record eyelet and washer part numbers, drawings, materials, finishes, and dimensions. Check the pairing rather than relying on the nominal size.
- Set candidates in real product geometry. Check barrel passage, washer capture and seating, contact on both faces, appearance, and clearance around nearby features.
- Check the production method. Confirm tooling and washer placement, then trial the intended material handling and component lots.
- Qualify the combination. Apply agreed acceptance criteria to representative samples, retain a reference, and record the setup for future change control.
Validate the Assembly Before Mass Production
Make trial samples with representative production materials, hardware lots, hole method, tooling, and machine setup. Include the thinnest and thickest stack conditions and the most demanding relevant locations. Inspect both faces for the specified formed profile and washer capture, plus gaps, movement, splits, sharp edges, coating damage, and distortion.
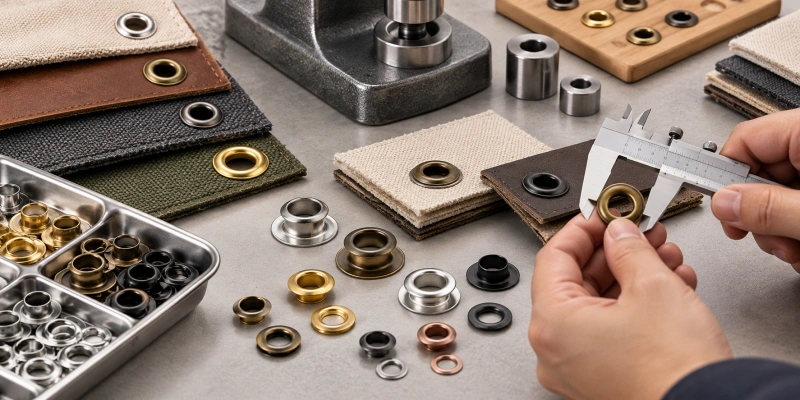
Define acceptance limits on a drawing or approved sample; one height or visual limit cannot cover every system. Our eyelet setting inspection standard explains how to define inspection limits.
If retention matters, test the finished assembly using a documented method. Control specimen geometry, edge distance, pull direction, fixture, and loading rate. Record the force required by your test plan and the observed failure mode, such as eyelet release, washer movement, substrate tearing, or reinforcement separation.
Compare results with your product-specific criterion; appearance alone cannot establish holding performance. See the eyelet pull-out strength test method for setup and failure recording.
Approve the hardware, material, and process as a tested combination. Retain drawings, sample photos, lot details, and setup records. Review changes in supplier, washer profile, substrate, hole method, tooling, or machine route, and repeat trials when the approved conditions change.
Common Selection Mistakes
- Ordering by nominal size alone. Two “#2” parts may belong to different systems; match drawings and part numbers.
- Equating a larger OD with stronger retention. Check actual contact and the failure mode under a representative test.
- Substituting a different profile without trials. Forming, substrate contact, and automatic feeding may all change.
- Approving only a hand-placed sample for an automatic line. Verify placement and repeatability under production conditions.
What to Send for a Washer Selection Review?
Send QC Machinery the eyelet and washer drawings or physical samples, with barrel dimensions and washer ID, OD, thickness, and profile. Include the material construction and thickness range, reinforcement, hole method, finished opening requirements, and photos of both faces.
Describe nearby seams and edges, loading direction, appearance, exposure, production volume, and any product-specific acceptance tests.
If you have a machine, add its model, die identification, washer placement method, and a short setting-cycle video. These details help QC Machinery review the proposed combination and discuss tooling or machine configuration. Confirm final suitability with representative production samples.
FAQs
Do all industrial eyelets need washers?
No. Follow the specified construction for your eyelet system. If you add or remove a washer, test the new joint and confirm that it meets your application criteria.
How do you choose the correct eyelet washer size?
Use the specified pairing or compare actual drawings for the eyelet and washer. Check ID, OD, thickness, and profile against the material stack and tooling, then qualify finished samples.
Does a larger washer always improve pull-through resistance?
No. Added bearing area helps only when the washer contacts suitable material and the joint forms correctly. Compare candidates with the same material, geometry, and test method.