
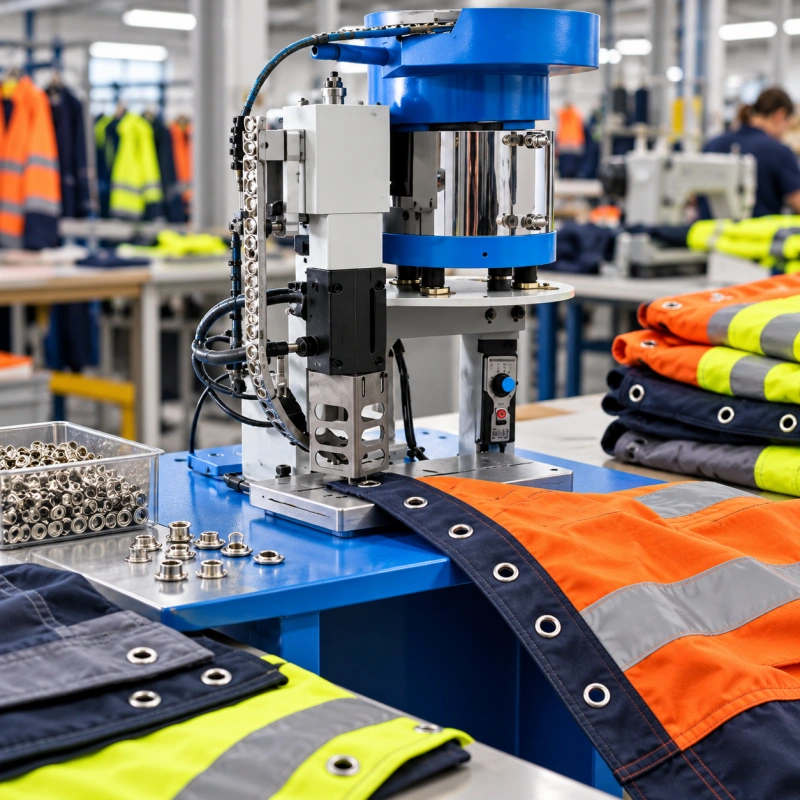
An eyelet machine for workwear has to do more than install a neat-looking metal ring. Your material may have a reinforcement patch, a coating, a seam nearby or several layers that compress differently. The eyelet may sit on an open panel or inside a partly assembled garment. Those differences change how you make the hole, support the product, feed the hardware and judge the finished setting.
If the garment is PPE, the process must fit its specified design and applicable test requirements. A press or eyelet cannot make a garment compliant by itself. Start with a representative garment sample, the specified eyelet and washer, and agreed acceptance criteria. Qualify the process on that basis before comparing advertised machine speeds.
Define the Eyelet Job on the Finished Product
First identify what the opening does. A lacing point, cord opening or ventilation detail can have different load and appearance requirements. Some designs also use eyelets to attach components, but any load-bearing use needs its own engineering assessment. Include an opening in a protective garment only where the design permits it and the finished assembly meets its required tests.
Do not assume that adding ventilation to a barrier garment is acceptable.
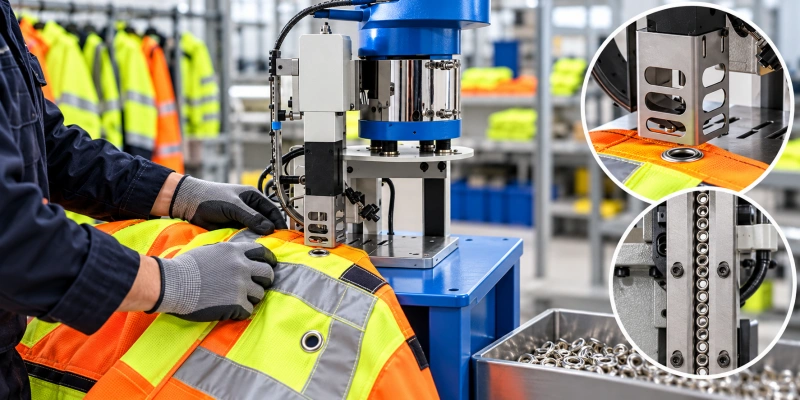
Mark each location on a full-size panel or finished sample. Record its distance from edges, seams and reinforcement, and note which face remains visible. A hole beside a thick seam may need more support than the same eyelet on a flat panel. The position also determines whether the operator can place the garment beneath the dies without folding or stretching it.
The existing guide to metal eyelets in PPE and workwear discusses the fastener’s possible uses. Here the question is whether your chosen hardware and garment construction can be processed repeatably at each actual location.
Start With the Material Stack
Do not describe a job as simply “heavy fabric.” Give the machine supplier a cross-section or material build for each eyelet location: face fabric, lining, coating or laminate, interfacing, patch, webbing and any folded or stitched layers.
A setup that works on a flat two-layer swatch may fail where a seam allowance creates a raised area. Barrel length, hole size, washer seating and die geometry all have to suit the stack as it compresses.
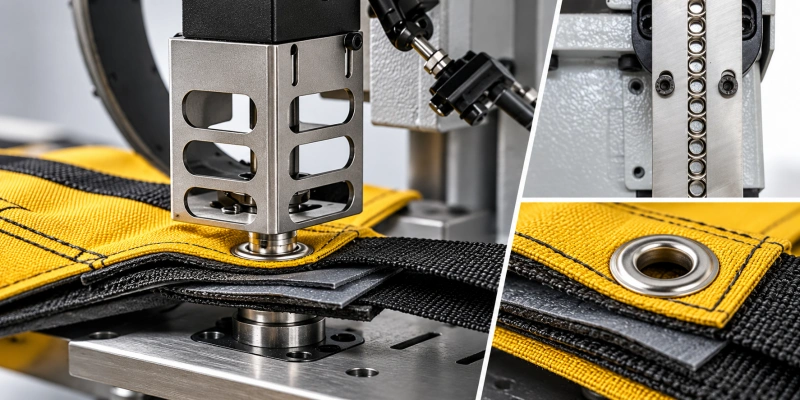
Prepare samples from the thinnest and thickest intended constructions, including the hardest-to-reach positions. Check whether a coating whitens, cracks or delaminates around the hole and flange. Look for distortion in loose weaves, a shifted backing patch or puckering after the press releases the garment. One good test piece does not cover other colors, supplier lots or sizes when their construction differs.
For a coated or laminated protective fabric, involve the product engineer before making a hole. Piercing can affect barrier, water resistance or other claimed performance. Set the test plan against the specific garment’s requirements; an attractive eyelet face is not evidence that the protective function survived.
Decide How the Hole Will Be Made
There are three distinct routes. A setting-only press needs a prepared hole. A matched self-piercing eyelet and die set can form an opening during setting on a validated material. An integrated punch-and-set machine cuts the hole and sets the eyelet in one cycle. Ask the supplier which route the proposed hardware and tooling use; more press force does not turn a conventional eyelet into a self-piercing one.
A separate punching step lets you inspect the hole and prepare awkward panels before setting. It also creates a transfer step: if the prepared hole is misaligned with the die, the eyelet may sit crooked or leave too little material under one side of the flange.
A one-cycle process can reduce handling on repeatable flat pieces, but it still needs a clean opening through the full stack. If it produces a cut-out slug, confirm how the machine removes it.
Compare the relevant methods on representative parts if the choice is uncertain. Inspect hole edges before setting, both sides after setting, and the surrounding fabric after the applicable product tests. QC Machinery’s pre-punching decision guide covers the general fastener and tooling conditions in more detail.
Match Feeding and Handling to the Order Mix
“Automatic” can refer to fastener feeding, the press stroke or movement of the garment. Ask the supplier to state exactly which operations are automated. A feeder can present eyelets, washers or both while an operator still positions every garment panel. That distinction matters when the workpiece is bulky, flexible or partly assembled.
Hand feeding can suit development work, short runs, frequent hardware changes and hard-to-reach positions. Trial automatic feeding when the eyelet and washer are standardized and batches are long enough to justify setup and changeover.
A partly automated station might feed the eyelet while the operator still positions the garment and places the washer. Confirm those tasks on the quoted machine; the label alone tells you little about good output.
For a workwear factory, count good settings per scheduled hour rather than press strokes. Include positioning, feeder refills, inspection, rejected pieces and normal stoppages. If the operator must rotate a jacket or reach deep into a sleeve for each setting, faster part delivery may leave the actual bottleneck unchanged. Use the automatic versus hand feeding guide for the detailed economic comparison.
Specify the Whole Setting Station
Select the station around the most difficult eyelet position. Check usable throat reach and clearance with the assembled garment, guides, guards and support table in place. Watch how the operator presents the correct face to the dies, keeps a patch aligned and removes the garment without snagging it. A positioning stop or suitable workpiece support may help more than a faster press cycle.
Ask which die set each eyelet and washer combination needs. Check washer orientation, whether a different finish changes feeding behavior, which settings go on the setup sheet and which parts change between sizes. Review guarding and safe access during normal operation, setup, misfeed clearing and maintenance. Confirm utility and floor-space needs for the tested configuration.
If several garment styles share a cell, map the route from cutting or pre-punching through eyelet setting, inspection and subsequent sewing or finishing. Putting eyelets in too early may complicate later handling; putting them in after assembly may make a position unreachable.
The broader garment factory machinery overview explains where fastening equipment sits among other production operations. Use the finished product to settle your own sequence.
| Production situation | Main concern | Machine or process feature to evaluate | Evidence to collect |
| Several short runs with different eyelets | Setup and changeover | Hand feeding or changeable tooling | First-piece approval and changeover time |
| Repeated flat panels using one hardware set | Part handling and output | Eyelet and washer feeding with positioning aids | Good settings per scheduled hour |
| Thick patch beside a seam | Uneven support | Die access and a stable workpiece support | Both-side inspection on the thickest stack |
| Coated or laminated material | Surface and functional damage | Hole-making method and contact surfaces | Visual checks and required finished-product test results |
| Eyelet far inside an assembled garment | Reach and operator handling | Throat clearance, fixture and process sequence | Full-size garment trial, including guarded operation |
Protect the Finish and the Garment Surface
Choose the eyelet, washer and finish for the garment’s expected exposure and care conditions. The press cannot make an unsuitable fastener corrosion resistant. Its tooling and handling can scratch a coating or plating, mark a flange or leave a poorly formed barrel with a sharp edge. Run the specified hardware and finish through the proposed production process, then inspect both sides.
Set appearance limits for both faces. Inspect for flange marks, crushed or wrinkled fabric, coating damage, an off-center washer, gaps, tilt and a cracked or uneven flare. If the eyelet feels loose, increasing stroke or force without finding the cause may damage the fabric or coating. Review hole size, barrel length, washer, dies, support and setup together, then retest.
If the garment has specified visibility, flame-resistance, weather-protection or other protective performance, have the product engineer review the eyelet design and process. The garment manufacturer must identify the applicable requirements and test the finished construction where required. Performance shown by unpierced fabric cannot simply be assumed for a panel with a new hole.
Set Inspection and Traceability Before Production
Approve a first-piece sample for each qualified setup. Keep photographs or physical reference samples of both faces, along with drawings and the measurements that matter to the product.
Your inspection plan may cover location, hole edge, flange and washer seating, finished height or flare, cracks, surface condition and retention when the design requires a test. Set limits and test methods from the specific assembly’s qualification; there is no universal value.
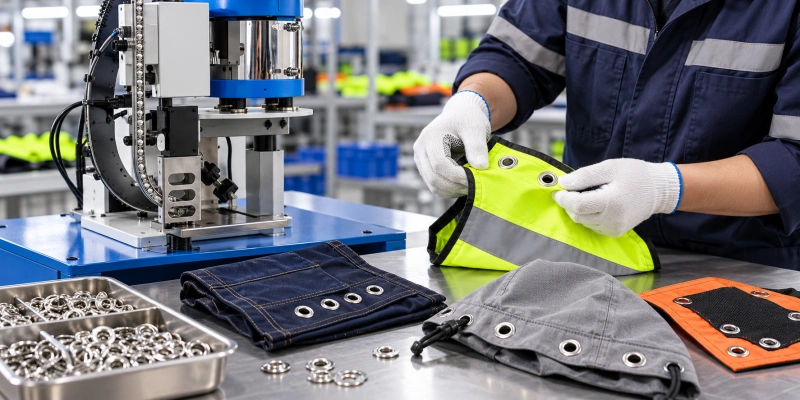
Record the work order and material construction, eyelet and washer part numbers and lots where required, die identification, machine or head, setup, operator, inspection results and any product-specific test result. Your quality system and customer specification determine the level of traceability.
If material, hardware, tooling or setup changes beyond the qualified conditions, repeat the required first-piece approval before continuing.
Use the eyelet setting inspection standard to build a measurable instruction for the chosen assembly. If defects appear during a run, separate affected product, correct the cause and verify the next approved sample rather than judging only the front face.
Run a Trial That Resembles a Shift
Send the supplier production material and finished or partly assembled garments, not just flat offcuts. Include each eyelet and washer variant, a drawing of the locations, the thickest and thinnest stacks, and samples that expose the most difficult access points. The sample preparation guide can help you prepare the trial set.
Approve the first piece, then run a representative series to observe feeding stability, positioning drift, visible damage, refills, faults and recovery. Time the operator’s complete task. Inspect good and rejected pieces, retain the setup record and document a typical changeover.
If the eyelet could affect a protective feature, send representative finished assemblies for the required product tests. One attractive eyelet—or a video of the press cycling without a garment—cannot establish good output or finished-garment performance.
Ask the supplier to describe the tested configuration in the proposal: machine and feeding mode, eyelet and washer, dies, hole-making method, material stack, support, access and guards, operator tasks, observed good output and rejection criteria. Then you can compare quotations against the same job and use the trial record during installation.
What to Send With Your Inquiry
- A finished workwear or PPE sample and drawings showing each eyelet position, edge and seam clearance, and visible face.
- The material build at each position, including coating, lining, patch, webbing, folds and the range of local stacks.
- Eyelet and washer samples or specifications, intended finish and any approved alternatives.
- The existing hole method, if specified, and product-level appearance, dimensional, retention and performance criteria.
- Annual demand, settings per product, typical batch size, style and hardware variation, and desired line sequence.
- The quality records or traceability requirements and the difficult positions to demonstrate in the trial.
FAQ
Is One Eyelet Machine Suitable for Both Ordinary Workwear and PPE?
Possibly. The same press may serve both products, but each can need different tooling, settings and acceptance checks. Qualify each combination of material, hardware and location, or document why a group of products can share one qualified setup. Keep any required finished-product testing separate from machine qualification.
Do You Need an Automatic Eyelet Machine for PPE Production?
PPE status alone does not determine the feeding method. Consider the number of repeated settings, batch length, hardware variation, handling time and documented quality results. Automatic feeding is useful when it remains stable on your approved hardware and actual garments; hand feeding may suit short or varied runs. Demonstrate the proposed process on samples.
Can a Machine Make the Hole and Set the Eyelet in One Cycle?
A matched self-piercing eyelet and die set may make the opening and set the fastener in one stroke. An integrated punch-and-set machine can cut and set within one cycle, which need not be a single stroke. Other setups need a prepared hole. Confirm the proposed method on your full material stack and inspect both the hole and the surrounding surface.
How Do You Avoid Damaging a Coated Workwear Fabric?
Test the actual coated construction with the proposed hole method, dies and support. Inspect around the hole and both eyelet faces for cracks, whitening, delamination and pressure marks. The product engineer must decide whether the processed material still passes any required protective or weather performance tests.
What Does a Machine Trial Need to Prove?
It should show repeatable acceptable settings at the difficult positions, stable feeding, practical operator handling and fault recovery, and a measured rate of good output. Keep the first-piece approval, inspection criteria, changeover notes and samples. Arrange any required finished-product tests separately.
Does Setting an Eyelet Make Protective Clothing Compliant?
No. Compliance concerns the finished product and its applicable requirements. An opening or metal component can change the performance of a protective garment. Validate the approved construction and completed assembly through the manufacturer’s product assessment and required testing.
Discuss Your Samples With QC Machinery
Send us a workwear or PPE sample, the local material build, eyelet and washer samples or specifications, installation positions and expected production quantities. We can use those inputs to review feeding, hole making, tooling, station access and a representative machine trial. Share your product’s acceptance and testing requirements so the proposed process can be evaluated against them.